Wedding Tips & Trends
What Shoes and Accessories Should I Pair with a Bridesmaid Dress?
Nude or metallic block heel sandals work best with bridesmaid dresses. Choose 2–3 inch heels for comfort during all-day wear.
Pair shoes with a small clutch, simple earrings, and a delicate necklace. Keep jewelry minimal if the dress has embellishments. Budget $40–$80 for shoes, $20–$50 for jewelry, and $25–$60 for a clutch. Match accessories to the dress color or choose neutral tones.
Best Shoes and Accessories for Bridesmaid Dresses: Quick Guide
| Accessory Type | Best Options | Color Choice | Price Range | When to Wear |
| Shoes | Block heel sandals | Nude, metallic, match dress | $40–$80 | All weddings |
| Clutch | Small envelope style | Match or neutral | $25–$60 | Evening events |
| Earrings | Studs or small drops | Silver, gold, pearl | $15–$40 | All occasions |
| Necklace | Delicate pendant | Matches earrings | $20–$50 | Simple necklines |
| Bracelet | Thin chain or bangle | Matches other jewelry | $15–$35 | Optional add-on |
This table shows the essential accessories every bridesmaid needs. Focus on comfort and simplicity for the best look.
Choosing the Right Shoes for Bridesmaid Dresses
Shoes make or break your comfort level during a wedding. Choose styles that look good and feel comfortable for 6–8 hours.
Best Shoe Styles for Bridesmaids:
Block Heel Sandals (2–3 inches):
- Most comfortable heel style
- Stable base prevents wobbling
- Works on grass or pavement
- Easy to walk and dance in
- Available in all colors
- Price: $40–$70
Wedge Heels (2–3 inches):
- Even weight distribution
- Great for outdoor weddings
- Does not sink into grass
- Comfortable all day
- Supports arch well
- Price: $45–$75
Kitten Heels (1–2 inches):
- Low height for comfort
- Elegant and feminine
- Works for petite bridesmaids
- Easy to walk in
- Less foot pain
- Price: $35–$65
Ballet Flats:
- Zero heel for maximum comfort
- Perfect for pregnant bridesmaids
- Good for all-day standing
- Works for casual weddings
- Easy to pack and store
- Price: $30–$60
Pointed-Toe Pumps (2–3 inches):
- Classic, elegant look
- Lengthens legs visually
- Best for indoor venues
- Formal wedding style
- Requires break-in time
- Price: $50–$80
Shoe Styles to Avoid:
| Shoe Type | Why to Avoid | Better Alternative |
| Stiletto heels over 4 inches | Causes foot pain, hard to walk | Block heel 2–3 inches |
| Platform heels | Too casual, adds bulk | Wedge or block heel |
| Ankle boots | Covers dress hem | Sandals or pumps |
| Flip-flops | Too casual | Ballet flats |
| Brand new unworn shoes | Causes blisters | Broken-in comfortable shoes |
Shoe Color Guide by Dress Color
Matching shoe color to dress color creates a cohesive look. Follow this guide for the best pairings.
For Dark Dress Colors:
Navy, Burgundy, Emerald Dresses:
- Nude heels elongate legs
- Metallic gold adds warmth
- Metallic silver looks modern
- Black works but shortens legs
- Match dress for bold look
Black Dresses:
- Black shoes create sleek line
- Nude breaks up darkness
- Silver adds sparkle
- Gold brings warmth
- Avoid bright colors
For Light Dress Colors:
Blush, Champagne, Ivory Dresses:
- Nude matches skin tone perfectly
- Rose gold adds elegance
- Champagne metallic matches
- Avoid black (too harsh)
- White works for summer
Dusty Blue, Sage, Lavender Dresses:
- Nude elongates naturally
- Silver complements cool tones
- Match dress for cohesive look
- Gold brings warmth
- Gray works subtly
For Bright Dress Colors:
Red, Coral, Fuchsia Dresses:
- Nude neutralizes brightness
- Gold metallic adds richness
- Match dress for drama
- Silver looks modern
- Avoid competing colors
Neutral Metallics Work with Everything:
- Nude: $40–$70, most versatile
- Rose gold: $45–$75, warm and feminine
- Silver: $40–$70, cool and modern
- Gold: $45–$75, classic elegance
- Champagne: $40–$70, soft and subtle
Clutches and Small Bags for Bridesmaids
A small clutch holds essentials without being bulky. Choose styles that match your dress and venue.
Best Clutch Styles:
Envelope Clutch:
- Sleek, flat design
- Fits phone and lipstick
- Holds 4–6 items comfortably
- Works for formal events
- Easy to carry or tuck
- Price: $25–$50
Box Clutch:
- Structured, elegant shape
- Holds more than envelope
- Stands alone on tables
- Good for evening weddings
- Metal or satin material
- Price: $30–$60
Wristlet Clutch:
- Strap prevents dropping
- Hands-free option
- Casual to semi-formal
- Easy to dance with
- Holds phone and essentials
- Price: $20–$45
Pearl or Beaded Clutch:
- Adds texture and interest
- Matches formal dresses
- Evening wedding style
- Catches light beautifully
- Statement accessory
- Price: $35–$65
What to Carry in Your Clutch:
- Phone (on silent mode)
- Lipstick or lip gloss
- Blotting papers or powder
- Mints or gum
- Emergency bobby pins
- Small tissues
- Band-aids for shoes
Clutch Color Rules:
Match your clutch to:
- Your shoe color (easiest match)
- Your dress color (cohesive look)
- Neutral tone (works with anything)
- Metallic accent (adds sparkle)
Avoid:
- Patterns that clash with dress
- Bright colors that compete
- Large bags that overwhelm
- Casual crossbody styles
Clutch and Shoe Color Combinations
| Dress Color | Best Shoe Color | Best Clutch Color | Why It Works |
| Navy | Nude or gold | Gold or navy | Elegant, elongating |
| Burgundy | Nude or gold | Gold or burgundy | Warm, cohesive |
| Emerald | Nude or gold | Gold or emerald | Rich, luxurious |
| Dusty Blue | Nude or silver | Silver or dusty blue | Soft, romantic |
| Blush | Nude or rose gold | Rose gold or blush | Feminine, delicate |
| Black | Nude or black | Black or silver | Classic, sleek |
| Champagne | Nude or champagne | Champagne or gold | Soft, neutral |
This chart shows the most flattering combinations. Stick to 2–3 colors total (dress, shoes, clutch) for a polished look.
Jewelry for Bridesmaid Dresses: What to Wear
Jewelry completes your look without overwhelming the dress. Follow these guidelines for perfect balance.
Earring Styles:
Stud Earrings:
- Small, classic, timeless
- Works with all necklines
- Does not compete with dress
- Comfortable all day
- Pearl, diamond, or crystal
- Price: $15–$35
Small Drop Earrings:
- Adds movement and sparkle
- Dangles 1–2 inches
- Frames face beautifully
- Works for most necklines
- Elegant and feminine
- Price: $20–$45
Hoop Earrings (Small):
- Modern, minimalist style
- Thin, delicate hoops only
- Works for casual weddings
- Avoid large statement hoops
- Gold or silver finish
- Price: $15–$30
Chandelier Earrings:
- Use only with simple dresses
- Avoid with embellished dresses
- Statement piece
- Works for strapless necklines
- Evening formal style
- Price: $25–$60
Earrings to Avoid:
- Large statement earrings with busy dresses
- Heavy earrings that hurt ears
- Mismatched metals (gold with silver)
- Overly trendy styles
- Anything that pulls on earlobes
Necklace Guidelines:
When to Wear a Necklace:
- Strapless or sweetheart necklines
- Scoop neck dresses
- V-neck styles (short necklace)
- Simple, unembellished bodices
- When bride approves
When to Skip a Necklace:
- High necklines (halter, jewel)
- Off-shoulder styles
- Heavily embellished bodices
- Statement earrings worn
- Dress has built-in necklace detail
Best Necklace Styles:
Delicate Pendant:
- Sits at collarbone
- Simple chain with small charm
- Does not overwhelm dress
- Works with V-necks
- Price: $20–$45
Short Strand of Pearls:
- Classic, elegant choice
- Single strand only
- Sits above décolletage
- Works with strapless
- Price: $30–$60
Thin Chain Necklace:
- Minimal, modern look
- Gold or silver finish
- Can layer two thin chains
- Works with scoop necks
- Price: $15–$35
Necklace Lengths by Neckline:
| Neckline | Best Necklace Length | Style to Wear | Avoid |
| Strapless | 16–18 inch (collarbone) | Pendant or pearls | Long, low-hanging |
| Sweetheart | 16–18 inch | Delicate pendant | Choker styles |
| V-Neck | 18–20 inch (follows V) | Thin chain or Y-necklace | Short chokers |
| Scoop Neck | 16–18 inch | Simple pendant | Statement pieces |
| Halter | Skip necklace | None | All necklaces |
| High Neck | Skip necklace | None | All necklaces |
Bracelet Options:
Bracelets are optional accessories. Add them only if your look needs balance.
When to Wear Bracelets:
- Sleeveless or strapless dresses
- When not carrying a clutch
- To balance no necklace
- With simple jewelry
- For casual or outdoor weddings
Best Bracelet Styles:
- Thin bangle (single or stacked)
- Delicate chain bracelet
- Tennis bracelet for formal
- Pearl strand for classic
- Avoid chunky or noisy styles
Bracelet Guidelines:
- Match metal to other jewelry
- Keep thin and delicate
- Avoid multiple noisy bangles
- One wrist only
- Price: $15–$40
Wraps and Shawls for Bridesmaid Dresses
Wraps add warmth for cool weather or air-conditioned venues. Choose styles that do not hide the dress.
Best Wrap Styles:
Satin Shawl:
- Smooth, elegant material
- Drapes beautifully
- Matches dress sheen
- Formal event style
- Easy to remove for photos
- Price: $25–$50
Pashmina:
- Soft, lightweight fabric
- Provides warmth without bulk
- Many color options
- Works for all seasons
- Can tie multiple ways
- Price: $20–$45
Bolero Jacket:
- Structured, fitted style
- Covers shoulders and arms
- Good for modest dress codes
- Stays in place while dancing
- Formal or semi-formal
- Price: $35–$70
Faux Fur Stole:
- Luxurious winter option
- Adds glamour and warmth
- Only for cold weather
- Formal evening weddings
- Remove for ceremony photos
- Price: $40–$80
When to Wear a Wrap:
- Outdoor fall or winter weddings
- Indoor venues with strong AC
- Evening events that cool down
- Modest dress code required
- Personal comfort preference
When to Skip a Wrap:
- Summer daytime weddings
- Hot, humid weather
- Beach or tropical venues
- Casual outdoor events
- When bride prefers no wraps
Wrap Color Rules:
Match Your Dress:
- Creates unified, sleek line
- Most cohesive option
- Looks intentional, not added
- Best for photos
Choose Neutral:
- Nude, ivory, champagne
- Works with any dress color
- Versatile for future use
- Subtle, not distracting
Metallic Accent:
- Gold or silver shawl
- Adds sparkle to simple dress
- Evening wedding style
- Festive and elegant
Avoid:
- Black wraps with light dresses (too harsh)
- Bright colors that clash
- Heavy knit shawls (too casual)
- Patterned or printed wraps
Hair Accessories for Bridesmaids
Hair accessories add polish to your overall look. Choose simple pieces that complement your hairstyle.
Best Hair Accessory Options:
Pearl Hair Pins:
- Classic, elegant choice
- Scatter 3–5 throughout updo
- Adds subtle sparkle
- Works for all hair types
- Easy to secure
- Price: $10–$25 (set)
Delicate Headband:
- Simple metal or pearl design
- Frames face beautifully
- Works with down hairstyles
- Adds polish to simple look
- Comfortable all day
- Price: $15–$40
Small Hair Comb:
- Secures side-swept hair
- Adds decoration to updos
- Crystal or pearl details
- Classic bridesmaid style
- Stays in place easily
- Price: $12–$35
Fresh Flowers:
- Natural, romantic option
- Matches wedding florals
- Works for outdoor weddings
- Affordable and pretty
- Provided by florist
- Price: Included in flowers
Hair Accessories to Avoid:
- Large statement pieces that overwhelm
- Tiaras or crowns (bride only)
- Overly trendy styles
- Colored or sparkly headbands
- Heavy pieces that slip
Hair Accessory Rules:
Keep hair accessories:
- Small and delicate
- In line with bride's style
- Matching bridesmaid look
- Comfortable for all day
- Secure and stable
Accessory Shopping Timeline for Bridesmaids
Shop for accessories in the right order to avoid stress. Follow this timeline for smooth preparation.
| Timeline | Task | Why This Timing | Budget |
| 3–4 months before | Order or buy shoes | Need time to break in | $40–$80 |
| 2 months before | Confirm jewelry style with bride | Ensure cohesive look | $0 |
| 1–2 months before | Purchase jewelry pieces | Match to dress | $40–$100 |
| 1 month before | Buy clutch and wrap if needed | Final accessories | $45–$110 |
| 2–3 weeks before | Get hair accessories | Based on hairstyle plan | $10–$40 |
| 1 week before | Break in shoes, test outfit | Prevent blisters | $0 |
| 2–3 days before | Pack all accessories | Nothing forgotten | $0 |
Starting early prevents last-minute panic buying. Breaking in shoes prevents painful blisters on wedding day.
Frequently Asked Questions
What color shoes should bridesmaids wear with their dresses?
Nude shoes work with any dress color and elongate legs. Metallic gold or silver add elegance without competing.
Match your shoe color to your dress for a cohesive look. Avoid black shoes with light dresses as it creates harsh contrast.
Should bridesmaids all wear the same accessories?
Bridesmaids should wear matching or coordinating jewelry, not necessarily identical pieces. Same metal tone (all gold or all silver) creates unity.
Shoes can match or be similar styles in the same color family. Clutches work best when they coordinate but do not need to be identical.
How high should bridesmaid shoe heels be?
Choose 2–3 inch heels for comfort during all-day wear. Block heels or wedges provide more stability than stilettos.
Bridesmaids standing or dancing for 6–8 hours need comfortable, stable heels. Lower heels prevent foot pain and allow easy movement.
What jewelry looks best with a strapless bridesmaid dress?
Small drop earrings and a delicate necklace at collarbone length work best with strapless dresses. Add a thin bracelet for balance.
Avoid chokers that sit too high. Choose 16–18 inch necklace length that sits just above the bodice edge.
Do bridesmaids need to carry clutches?
Clutches are helpful but not required. They hold essentials like phone, lipstick, and tissues during the reception.
For ceremony only, bridesmaids can skip clutches. For full-day events, small clutches prevent constantly asking for items.
Should bridesmaid accessories match the wedding colors?
Accessories should complement dress colors, not necessarily match all wedding colors. Keep shoes and jewelry neutral or matching.
Metallics (gold, silver, rose gold) coordinate with any wedding palette. Focus on cohesive bridesmaid look over matching centerpieces.
Final Tips for Bridesmaid Accessories
Choose comfortable block heel sandals in nude or metallic tones. Break them in 2–3 weeks before the wedding. Keep jewelry simple and delicate. Match all metals (all gold or all silver) for polish.
Test your complete outfit 1–2 weeks before the wedding. Make sure everything fits and feels comfortable. Keep accessories simple, elegant, and comfortable. Your goal is to look polished while feeling great all day.
What Is the Return Policy for Bridesmaid Dresses?
Azazie accepts returns for standard size bridesmaid dresses within 30 days of delivery. Dresses must be unworn, unaltered, and have tags attached.
Return shipping costs $6.99 per dress in the US. Refunds take 1–5 weeks depending on return method. Custom sized dresses cannot be returned. Try-on dresses must be returned within 7 days of delivery.
Azazie Return Policy Summary: Quick Reference
| Item Type | Return Window | Return Fee (US) | Refundable | Notes |
| Standard bridesmaid dresses | 30 days | $6.99 per dress | Yes | Must be unworn with tags |
| Try-on dresses | 7 days | Prepaid label included | No | Non-refundable fee |
| Wedding dresses | 30 days | $9.99 per dress | Yes | Must be unworn with tags |
| Accessories (most) | 30 days | $3.99 per item | Yes | Unworn condition |
| Jewelry & headpieces | 7 days | $3.99 per item | Yes | Shorter window |
| Custom sized items | Not returnable | N/A | No | Cannot return |
This table shows return windows and fees for all Azazie items. Standard bridesmaid dresses have the most flexible return policy.
What Bridesmaid Dresses Can Be Returned?
Azazie accepts returns only for items that meet specific conditions. Know what qualifies before ordering.
Items You CAN Return:
Standard Size Bridesmaid Dresses:
- Ordered in size 0–30 standard sizing
- Unworn and unaltered condition
- All tags still attached
- Clean with no stains or damage
- No lint, hair, or odors
- Returned within 30 days of delivery
- Return fee: $6.99 per dress
Accessories (Most Types):
- Shoes, bags, and clutches
- Wraps and shawls
- Hair accessories (not jewelry)
- Unworn with original packaging
- Returned within 30 days
- Return fee: $3.99 per item
Jewelry and Headpieces:
- Must be returned within 7 days only
- Shorter return window than other items
- Unworn with tags attached
- Original packaging required
- Return fee: $3.99 per item
Wedding Dresses (Standard Size):
- Standard sizing only
- 30-day return window
- Unworn and unaltered
- Return fee: $9.99 per dress
Items You CANNOT Return:
| Item Type | Why Not Returnable | Alternative Option |
| Custom sized dresses | Made to your measurements | Order carefully, measure accurately |
| Try-on dresses (purchased) | Non-refundable program fee | Return within 7 days if trying only |
| Swatches | Low-cost sample items | Order multiple to compare |
| Fabric by the yard | Cut to order | Order samples first |
| Final sale items | Marked as final at purchase | Check before buying |
| Shapewear & intimates | Hygiene reasons | Try on over clothing |
| Personalized products | Custom made for you | Double-check customization |
| Garment bags | Complimentary items | Keep as storage |
Custom sized dresses are the most common non-returnable items. Always order standard sizes if you are unsure about fit.
Return Requirements: What Condition Items Must Be In
Azazie has strict return requirements. Items not meeting these standards will be rejected.
Required Condition for Returns:
Unworn:
- Never worn outside the house
- No signs of wear anywhere
- No stretched seams or fabric
- No makeup stains on neckline
- No deodorant marks on underarms
- No perspiration odors
Unaltered:
- No hemming or taking in
- No added or removed embellishments
- No strap adjustments
- Original length and fit
- Seams untouched
- Zippers unchanged
Clean:
- No stains or marks
- No dirt or dust
- Free of lint and pet hair
- No food or drink spills
- No perfume or strong odors
- Fresh, like-new appearance
Tags Attached:
- Original price tags present
- Size tags intact
- Care instruction tags attached
- Barcode tags not removed
- All labels in place
Original Packaging:
- Garment bag if provided (optional)
- Dress in good folded condition
- No excessive wrinkles
- Protected for shipping
- Secure packaging materials
Items That Will Be REJECTED:
- Dresses with makeup stains
- Altered hemlines or seams
- Missing tags or labels
- Strong perfume or smoke smell
- Visible signs of wear
- Stained or damaged fabric
- Stretched or pulled seams
- Broken or damaged zippers
Rejected returns will not be refunded. Azazie may ship the item back to you at your expense.
Bridesmaid Dress Return Fees by Item Type
Return fees are deducted from your refund amount. These fees cover processing and handling.
US Return Fees:
Bridesmaid Dresses:
- Standard size: $6.99 per dress
- Cannot return custom size
- Fee deducted from refund
- Same fee for all dress colors
- Same fee for all dress styles
Wedding Dresses:
- Standard size: $9.99 per dress
- Higher fee due to size
- Cannot return custom size
- Includes atelier wedding dresses
- Fee applies per gown
Accessories:
- Shoes, bags, wraps: $3.99 per item
- Jewelry: $3.99 per item
- Headpieces: $3.99 per item
- Lower fee for smaller items
- Each item counted separately
Try-On Dresses:
- No return fee
- Prepaid return label included
- Original try-on fee not refunded
- Must return within 7 days
- Mail only (no Happy Returns)
International Return Fees:
| Country | Bridesmaid Dress Fee | Wedding Dress Fee | Accessories Fee |
| Canada | CAD $9.99 | CAD $14.99 | CAD $4.99 |
| UK | £4.99 | £6.99 | £2.99 |
| Australia | AU $6.99 | AU $9.99 | AU $3.99 |
| Germany | €4.99 | €6.99 | €2.99 |
| Other Europe | €6.99 | €9.99 | €3.99 |
International return fees are higher than US fees. Factor this into your budget when ordering.
How to Return Bridesmaid Dresses: Step-by-Step
Azazie offers two return methods. Choose the one that works best for your location and timeline.
Method 1: Happy Returns (US Customers Only)
What It Is:
- Drop off returns at partner locations
- Instant return processing
- No shipping label needed
- No boxing or packaging required
- Fastest refund method
Step-by-Step Process:
Step 1: Initiate return online
- Log into your Azazie account
- Go to Order History
- Select items to return
- Choose "Happy Returns" method
- Get QR code via email
Step 2: Find a return location
- Use the Happy Returns locator
- Common locations: FedEx, UPS stores
- Choose closest location
- Check store hours before going
- Bring dress and QR code
Step 3: Drop off items
- Show QR code to store agent
- Agent scans items
- No packaging needed
- Get confirmation instantly
- Return processed in minutes
Step 4: Receive refund
- Refund processed within 24 hours
- Funds appear in 5–7 business days
- Email confirmation sent
- Check account for credit
- Fastest refund option
Happy Returns Benefits:
- Refund in 1 week instead of 5 weeks
- No need to pack or ship yourself
- Instant confirmation at drop-off
- Available at 5,000+ US locations
- Free and convenient
Method 2: Mail-In Returns (All Customers)
What It Is:
- Ship returns via postal service
- Available worldwide
- Requires packaging and shipping
- Takes longer for refunds
- Standard return method
Step-by-Step Process:
Step 1: Initiate return online
- Log into Azazie account
- Go to Order History section
- Select items to return
- Choose reason for return
- Print return form
Step 2: Package items carefully
- Fold dress neatly
- Place in original garment bag (optional)
- Use sturdy shipping box
- Include printed return form
- Seal box securely
Step 3: Ship to Azazie
- Use carrier of your choice
- Get tracking number
- Keep receipt as proof
- Ship within 30-day window
- Allow time for delivery
Step 4: Wait for processing
- Azazie receives package
- Inspects items (2–3 weeks)
- Processes return and refund
- Sends email confirmation
- Refund appears in account
Mail-In Return Address:
Check your return confirmation email for the correct return address. Addresses vary by region and may change.
Mail-In Returns Timeline:
| Stage | Time Required | What Happens |
| Shipping to Azazie | 5–10 business days | Item in transit |
| Receiving and inspection | 1–2 weeks | Quality check |
| Processing return | 3–5 business days | System updates |
| Refund to account | 1–2 weeks | Bank processing |
| Total Time | 3–5 weeks | Complete process |
Mail returns take significantly longer than Happy Returns. Plan accordingly if you need funds quickly.
Refund Processing Timeline Comparison
| Return Method | Processing Stage | Time Required | Total Time to Account |
| Happy Returns | Drop-off scan | Instant | 5–7 business days |
| Azazie processes | 24 hours | ||
| Bank transfers | 3–5 days | ||
| Mail-In | Shipping to Azazie | 5–10 days | 3–5 weeks |
| Inspection | 1–2 weeks | ||
| Azazie processes | 3–5 days | ||
| Bank transfers | 1–2 weeks |
What Is NOT Refunded with Returns
Return refunds do not include certain fees. Understand what you lose when returning items.
Non-Refundable Fees:
Shipping Fees:
- Original shipping cost not refunded
- You paid to receive the dress
- Not returned with dress refund
- Standard or express shipping
- Lost when returning
Rush Fees:
- Expedited production costs
- Paid to speed up dress making
- Not refunded on returns
- Lost completely when returning
- Factor into return decision
Taxes on Shipping and Rush:
- Taxes paid on non-refundable fees
- Also not refunded
- Small amount but adds up
- Included in original order
- Not recoverable
Return Shipping Fee:
- $6.99 per bridesmaid dress (US)
- Deducted from your refund
- Covers processing and handling
- Cannot be waived
- Applies to all returns
Try-On Dress Fee:
- Original try-on cost not refunded
- Fee covers try-on service
- Even if returned on time
- Non-refundable by design
- Plan for this cost
Example Refund Calculation:
Original order:
- Dress price: $120.00
- Shipping: $9.99
- Rush fee: $20.00
- Tax on items: $12.00
- Total paid: $161.99
Return refund:
- Dress price: $120.00
- Tax on dress: $12.00
- Minus return fee: -$6.99
- Total refund: $125.01
You lose $36.98 in non-refundable fees when returning. Consider this before ordering multiple dresses to try at home.
Try-On Dress Program vs Standard Returns
Azazie's try-on program has different rules from standard returns. Understand the difference.
Try-On Dress Program:
How It Works:
- Order up to 3 dresses to try
- Pay try-on fee per dress
- Keep for 7 days
- Return within 7 days
- Try at home before buying
Try-On Program Rules:
Cost:
- $10–$15 per try-on dress
- Non-refundable fee
- Covers round-trip shipping
- Prepaid return label included
- Fee keeps if you don't return
Return Window:
- Must return within 7 days
- Postmarked within 7 days counts
- Strict deadline enforced
- Late returns become purchases
- No extensions granted
Return Method:
- Mail-in only
- Use prepaid label provided
- Cannot use Happy Returns
- Ship to specific address
- Track your return
Condition Requirements:
- Same as regular returns
- Unworn with tags
- Clean and undamaged
- No alterations allowed
- Must be like-new
What Happens If Late:
- Try-on becomes purchase
- Charged full dress price
- Cannot return after
- Considered standard purchase
- Subject to regular return policy
Try-On vs Standard Return Comparison:
| Feature | Try-On Dresses | Standard Size Dresses |
| Return window | 7 days | 30 days |
| Refundable | No (try-on fee) | Yes (minus return fee) |
| Return method | Mail only | Mail or Happy Returns |
| Return fee | Included in try-on | $6.99 deducted |
| Purpose | Test before buying | Changed mind/doesn't fit |
Use try-on program to test styles before ordering full-price dresses. Do not confuse with standard returns.
Frequently Asked Questions
Can I return a bridesmaid dress if it does not fit?
Yes, you can return standard size dresses within 30 days if unworn with tags attached. Return fee is $6.99 per dress in the US.
Custom sized dresses cannot be returned for fit issues. Always measure carefully before ordering custom sizing.
How long does it take to get a refund for a returned bridesmaid dress?
Refunds take 1 week with Happy Returns or 3–5 weeks with mail-in returns. Mail returns require inspection time before processing.
Bank transfers add 5–7 days after Azazie processes your refund. Choose Happy Returns for fastest refunds.
Can I exchange a bridesmaid dress for a different size?
Yes, US customers with Azazie accounts can exchange dresses. International customers cannot exchange and must return instead.
Exchanges cost $6.99 return fee plus possible shipping on new item. New dress production takes 4–6 weeks after exchange processes.
What happens if my bridesmaid dress arrives damaged?
Contact Azazie customer service within 30 days with photos. They will investigate and offer refund, replacement, or partial credit.
Damaged items do not have return shipping fees. Azazie covers costs for manufacturing defects and shipping damage.
Can I return a custom sized bridesmaid dress?
No, custom sized dresses cannot be returned. They are made to your specific measurements and cannot be resold.
Only order custom sizing if you are confident in your measurements. Use standard sizing when unsure about fit.
Do I have to pay return shipping for bridesmaid dresses?
Yes, a return fee of $6.99 per dress is deducted from your refund in the US. This covers processing and handling.
The original shipping fee you paid is not refunded. Factor both fees into your budget when considering returns.
Final Tips for Hassle-Free Returns
Order standard sizes instead of custom when unsure about fit. Standard sizes can be returned, custom cannot. Use the try-on program to test styles before buying full-price dresses. This prevents expensive return fees.
Keep all tags attached and dresses unworn until you are certain. Even trying on multiple times can show wear. Return within 30 days using Happy Returns when possible. This provides fastest refunds in just 1 week.
Contact customer service immediately for damaged items. Report within 30 days for full protection. Plan returns around your timeline. Mail returns take 3–5 weeks for refunds to appear in your account.
Sources
- Azazie Return Policy: https://www.azazie.com/return-privacy
- Azazie Customer Service: https://customerservice.azazie.com
- Azazie Try-On Program: https://www.azazie.com/all/sample-dresses
- Azazie Size Guide: https://www.azazie.com/all/bridesmaid-dresses
How Long Does It Take to Alter a Bridesmaid Dress, and How Much Does It Cost?
Bridesmaid dress alterations take 2–4 weeks and cost $30–$150 depending on complexity. Simple hem alterations take 1–2 weeks and cost $30–$60.
Complex alterations like taking in the bodice or adding sleeves take 3–4 weeks and cost $80–$150. Schedule your first fitting 4–6 weeks before the wedding.
Rush alterations cost 50–100% extra. Plan ahead to avoid rush fees and ensure perfect fit.
Bridesmaid Dress Alteration Costs and Timeline: Quick Guide
| Alteration Type | Time Required | Cost Range | Complexity | When to Start |
| Hem (simple) | 1–2 weeks | $30–$60 | Easy | 4 weeks before |
| Hem (with lining) | 2–3 weeks | $50–$80 | Medium | 5 weeks before |
| Take in sides/bust | 2–3 weeks | $40–$80 | Medium | 5–6 weeks before |
| Shorten straps | 1 week | $15–$30 | Easy | 3 weeks before |
| Bustle addition | 2–3 weeks | $30–$60 | Medium | 5 weeks before |
| Full bodice restructure | 3–4 weeks | $100–$200 | Complex | 6–8 weeks before |
This table shows the most common bridesmaid dress alterations. Simple changes take less time and cost less than complex structural work.
Most Common Bridesmaid Dress Alterations and Costs
Understand what alterations you might need. Each type has different costs and time requirements.
Hemming the Dress
What It Is:
- Shortening the dress length
- Most common alteration needed
- Adjusts hem to your height
- Works with or without heels
- Essential for proper fit
Simple Hem (No Lining):
- Time: 1–2 weeks
- Cost: $30–$50
- Single layer of fabric
- Straight or slightly curved
- Basic sewing skill required
- Fastest and cheapest option
Lined Hem:
- Time: 2–3 weeks
- Cost: $50–$80
- Two or more fabric layers
- Lining and outer fabric both shortened
- More precise work required
- Common for formal dresses
Curved or Asymmetrical Hem:
- Time: 2–3 weeks
- Cost: $60–$90
- High-low or angled hemlines
- Requires pattern matching
- More complex measuring
- Specialized skill needed
Beaded or Detailed Hem:
- Time: 3–4 weeks
- Cost: $80–$120
- Beading or embellishments at bottom
- Must remove and reattach details
- Very time-intensive work
- Most expensive hem option
Hem Cost Factors:
- Dress length (floor vs tea-length)
- Number of fabric layers
- Embellishments on hem
- Fabric type (chiffon vs satin)
- Whether it needs hand-sewing
- Tailor's experience level
Taking In the Sides or Bust
What It Is:
- Making dress smaller in body
- Adjusts for loose fit
- Common after weight loss
- Creates better shape
- More fitted silhouette
Side Seams Only:
- Time: 2–3 weeks
- Cost: $40–$70
- Takes in dress at waist/hips
- Maintains original bust fit
- Moderate difficulty
- Common alteration
Bust and Bodice:
- Time: 2–3 weeks
- Cost: $60–$100
- Adjusts bust, waist, and hips
- More extensive work
- Requires precise fitting
- Medium to high cost
Full Bodice Restructure:
- Time: 3–4 weeks
- Cost: $100–$200
- Major size reduction (2+ sizes)
- Reconstructs entire top
- May need new zipper
- Most expensive body alteration
Factors Affecting Cost:
- How many sizes to take in
- Whether zipper needs replacement
- Built-in bra or structure
- Boning or internal support
- Embellishments to work around
- Complexity of dress design
Shortening or Adjusting Straps
What It Is:
- Making shoulder straps shorter
- Lifting bodice higher
- Improving shoulder fit
- Preventing slipping
- Quick and simple fix
Standard Strap Shortening:
- Time: 1 week
- Cost: $15–$30
- Simple adjustment
- No restructuring needed
- Quick turnaround
- Least expensive alteration
Halter or Complex Straps:
- Time: 1–2 weeks
- Cost: $30–$50
- Multiple attachment points
- May need reshaping
- More involved process
- Medium cost
Converting Strap Style:
- Time: 2–3 weeks
- Cost: $50–$90
- Changing strap type completely
- Adding or removing straps
- Requires new fabric
- Complex alteration
When You Need This:
- Dress slides off shoulders
- Straps are too loose
- Bodice sits too low
- Need more support
- Petite height adjustments
- Prefer different strap style
Adding or Removing Sleeves
What It Is:
- Adding coverage to sleeveless
- Removing existing sleeves
- Changing sleeve length
- Modifying neckline
- Style preference change
Adding Cap Sleeves:
- Time: 2–3 weeks
- Cost: $60–$100
- Small sleeve coverage
- Matches dress fabric
- Requires fabric purchase
- Medium complexity
Adding Three-Quarter or Long Sleeves:
- Time: 3–4 weeks
- Cost: $100–$150
- More fabric needed
- Complex pattern work
- Must match dress exactly
- High cost and time
Removing Sleeves:
- Time: 1–2 weeks
- Cost: $40–$70
- Takes out existing sleeves
- Finishes armhole edges
- Less complex than adding
- Moderate cost
Factors That Increase Cost:
- Finding matching fabric
- Intricate sleeve design
- Lace or detailed work
- Need for lining
- Dress construction type
- Tailor expertise required
Adjusting or Adding Bustles
What It Is:
- Attaching points to lift train
- Keeps hem off ground
- Used during reception
- Allows easier movement
- Protects dress from damage
Simple Bustle (2–3 Points):
- Time: 1–2 weeks
- Cost: $30–$50
- Basic lift system
- Two or three attachment points
- Quick to hook up
- Standard option
Complex Bustle (5+ Points):
- Time: 2–3 weeks
- Cost: $50–$80
- Multiple attachment points
- Creates specific drape
- More intricate system
- Fuller dresses need this
French Bustle (Under-Bustle):
- Time: 2–3 weeks
- Cost: $60–$100
- Fabric lifts from underneath
- More invisible system
- Requires precise placement
- Higher skill level
When You Need This:
- Floor-length dresses only
- Train or excess length
- Reception dancing
- Outdoor venue with ground
- Protect dress from dirt
- Make movement easier
Adding Bra Cups or Structure
What It Is:
- Internal support addition
- Built-in bra alternative
- Eliminates visible straps
- Better bust support
- More confident fit
Simple Bra Cups:
- Time: 1 week
- Cost: $20–$40
- Sewn-in padded cups
- Basic support only
- Quick addition
- Low cost
Boning Addition:
- Time: 2–3 weeks
- Cost: $50–$90
- Structural support added
- Metal or plastic boning
- More complex work
- Better support
Full Corset Back:
- Time: 3–4 weeks
- Cost: $100–$150
- Complete back restructure
- Lace-up closure
- Adjustable fit
- Most expensive option
Benefits:
- No bra needed
- Better support
- Smooth appearance
- Enhanced confidence
- Professional look
- Comfortable all day
Alteration Timeline by Complexity
| Complexity Level | Examples | Time Needed | Cost Range | Fittings Required |
| Simple | Hem, strap shorten | 1–2 weeks | $30–$60 | 1–2 fittings |
| Moderate | Take in sides, add bustle | 2–3 weeks | $50–$100 | 2 fittings |
| Complex | Bodice restructure, add sleeves | 3–4 weeks | $100–$200 | 2–3 fittings |
| Extensive | Multiple major changes | 4–6 weeks | $200–$350 | 3–4 fittings |
More complex alterations require more fittings and time. Simple alterations need fewer appointments and finish faster.
How Many Fittings Do You Need?
Multiple fittings ensure perfect fit. Each fitting serves a specific purpose.
First Fitting (4–6 Weeks Before Wedding)
What Happens:
- Wear dress with wedding undergarments
- Tailor pins all needed changes
- Mark hem length with shoes on
- Discuss all alterations needed
- Take initial measurements
- Estimate costs and timeline
Time Required:
- 30–45 minutes
- Longer for complex alterations
- Shorter for simple hem only
- Bring shoes and undergarments
- Wear hair up if planning updo
What to Bring:
- Wedding shoes (exact pair)
- Strapless bra or shapewear
- Any accessories planned
- Photos of desired fit
- List of concerns
- Payment for deposit
Questions to Ask:
- Total alteration cost
- Timeline for completion
- Number of fittings needed
- Rush fee if applicable
- Payment schedule
- Pickup date
Second Fitting (2–3 Weeks Before Wedding)
What Happens:
- Try on with completed alterations
- Check all pinned areas
- Verify hem length again
- Test movement and sitting
- Make minor adjustments
- Confirm final fit
Time Required:
- 20–30 minutes
- Quick check-in appointment
- Final tweaks made
- Less intensive than first
- Most alterations complete
What to Check:
- Hem touches floor correctly
- Straps do not slip
- Bust fits comfortably
- Can sit and stand easily
- Zipper closes smoothly
- No pulling or gaping
Common Adjustments:
- Hem up or down 1/4 inch
- Straps slightly tighter
- Minor side seam tweaks
- Bustle point adjustments
- Small comfort fixes
Final Fitting (1 Week Before Wedding)
What Happens:
- Pick up completed dress
- Do final walk and movement test
- Ensure everything is perfect
- Pay remaining balance
- Get care instructions
- Take dress home
Time Required:
- 15–20 minutes
- Quick pickup appointment
- Final inspection only
- No changes at this point
- Emergency fixes only
When to Skip Final Fitting:
- Simple alterations only (hem)
- Second fitting was perfect
- You trust your tailor completely
- Timeline is very tight
- Pickup only appointment
Emergency Issues:
If something is wrong at final fitting:
- Tailor fixes immediately if possible
- Rush work for wedding week
- May charge additional fee
- Communicate concerns clearly
- Allow 2–3 days for fixes
Alteration Costs by Dress Fabric Type
Fabric affects alteration difficulty and cost. Some materials are harder to work with than others.
Easy Fabrics to Alter
Chiffon:
- Cost factor: Standard
- Easy to hem and adjust
- Lightweight and flexible
- Forgiving of small errors
- Quick to work with
- Most affordable alterations
Cotton Blends:
- Cost factor: Standard
- Simple to sew
- Does not slip or slide
- Holds stitches well
- No special tools needed
- Budget-friendly option
Jersey Knit:
- Cost factor: Standard
- Stretchy and forgiving
- Does not fray easily
- Comfortable to work with
- Good for beginners
- Reasonable alteration costs
Moderate Difficulty Fabrics
Satin:
- Cost factor: +20–30% more
- Shows every pin hole
- Slips while sewing
- Must be very precise
- Water spots easily
- Requires experience
Tulle:
- Cost factor: +10–20% more
- Multiple layers complex
- Must align perfectly
- Delicate and tears easily
- Time-consuming work
- Needs patience
Lace:
- Cost factor: +30–40% more
- Must match patterns
- Cannot cut randomly
- Intricate detail work
- Hand-sewing often needed
- Specialized skill required
Difficult Fabrics to Alter
Velvet:
- Cost factor: +40–50% more
- Shows stitch marks permanently
- Crushes easily
- Special pressing needed
- One-shot precision required
- Expert tailors only
Beaded or Sequined:
- Cost factor: +50–80% more
- Must remove embellishments first
- Hand-sew back on after
- Very time-intensive
- Risk of damaging details
- Most expensive to alter
Silk (Pure):
- Cost factor: +30–40% more
- Delicate and stains easily
- Frays when cut
- Requires silk thread
- Professional skills needed
- Water spots show
How to Find a Good Bridesmaid Dress Tailor
Finding the right tailor prevents alteration disasters. Follow these guidelines.
Where to Find Tailors
Bridal Shops:
- Often have in-house tailors
- Experience with formal dresses
- Understand wedding timelines
- May require dress purchase there
- Higher cost but reliable
Independent Seamstresses:
- Work from home or small shop
- Often lower costs
- Flexible scheduling
- May have more availability
- Check reviews carefully
Dry Cleaners:
- Some offer alteration services
- Convenient locations
- Variable skill levels
- Best for simple alterations
- Not all do formal dresses
Department Store Alterations:
- Available at major retailers
- Standard pricing
- Professional service
- May have long wait times
- Good for basic work
Questions to Ask Before Booking
Experience Questions:
- How long have you been doing alterations?
- How many bridesmaid dresses do you alter yearly?
- Do you specialize in formal wear?
- Can you work with [your fabric type]?
- Do you have examples or portfolio?
- What is your busiest season?
Timeline Questions:
- How far in advance should I book?
- How many fittings will I need?
- What is your standard timeline?
- Do you offer rush service?
- What is your cancellation policy?
- When should I schedule my first fitting?
Cost Questions:
- What is your pricing for [specific alteration]?
- Do you charge by the hour or by project?
- Is there a consultation fee?
- Do you require a deposit?
- What forms of payment do you accept?
- Are rush fees negotiable?
Logistics Questions:
- Where is your location?
- What are your business hours?
- Do you have parking?
- Can I bring someone to fittings?
- Do you have a fitting room?
- How do I contact you for questions?
Red Flags to Avoid
Warning Signs:
- Cannot provide references or reviews
- No formal business location
- Vague or evasive answers
- Does not take measurements
- Promises unrealistic timeline
- Significantly cheaper than others
- Poor communication
- Messy or disorganized workspace
- No payment receipt provided
- Cannot explain alteration process
Trust Your Instincts:
If something feels off, find another tailor. Your dress is too important to risk.
Good tailors are busy during wedding season. Book 6–8 weeks in advance.
Alteration Cost-Saving Tips
Alterations add up quickly. Use these strategies to reduce costs.
Money-Saving Strategies:
Order Closer to Your Size:
- Reduces alteration needs
- Measure accurately before ordering
- Use size charts carefully
- Simple hem cheaper than major work
- Saves $50–$150
Do Simple Work Yourself:
- Shorten straps if capable
- Add bra cups at home
- Sew on missing button
- Basic repairs DIY
- Saves $20–$50
Combine Alterations:
- Schedule all work at once
- Some tailors offer package deals
- Bringing multiple bridesmaids together
- Group discount possible
- Saves 10–20%
Avoid Rush Fees:
- Start alteration process early
- Book 6–8 weeks in advance
- Do not wait until last minute
- Plan for unexpected delays
- Saves 50–100% rush fees
Shop Around:
- Get quotes from 3–4 tailors
- Compare pricing and reviews
- Balance cost with quality
- Do not choose cheapest automatically
- Can save $30–$80
Choose Simple Styles:
- Fewer embellishments cost less
- Plain hems are cheaper
- No lace or beading to work around
- Easier fabrics reduce cost
- Saves $20–$100
Use Bridal Party Discounts:
- Some tailors offer group rates
- All bridesmaids together
- Coordinated fitting times
- Loyalty discounts
- Saves 10–15% per person
Complete Bridesmaid Alteration Budget Guide
| Number of Alterations | Simple (Hem Only) | Moderate (2–3 Changes) | Complex (4+ Changes) | Total Budget |
| 1 bridesmaid | $30–$60 | $80–$150 | $150–$300 | For one dress |
| 3 bridesmaids | $90–$180 | $240–$450 | $450–$900 | Small wedding party |
| 5 bridesmaids | $150–$300 | $400–$750 | $750–$1,500 | Medium wedding party |
| 8 bridesmaids | $240–$480 | $640–$1,200 | $1,200–$2,400 | Large wedding party |
Budget for alterations when planning bridesmaid expenses. Most bridesmaids spend $60–$120 on alterations.
Frequently Asked Questions
How much does it cost to hem a bridesmaid dress?
Hemming a bridesmaid dress costs $30–$60 for a simple hem without lining. Lined hems cost $50–$80.
Beaded or detailed hems cost $80–$120 due to intricate work. Fabric type also affects price.
How long does it take to alter a bridesmaid dress?
Simple alterations take 1–2 weeks. Moderate alterations take 2–3 weeks.
Complex alterations take 3–4 weeks or longer. Start the alteration process 4–6 weeks before the wedding.
Can I alter a bridesmaid dress myself?
You can do simple alterations like shortening straps or adding bra cups if you have basic sewing skills. Avoid DIY for complex work like hemming, taking in sides, or working with delicate fabrics.
One mistake can ruin the dress. Professional alterations are safer for anything beyond basic repairs.
When should I schedule my first fitting for bridesmaid dress alterations?
Schedule your first fitting 4–6 weeks before the wedding. This allows 2–3 weeks for alterations and 1–2 additional fittings.
For complex alterations, start 6–8 weeks before the wedding. Rush alterations cost 50–100% more.
How many fittings do bridesmaid dress alterations require?
Most alterations require 2 fittings. Simple hems may need only 1 fitting.
Complex alterations need 2–3 fittings. The first fitting takes 30–45 minutes, and follow-up fittings take 20–30 minutes.
What is the most expensive bridesmaid dress alteration?
Full bodice restructuring costs $100–$200 and takes 3–4 weeks. This includes taking in the dress 2+ sizes or major reconstruction.
Adding sleeves costs $100–$150. Beaded hem alterations cost $80–$120 due to hand-sewing detail work.
Final Tips for Bridesmaid Dress Alterations
Start the alteration process 4–6 weeks before the wedding. This allows time for multiple fittings without rush fees. Test your dress by sitting, walking, and raising arms at fittings. Ensure comfort for all-day wear.
Ask about package deals if multiple bridesmaids use the same tailor. Group discounts can save 10–20%.Only DIY simple alterations if you have sewing experience. Professional work prevents costly mistakes.
Pick up your altered dress 1 week before the wedding. This allows time for emergency fixes if needed. Keep alteration receipts and tailor contact information. You may need emergency adjustments closer to the wedding date.
How Do I Know What Size to Order for a Bridesmaid Dress?
Measure your bust, waist, and hips in inches and compare to the brand's size chart. Order the size that fits your largest measurement.
If between sizes, order the larger size for easier alterations. Bridesmaid dresses run smaller than street clothing by 1–2 sizes.
Order standard sizes unless you need custom sizing. Standard sizes can be altered and returned, while custom sizes cannot.
Bridesmaid Dress Sizing Quick Reference Guide
| Measurement | How to Measure | Common Mistakes | Best Practice | Tools Needed |
| Bust | Around fullest part | Measuring over clothing | Wear strapless bra | Soft tape measure |
| Waist | Natural waistline | Measuring too tight | Breathe normally | Soft tape measure |
| Hips | Fullest part of hips | Standing unevenly | Stand straight | Soft tape measure |
| Hollow-to-hem | Collarbone to floor | Not wearing heels | Wear wedding shoes | Soft tape measure |
| Height | Top of head to floor | No shoes | Stand barefoot first | Wall and tape |
This table shows the five essential measurements for bridesmaid dresses. Take all measurements while standing straight in undergarments only.
Understanding Bridesmaid Dress Sizing vs Street Sizing
Bridesmaid dress sizing differs significantly from regular clothing. Understanding this prevents ordering the wrong size.
Why Bridesmaid Sizes Run Smaller
Key Differences:
- Bridesmaid dress size 8 = Street size 4–6
- Bridesmaid dress size 12 = Street size 8–10
- Bridesmaid dress size 16 = Street size 12–14
- Bridesmaid dresses use formal sizing standards
- Designed for structured, fitted wear
- Based on body measurements, not vanity sizing
Street Clothing vs Formal Dress Sizing:
| Your Street Size | Typical Bridesmaid Size | Size Difference | Why This Matters |
| 0–2 | 2–4 | 2 sizes up | Formal sizing is stricter |
| 4–6 | 6–8 | 2 sizes up | No vanity sizing |
| 8–10 | 10–12 | 2 sizes up | Based on measurements |
| 12–14 | 14–16 | 2 sizes up | More fitted construction |
| 16–18 | 18–20 | 2 sizes up | Standard across brands |
| 20+ | 22+ | 2 sizes up | Measurement-based only |
Why This Happens:
- Street brands use vanity sizing
- Formal wear uses actual measurements
- Bridesmaid dresses fit more closely
- Built-in structure requires precision
- Industry standard since 1950s
- No flexibility for loose fit
What This Means for You:
Do not order your usual clothing size. Always use measurements and size charts.
You will likely order 1–2 sizes larger than your street size. This is completely normal.
How to Measure Yourself for a Bridesmaid Dress
Accurate measurements prevent sizing mistakes. Follow these steps for perfect measurements.
What You Need Before Measuring
Essential Items:
- Soft fabric measuring tape (not metal)
- Mirror to check tape placement
- Strapless bra or wedding undergarments
- Someone to help with back measurements
- Pen and paper to record numbers
- Well-lit room
What to Wear:
- Strapless bra or bra you will wear
- Fitted underwear or shapewear
- Nothing else (no clothing over)
- Wedding shoes for hollow-to-hem
- Hair down for natural posture
Before You Start:
- Stand straight with good posture
- Breathe normally, do not suck in
- Keep tape measure parallel to floor
- Do not pull tape too tight
- Record measurements immediately
- Measure twice to confirm accuracy
Step-by-Step Measurement Guide
Bust Measurement:
How to Measure:
- Wrap tape around fullest part of bust
- Usually across nipple line
- Keep tape parallel to floor
- Do not compress breasts
- Tape should be snug but not tight
- Can breathe comfortably
Common Mistakes:
- Measuring over clothing
- Tape too tight (reduces size)
- Tape angled up or down
- Not measuring fullest part
- Holding breath while measuring
Tips for Accuracy:
- Have someone else measure if possible
- Take measurement 3 times
- Use average of 3 measurements
- Round up to nearest half inch
- Measure in strapless bra
Waist Measurement:
How to Measure:
- Find natural waistline (narrowest part)
- Usually 1–2 inches above belly button
- Wrap tape around completely
- Keep tape parallel to floor
- Stand straight, breathe normally
- Do not pull in stomach
Finding Your Natural Waist:
- Bend to the side
- Waist is where body creases
- Not where pants sit
- Usually narrowest point
- Between ribs and hips
Common Mistakes:
- Measuring where pants sit (too low)
- Pulling tape too tight
- Sucking in stomach
- Measuring after eating
- Not standing straight
Tips for Accuracy:
- Measure first thing in morning
- Empty stomach preferred
- Keep tape snug but comfortable
- Should fit one finger under tape
- Take 3 measurements, use average
Hip Measurement:
How to Measure:
- Stand with feet together
- Measure around fullest part of hips
- Usually 7–9 inches below waist
- Include buttocks in measurement
- Keep tape parallel to floor
- Do not pull tape tight
Finding Fullest Part:
- Usually widest point of buttocks
- Stand in front of mirror
- Look at profile view
- Measure at widest point
- Include hip bones if widest
Common Mistakes:
- Measuring too high (at hip bones only)
- Measuring too low (mid-thigh)
- Standing with feet apart
- Tape not parallel to floor
- Not including buttocks
Tips for Accuracy:
- Wear fitted underwear only
- Stand naturally with feet together
- Do not shift weight to one side
- Keep posture straight
- Take measurement 3 times
Hollow-to-Hem Measurement:
How to Measure:
- Start at hollow between collarbones
- Measure straight down center front
- Go all the way to floor
- Wear your wedding shoes
- Stand straight with good posture
- Someone else should measure this
Why This Matters:
- Determines dress length
- Ensures proper hemline
- Accounts for your height
- Includes shoe height
- Prevents too-short or too-long dress
Common Mistakes:
- Measuring without shoes
- Not measuring to actual floor
- Tape not straight down center
- Bending forward slightly
- Not recording shoe height
Tips for Accuracy:
- Wear exact wedding shoes
- Stand against wall if needed
- Have helper hold top of tape
- Keep tape straight (not angled)
- Note shoe heel height separately
How to Use a Size Chart
Every brand has different size charts. Never assume your size based on another brand.
Reading Size Charts Correctly
Standard Size Chart Format:
| Size | Bust (inches) | Waist (inches) | Hips (inches) |
| 0 | 32–32.5 | 24.5–25 | 35.5–36 |
| 2 | 33–33.5 | 25.5–26 | 36.5–37 |
| 4 | 34–34.5 | 26.5–27 | 37.5–38 |
| 6 | 35–35.5 | 27.5–28 | 38.5–39 |
| 8 | 36–36.5 | 28.5–29 | 39.5–40 |
| 10 | 37.5–38 | 29.5–30 | 40.5–41 |
| 12 | 39–39.5 | 31–31.5 | 42–42.5 |
| 14 | 40.5–41 | 32.5–33 | 43.5–44 |
| 16 | 42–42.5 | 34–34.5 | 45–45.5 |
| 18 | 43.5–44 | 35.5–36 | 46.5–47 |
| 20 | 45–45.5 | 37–37.5 | 48–48.5 |
| 22 | 46.5–47 | 38.5–39 | 49.5–50 |
How to Choose Your Size:
Step 1: Compare all three measurements
- Check where bust measurement falls
- Check where waist measurement falls
- Check where hip measurement falls
- Note which size each measurement suggests
Step 2: Choose based on largest measurement
- If bust is size 8, waist is 6, hips is 10
- Order size 10 (largest measurement)
- Easier to take in than let out
- Alterations fix smaller measurements
Step 3: Consider body proportions
- Hourglass: All measurements similar size
- Pear shape: Hips larger than bust
- Apple shape: Waist larger than hips/bust
- Athletic: All measurements close together
When Measurements Fall Between Sizes:
Option 1: Order larger size (recommended)
- Easier to alter smaller
- Cannot easily let out dresses
- Safer choice overall
- Costs $40–$80 to take in
- Less stress about fit
Option 2: Order smaller size (risky)
- Only if very close to that size
- Cannot let out more than 1–2 inches
- May not fit at all
- Could need new dress
- Higher risk option
Option 3: Custom sizing
- Provides exact fit to measurements
- Cannot be returned
- Costs $15–$30 extra usually
- No exchanges allowed
- Only if measurements are unusual
Standard vs Custom Sizing Decision Guide
| Factor | Standard Sizing | Custom Sizing | Recommendation |
| Can return | Yes, within 30 days | No, final sale | Standard if unsure |
| Can exchange | Yes (US only) | No | Standard for flexibility |
| Alterations needed | Usually $40–$80 | Minimal or none | Custom saves alteration cost |
| Risk level | Low | High | Standard for first-timers |
| Cost | Standard price | +$15–$30 usually | Standard more economical |
| Fit | May need adjusting | Exact to measurements | Custom if proportions unusual |
Choose standard sizing unless your measurements clearly require custom. The return option is worth more than perfect initial fit.
Common Sizing Mistakes and How to Avoid Them
Many bridesmaids make the same sizing errors. Learn from these mistakes.
Mistake 1: Ordering Your Street Size
The Problem:
- Ordering size 8 because you wear size 8 jeans
- Formal sizing is 1–2 sizes larger
- Dress arrives too small
- Cannot exchange custom sizes
- Wasted money on wrong size
The Solution:
- Always measure yourself
- Compare to brand size chart
- Ignore your usual clothing size
- Base decision on measurements only
- Order 1–2 sizes up from street size
Real Example:
- Street size: Size 10
- Measurements: Bust 38", Waist 31", Hips 41"
- Correct bridesmaid size: 12 or 14
- Wrong choice: Ordering size 10
- Result: Dress does not fit
Mistake 2: Measuring Over Clothing
The Problem:
- Measuring over jeans and shirt
- Adds 2–4 inches to measurements
- Orders size too large
- Dress arrives baggy and loose
- Expensive alterations needed
The Solution:
- Measure in undergarments only
- Wear strapless bra or wedding bra
- Remove all clothing
- Get accurate bare measurements
- Order correct size
Cost of This Mistake:
- Taking in dress: $60–$100
- Could have avoided by measuring correctly
- Time wasted on unnecessary alterations
Mistake 3: Sucking In While Measuring
The Problem:
- Holding breath and stomach in
- Reduces waist measurement by 1–3 inches
- Orders size too small
- Dress too tight on wedding day
- Cannot breathe or sit comfortably
The Solution:
- Breathe normally while measuring
- Stand naturally with good posture
- Do not suck in stomach
- Measure realistic, comfortable fit
- Order for relaxed state
Why This Matters:
- You will wear dress 8+ hours
- Need to sit, eat, dance
- Tight dress is uncomfortable
- Cannot enjoy wedding if too small
Mistake 4: Ordering Between Sizes (Smaller)
The Problem:
- Measurements between size 10 and 12
- Orders size 10 to save alteration cost
- Dress arrives too small
- Cannot let out more than 1–2 inches
- May need to order new dress
The Solution:
- Always order larger when between sizes
- Can take in a dress easily
- Cannot let out beyond 1–2 inches
- Alterations for taking in: $40–$80
- New dress if too small: $100+
Why Larger Is Safer:
- Taking in is straightforward
- Letting out may not be possible
- Dress can be altered to perfect fit
- Less stress and worry
Mistake 5: Not Accounting for Weight Changes
The Problem:
- Orders dress 4–6 months early
- Loses or gains 10+ pounds before wedding
- Dress no longer fits
- No time to reorder
- Emergency alterations needed
The Solution:
- Order 2–3 months before wedding
- Account for planned weight changes
- Order larger if losing weight
- Order size up if weight fluctuates
- Can always alter to fit
Timeline for Orders:
| Time Before Wedding | Order Strategy | Why |
| 6+ months | Wait to order | Too far out, body may change |
| 4–5 months | Order with caution | Account for weight plans |
| 2–3 months | Ideal time | Body stable, time for alterations |
| 1 month | Too late | Rush fees, limited options |
Mistake 6: Not Using a Soft Tape Measure
The Problem:
- Using metal tape measure
- Does not bend around curves
- Measurements inaccurate by 2–4 inches
- Orders wrong size
- Dress does not fit
The Solution:
- Buy soft fabric measuring tape
- Available at craft stores for $3–$5
- Bends around body curves
- Provides accurate measurements
- Essential tool for dress ordering
Where to Buy:
- Craft stores (Joann, Michaels)
- Online (Amazon, craft sites)
- Sewing section of Target/Walmart
- Fabric stores
- Usually under $5
Mistake 7: Measuring Yourself Alone
The Problem:
- Trying to measure own bust and back
- Cannot hold tape and see measurement
- Tape slips or angles incorrectly
- Measurements off by 1–3 inches
- Orders wrong size
The Solution:
- Ask someone to help measure
- Friend, family member, or roommate
- They hold tape and read number
- You stand still with good posture
- Accurate measurements guaranteed
Who Can Help:
- Another bridesmaid
- Mother or sister
- Partner or spouse
- Friend or roommate
- Professional seamstress ($10–$20 fee)
Special Sizing Situations
Some body types and situations require special sizing considerations.
Petite Bridesmaids (Under 5'4")
Sizing Considerations:
Standard Sizing:
- Usually works for petite frames
- Will need hem shortened
- May need strap shortening
- Bodice proportions may be long
- Cost: $40–$70 in alterations
Petite Sizing:
- Some brands offer petite sizing
- Shorter torso and straps
- Proportioned for smaller frames
- Less alteration needed
- May cost same or slightly more
Best Approach:
- Check if petite sizes available
- If not, order standard size by measurements
- Budget $40–$70 for hemming
- May need straps and bodice adjusted
- Alterations are normal and expected
Petite Sizing Guide:
| Height | Typical Hem Alteration | Strap Adjustment | Total Alteration Cost |
| 4'10"–5'0" | $50–$70 | $15–$30 | $65–$100 |
| 5'0"–5'2" | $40–$60 | $15–$30 | $55–$90 |
| 5'2"–5'4" | $30–$50 | $15–$25 | $45–$75 |
How to Order Multiple Bridesmaids' Dresses
Coordinating sizes for multiple bridesmaids requires organization. Follow this system.
Frequently Asked Questions
Should I order my street size for a bridesmaid dress?
No, never order your street clothing size. Bridesmaid dresses run 1–2 sizes smaller than street sizing.
Always measure your bust, waist, and hips and compare to the brand's size chart. Order based on your largest measurement.
What if I am between two bridesmaid dress sizes?
Always order the larger size when between sizes. It is much easier to take in a dress than let it out.
Alterations to make a dress smaller cost $40–$80. Dresses can only be let out 1–2 inches maximum.
How do I measure myself for a bridesmaid dress?
Measure in undergarments only with a soft fabric tape measure. Take bust (fullest part), waist (natural waistline), and hips (fullest part).
Have someone help you for accuracy. Take each measurement 3 times and use the average.
Should I order custom sizing or standard sizing?
Order standard sizing unless your measurements span 3+ sizes. Standard sizes can be returned and exchanged.
Custom sizing cannot be returned and costs $15–$30 extra. Choose custom only if very confident in measurements.
How much do alterations cost after ordering the right size?
Most bridesmaids spend $40–$80 on alterations even with correct sizing. Common alterations include hemming ($30–$60) and taking in sides ($40–$70).
Budget for alterations when ordering. It is normal to need 1–2 adjustments for perfect fit.
Can I return a bridesmaid dress if I order the wrong size?
Yes, you can return standard size dresses within 30 days if unworn with tags. Custom sized dresses cannot be returned.
This is why standard sizing is recommended. Order standard sizes for return flexibility in case of sizing errors.
Final Tips for Ordering the Right Bridesmaid Dress Size
Measure yourself in undergarments with a soft fabric tape measure. Take bust, waist, and hips three times each. Compare your measurements to the brand's specific size chart. Every brand sizes differently.
Order based on your largest measurement. If bust is size 10, waist is 8, hips is 12, order size 12. Always order the larger size when between two sizes. Taking in is easier and cheaper than letting out.
Do not order your street clothing size. Bridesmaid dresses run 1–2 sizes smaller than regular clothes. Have someone help you measure. Measuring yourself alone leads to inaccurate measurements. Keep alteration costs in your budget. All bridesmaids need some alterations regardless of size ordered. Use the try-on program if available. Testing styles before buying prevents expensive mistakes.
How Do I Choose a Bridesmaid Dress That Matches the Wedding Color Scheme?
Choose bridesmaid dress colors that complement your wedding palette by matching 1–2 main colors from your theme. Order fabric swatches to see colors in person before buying.
Bridesmaids can wear matching shades, ombre variations, or complementary colors from your palette. Keep metallics like gold or silver neutral across all wedding colors.
Order dresses from the same brand in the same dye lot to ensure color consistency. Colors look different in photos than in person, so always test with swatches first.
Bridesmaid Dress Color Matching Quick Guide
| Wedding Theme | Best Bridesmaid Colors | Complementary Accents | Season Match | Color Intensity |
| Romantic Garden | Blush, dusty rose, sage | Gold, ivory, champagne | Spring/Summer | Soft, muted |
| Classic Elegant | Navy, burgundy, emerald | Silver, gold, ivory | Fall/Winter | Rich, deep |
| Beach Coastal | Dusty blue, seafoam, aqua | Rose gold, sand, white | Summer | Light, airy |
| Rustic Barn | Terracotta, rust, olive | Gold, burlap, cream | Fall | Warm, earthy |
| Modern Minimalist | Charcoal, mauve, taupe | Silver, white, black | Any season | Neutral, sophisticated |
This table shows the most popular wedding themes with ideal bridesmaid colors. Match your dress colors to your overall wedding aesthetic.
Understanding Wedding Color Schemes and Palettes
Wedding color schemes typically include 2–4 colors. Understanding how to use them helps create cohesive bridesmaid dress choices.
Primary, Secondary, and Accent Colors
Primary Color (Main Color):
- The dominant color in your wedding
- Usually 50–60% of color usage
- Appears in major decor elements
- Often the bridesmaid dress color
- Sets the overall tone
- Examples: Navy, burgundy, blush
Secondary Color:
- Supports the primary color
- Usually 30–40% of color usage
- Appears in flowers and accents
- Can be second bridesmaid dress color
- Complements primary without competing
- Examples: Ivory, gold, champagne
Accent Colors:
- Small pops of color
- Usually 10–20% of usage
- Appears in details only
- Adds interest and contrast
- Usually not bridesmaid dress color
- Examples: Coral, blush, metallics
How to Apply to Bridesmaids:
- Choose primary or secondary color for dresses
- Use accent colors in accessories
- Keep dresses in main palette
- Accessories add accent pops
- Creates cohesive look across wedding
Monochromatic vs Multi-Color Schemes
Monochromatic Scheme:
What It Is:
- One color in different shades
- Light to dark variations
- Same color family throughout
- Very cohesive appearance
- Easy to coordinate
Bridesmaid Options:
- All same shade (traditional)
- Ombre effect (light to dark)
- Different shades same color
- 3–4 tones of one color
- Creates visual interest
Examples:
- Navy: Dusty blue, slate, navy, midnight
- Pink: Blush, rose, mauve, dusty rose
- Green: Sage, eucalyptus, olive, emerald
- Purple: Lavender, lilac, plum, eggplant
Multi-Color Scheme:
What It Is:
- 2–4 different colors
- Complementary color combinations
- More complex coordination
- Requires careful planning
- Can look stunning when done right
Bridesmaid Options:
- Each bridesmaid different color from palette
- Mix and match within color scheme
- Half in one color, half in another
- Maid of honor in unique shade
- Creates dynamic look
Examples:
- Navy + dusty rose + gold
- Burgundy + sage + champagne
- Emerald + blush + ivory
- Terracotta + dusty blue + cream
Wedding Color Palette by Season
Different seasons inspire different color palettes. Match your bridesmaid dresses to seasonal aesthetics.
Spring Wedding Colors (March–May)
Best Color Palettes:
Soft Pastels:
- Blush pink
- Lavender
- Mint green
- Baby blue
- Peach
- Soft yellow
Why They Work:
- Reflect spring flowers
- Light and fresh feeling
- Match blooming gardens
- Photograph beautifully outdoors
- Complement natural light
Bridesmaid Dress Strategy:
- Choose 2–3 pastel shades
- Keep tones soft and muted
- Avoid dark, heavy colors
- Mix pastels for ombre effect
- Add gold or rose gold accents
Popular Spring Combinations:
| Primary Color | Secondary Color | Accent Color | Overall Feel |
| Blush pink | Champagne | Gold | Romantic, soft |
| Lavender | Sage green | Silver | Fresh, garden-inspired |
| Dusty blue | Blush | Rose gold | Elegant, airy |
| Mint green | Peach | Gold | Playful, bright |
Summer Wedding Colors (June–August)
Best Color Palettes:
Bright & Bold:
- Coral
- Turquoise
- Fuchsia
- Sunshine yellow
- Tropical orange
- Hot pink
Coastal & Breezy:
- Dusty blue
- Seafoam green
- Aqua
- Sandy beige
- White/ivory
- Soft teal
Why They Work:
- Energetic and vibrant
- Match outdoor settings
- Photograph well in bright sun
- Reflect summer energy
- Work for beach or garden
Bridesmaid Dress Strategy:
- Choose colors that do not overwhelm in photos
- Keep fabrics light (chiffon, mesh)
- Bright colors work for informal weddings
- Muted tones for formal summer events
- Consider heat and comfort
Popular Summer Combinations:
| Primary Color | Secondary Color | Accent Color | Overall Feel |
| Dusty blue | Champagne | Rose gold | Beach, elegant |
| Coral | Mint | Gold | Tropical, fun |
| Turquoise | Ivory | Silver | Coastal, fresh |
| Peach | Sage | Gold | Garden, romantic |
Fall Wedding Colors (September–November)
Best Color Palettes:
Jewel Tones:
- Burgundy
- Emerald green
- Plum purple
- Navy blue
- Deep teal
- Sapphire
Earth Tones:
- Terracotta
- Rust orange
- Olive green
- Chocolate brown
- Burnt sienna
- Mustard yellow
Why They Work:
- Rich, saturated colors
- Match autumn leaves
- Warm and cozy feeling
- Photograph beautifully in fall light
- Work indoor and outdoor
Bridesmaid Dress Strategy:
- Go bold with deep, rich colors
- Mix jewel tones for drama
- Earth tones for rustic venues
- Velvet or satin for luxe feel
- Gold accents complement perfectly
Popular Fall Combinations:
| Primary Color | Secondary Color | Accent Color | Overall Feel |
| Burgundy | Navy | Gold | Classic, formal |
| Emerald | Dusty rose | Gold | Rich, romantic |
| Rust | Olive | Champagne | Rustic, earthy |
| Plum | Sage | Silver | Elegant, natural |
Winter Wedding Colors (December–February)
Best Color Palettes:
Classic Elegance:
- Navy blue
- Charcoal gray
- Black
- Wine/burgundy
- Forest green
- Silver
Winter Jewels:
- Emerald
- Sapphire
- Ruby red
- Amethyst
- Deep purple
- Icy blue
Why They Work:
- Formal and sophisticated
- Match indoor formal venues
- Rich colors stand out
- Work with winter lighting
- Photograph beautifully indoors
Bridesmaid Dress Strategy:
- Choose deep, saturated colors
- Velvet or satin fabrics add luxury
- Metallics work year-round
- Consider wraps for outdoor photos
- Darker colors suit evening weddings
Popular Winter Combinations:
| Primary Color | Secondary Color | Accent Color | Overall Feel |
| Navy | Silver | Ivory | Formal, timeless |
| Emerald | Gold | Champagne | Luxurious, rich |
| Burgundy | Champagne | Rose gold | Romantic, warm |
| Charcoal | Blush | Silver | Modern, sophisticated |
Matching Bridesmaid Dresses to Venue Type
Venue style influences color choices. Match dress colors to your venue aesthetic.
Garden and Outdoor Venues
Best Colors:
Natural Earth Tones:
- Sage green
- Dusty rose
- Terracotta
- Champagne
- Taupe
- Soft lavender
Why They Work:
- Blend with natural surroundings
- Do not compete with flowers
- Complement greenery and trees
- Photograph beautifully outdoors
- Work in natural light
Avoid:
- Neon or overly bright colors
- Pure white (competes with bride)
- Colors that blend into background
- Overly dark colors for daytime
Styling Tips:
- Light, flowing fabrics (chiffon)
- Natural makeup and hair
- Minimal jewelry
- Flower crowns or fresh flowers
- Neutral or metallic shoes
Beach and Coastal Venues
Best Colors:
Ocean-Inspired Palette:
- Dusty blue
- Aqua
- Seafoam green
- Coral
- Sandy beige
- Soft turquoise
Why They Work:
- Reflect ocean and sky
- Light colors suit beach setting
- Photograph beautifully with water
- Complement sandy backdrop
- Feel breezy and casual
Avoid:
- Heavy, dark colors
- Black (too formal for beach)
- Thick fabrics that overheat
- Anything that looks too formal
- Heavy embellishments
Styling Tips:
- Lightweight chiffon or mesh
- Shorter lengths (avoid sand drag)
- Barefoot or flat sandals
- Loose, beachy hair
- Minimal accessories
Ballroom and Hotel Venues
Best Colors:
Formal Elegance:
- Navy blue
- Burgundy
- Emerald green
- Charcoal gray
- Plum purple
- Black (semi-formal)
Why They Work:
- Sophisticated and formal
- Match elegant indoor setting
- Photograph beautifully with lighting
- Suit structured venue
- Work for evening events
Avoid:
- Overly casual pastels
- Neon or bright colors
- Too beachy or rustic tones
- Anything too informal
- Colors that clash with venue decor
Styling Tips:
- Satin or velvet fabrics
- Floor-length formal styles
- Statement jewelry
- Elegant updos
- Metallic heels
Barn and Rustic Venues
Best Colors:
Rustic Earth Tones:
- Rust orange
- Olive green
- Terracotta
- Dusty blue
- Mauve
- Burnt sienna
Why They Work:
- Complement wood and natural elements
- Warm, cozy feeling
- Match rustic aesthetic
- Photograph well with barn backdrop
- Feel organic and natural
Avoid:
- Overly formal jewel tones
- Very bright neon colors
- Colors too modern or sleek
- Pure black (too formal)
- Stark white
Styling Tips:
- Mix textures (lace, chiffon)
- Boots or rustic shoes acceptable
- Natural, loose hairstyles
- Wood or leather accessories
- Burlap or lace accents
Modern and Industrial Venues
Best Colors:
Contemporary Palette:
- Charcoal gray
- Mauve
- Taupe
- Black
- Navy
- Blush (soft contrast)
Why They Work:
- Sleek and modern
- Match industrial aesthetic
- Neutral and sophisticated
- Work with concrete and metal
- Clean, minimal look
Avoid:
- Overly traditional colors
- Too many colors mixed
- Overly rustic tones
- Busy patterns
- Country-style colors
Styling Tips:
- Sleek, structured fabrics
- Minimalist jewelry
- Geometric accessories
- Simple, clean lines
- Modern hair styles
Venue and Color Matching Guide
| Venue Type | Best Color Families | Fabric Choices | Avoid | Styling |
| Garden/Outdoor | Earth tones, pastels | Chiffon, tulle | Neon, pure white | Natural, loose |
| Beach | Blues, corals, neutrals | Light chiffon, mesh | Black, heavy fabrics | Casual, beachy |
| Ballroom | Jewel tones, navy, burgundy | Satin, velvet | Casual pastels | Formal, structured |
| Barn/Rustic | Rust, olive, dusty blue | Lace, chiffon | Neon, stark colors | Natural, textured |
| Modern/Industrial | Gray, mauve, black | Structured fabrics | Traditional colors | Sleek, minimal |
Color Coordination Strategies for Bridesmaids
Different approaches to coordinating bridesmaid dress colors create different effects.
Strategy 1: All Matching (Traditional)
What It Is:
- Every bridesmaid wears same color
- Same dress style and fabric
- Most traditional approach
- Creates uniform, cohesive look
- Easiest to coordinate
Benefits:
- Simple to order and coordinate
- Very cohesive in photos
- Classic, timeless appearance
- Bride stands out clearly
- No color matching issues
Best For:
- Formal, traditional weddings
- Small bridal parties (3–5)
- Brides who want classic look
- Weddings with one main color
- First-time coordinators
How to Execute:
- Choose one dress color from palette
- All bridesmaids order same color name
- Order from same dye lot if possible
- Same style or mix-and-match styles
- Keep accessories coordinated
Strategy 2: Ombre Effect (Gradient)
What It Is:
- Bridesmaids wear shades of one color
- Lightest to darkest gradient
- Creates visual flow
- Modern and trendy
- Instagram-worthy photos
Benefits:
- More interesting than all matching
- Still cohesive color family
- Flatters different skin tones
- Creates dimension in photos
- Easy to coordinate
Best For:
- Medium to large bridal parties (5–8)
- Monochromatic color schemes
- Modern, trendy weddings
- Outdoor ceremony photos
- Creative, artistic couples
How to Execute:
For 5 Bridesmaids:
- Lightest shade (blush)
- Light medium (dusty rose)
- Medium (mauve)
- Medium dark (rose)
- Darkest (burgundy)
For 3 Bridesmaids:
- Light (sage)
- Medium (eucalyptus)
- Dark (olive)
Tips:
- Keep shades in same color family
- Graduate evenly from light to dark
- Test with fabric swatches first
- Order from same brand
- Arrange by height or shade in photos
Strategy 3: Complementary Colors (Mix and Match)
What It Is:
- Each bridesmaid wears different color
- Colors from same wedding palette
- Creates vibrant, dynamic look
- Very modern approach
- Requires careful coordination
Benefits:
- Each bridesmaid chooses flattering color
- Accommodates different skin tones
- Visually interesting in photos
- Reflects personality
- Instagram-worthy diversity
Best For:
- Weddings with multi-color schemes
- Creative, non-traditional couples
- Diverse bridal party
- Outdoor garden weddings
- Bohemian or eclectic themes
How to Execute:
3-Color Palette Example:
- 2 bridesmaids in dusty blue
- 2 bridesmaids in dusty rose
- 1 maid of honor in champagne
4-Color Palette Example:
- Bridesmaid 1: Navy
- Bridesmaid 2: Burgundy
- Bridesmaid 3: Dusty blue
- Bridesmaid 4: Mauve
Tips:
- Keep same dress style for unity
- Or same color, different styles
- Test colors together with swatches
- Balance warm and cool tones
- Avoid too many competing colors
Strategy 4: Maid of Honor Standout
What It Is:
- Maid of honor wears different color
- Other bridesmaids match each other
- Distinguishes maid of honor
- Creates focal point
- Traditional with twist
Benefits:
- Honors maid of honor's special role
- Clear visual hierarchy
- Easy to identify in photos
- Still cohesive overall
- Simple to coordinate
Best For:
- Traditional weddings with modern twist
- When maid of honor is very close friend/sister
- Clear role distinction desired
- Small to medium bridal parties
- Formal weddings
How to Execute:
- Bridesmaids: Navy dresses
- Maid of honor: Dusty blue or gold
- Or bridesmaids: Burgundy
- Maid of honor: Champagne or rose gold
- Keep same style or fabric
Color Combinations:
- Bridesmaids in navy, MOH in gold
- Bridesmaids in burgundy, MOH in blush
- Bridesmaids in emerald, MOH in champagne
- Bridesmaids in dusty blue, MOH in mauve
Color Coordination Strategy Comparison
| Strategy | Coordination Difficulty | Best For | Photo Effect | Formality Level |
| All matching | Easy | Traditional, formal | Cohesive, uniform | Very formal |
| Ombre gradient | Moderate | Modern, creative | Dynamic, artistic | Semi-formal to formal |
| Mix and match | Complex | Eclectic, bohemian | Vibrant, diverse | Casual to semi-formal |
| MOH standout | Easy | Traditional with twist | Clear hierarchy | Formal |
Frequently Asked Questions
How do I match bridesmaid dresses to my wedding colors?
Choose 1–2 main colors from your wedding palette for bridesmaid dresses. Order fabric swatches to see colors in person before buying.
Match dresses to venue, season, and flower colors. Keep metallics neutral and test colors in your venue lighting.
Can bridesmaids wear different colors?
Yes, bridesmaids can wear different colors from your wedding palette. This creates a modern, mix-and-match look.
Keep colors within the same family or choose complementary colors. Test colors together with fabric swatches first.
Should bridesmaid dresses match the flowers exactly?
No, bridesmaid dresses should complement flowers, not match exactly. Choose dresses 1–2 shades different from flower colors.
This creates depth and visual interest. Exact matching makes dresses blend into bouquets in photos.
What colors look best in wedding photos?
Navy, burgundy, emerald, and dusty blue photograph beautifully. Rich, saturated colors look best in photos.
Avoid pale pastels that wash out and neon colors that overpower. Test colors in your venue lighting.
How do I coordinate colors for a large bridal party?
Use an ombre gradient (light to dark) or assign 2–3 colors from your palette. Keep same dress style for cohesion.
Order all dresses from the same brand in the same dye lot. Create a color coordination plan before ordering.
Can I mix warm and cool tones in bridesmaid dresses?
Yes, but choose carefully to avoid clashing. Pair warm tones like rust with neutral cool tones like taupe.
Test colors together with swatches first. Keep metallics consistent (all gold or all silver) to tie looks together.
Final Tips for Matching Bridesmaid Dresses to Wedding Colors
Order fabric swatches before buying dresses. Colors look different online than in person.
Choose 1–2 colors from your wedding palette for bridesmaid dresses. Keep color scheme simple and cohesive. Order all dresses from the same brand in the same dye lot. This ensures perfect color matching. Consider your venue type when choosing colors. Garden venues suit earth tones, ballrooms suit jewel tones.
Match dresses to your season. Spring uses pastels, fall uses rich jewel tones. Account for different skin tones in your bridal party. Navy, burgundy, and emerald flatter everyone. Test colors in your venue lighting. Natural light, indoor lighting, and flash affect colors differently.
Complement flowers, do not match exactly. Choose dresses 1–2 shades different for depth. Use ombre or mix-and-match for visual interest. Gradient creates modern, dynamic photos. Communicate with your photographer about colors. Share bridesmaid dress colors early for lighting planning.
Keep metallics consistent across accessories. All gold or all silver, not mixed. Trust fabric swatches over online photos. Computer screens vary and do not show true color.
How Do I Choose a Bridesmaid Dress for a Pregnant Bridesmaid?
Empire waist and A-line dresses with stretchy fabric work best for pregnant bridesmaids. Order 1–2 sizes up from pre-pregnancy size or use maternity sizing.
Chiffon and mesh fabrics stretch comfortably over a growing belly. Order dresses 2–3 months before the wedding to account for body changes.
Plan 2–3 fittings, with the final one 1–2 weeks before the wedding. Budget $40–$70 for alterations that accommodate the bump.
Best Maternity Bridesmaid Dress Styles: Quick Guide
| Style | Why It Works | Best Trimester | Fabric Choice | Price Range |
| Empire Waist | Sits above belly, room to grow | All trimesters | Chiffon, mesh | $85–$150 |
| A-Line | Skims bump, not clingy | 2nd & 3rd | Chiffon, tulle | $79–$145 |
| Wrap Style | Adjustable fit, ties at side | All trimesters | Jersey, stretch satin | $90–$155 |
| Maxi Dress | Full coverage, comfortable | 2nd & 3rd | Soft knit, mesh | $85–$140 |
| Stretchy Sheath | Form-fitting with give | 1st & early 2nd | Stretch mesh, jersey | $85–$150 |
This table shows the five most comfortable styles for pregnant bridesmaids. Each style adapts to body changes throughout pregnancy.
Why Empire Waist Is the Top Choice for Pregnant Bridesmaids
Empire waist dresses have a seam just under the bust line. The fabric flows freely from this high point over the belly.
Key Benefits:
- Does not constrict the growing belly
- Provides room for baby bump growth
- Comfortable for all-day wear
- Works at any stage of pregnancy
- Easy to alter after the wedding
- Looks elegant, not obviously maternity
- Allows easy movement and sitting
- No waistband pressure on stomach
Best Features for Maternity Empire Waist:
- Stretchy bodice panel for bust changes
- Soft, flowing skirt in chiffon or mesh
- Side zipper instead of back zipper
- Adjustable straps for bust support
- Extra length to account for belly
- Minimal gathering under bust
- Breathable, lightweight fabric
- Dark colors hide any concerns
Sizing Tips:
Order 1–2 sizes larger than pre-pregnancy size. Bust and belly both expand during pregnancy.
Use the sizing chart at your largest expected measurements. Measure at 6–8 weeks before the wedding for accuracy.
Maternity-Friendly Dress Styles by Trimester
Different stages of pregnancy need different dress considerations. Plan according to when the wedding happens.
First Trimester (Weeks 1–13)
Body Changes:
- Minimal belly growth
- Breast tenderness and swelling
- Bloating in midsection
- Energy levels vary
- Morning sickness possible
Best Dress Choices:
- Stretchy sheath with give in fabric
- Empire waist for early bump
- A-line with room in midsection
- Adjustable wrap styles
- Regular bridesmaid dresses one size up
Fabric Recommendations:
- Stretch mesh for comfort
- Jersey knit for softness
- Spandex blend for flexibility
- Avoid stiff satin or taffeta
- Choose breathable materials
Second Trimester (Weeks 14–27)
Body Changes:
- Visible baby bump appears
- Breasts continue growing
- Increased energy levels
- Better appetite returns
- Body shape changes quickly
Best Dress Choices:
- Empire waist with flowing skirt
- A-line with room for growth
- Wrap dress for adjustability
- Maxi dress for coverage
- Maternity-specific styles
Fabric Recommendations:
- Chiffon for airiness
- Soft tulle for volume
- Stretch satin for drape
- Mesh panels for flexibility
- Light, flowing materials
Third Trimester (Weeks 28–40)
Body Changes:
- Full baby bump size
- Swelling in feet and ankles
- Increased back discomfort
- Fatigue returns
- Frequent bathroom trips needed
Best Dress Choices:
- Full maternity empire waist
- Loose A-line with maximum room
- Maxi dress with stretch panels
- Wrap dress with adjustable tie
- Floor-length for swollen feet
Fabric Recommendations:
- Maximum stretch mesh
- Ultra-soft chiffon
- Jersey with spandex
- Breathable cotton blends
- Avoid heavy fabrics
Trimester-Based Sizing Guide
| Trimester | Size to Order | When to Order | Final Fitting | Alteration Focus |
| First | 1 size up | 3–4 months before | 2 weeks before | Bust and length |
| Second | 1–2 sizes up | 2–3 months before | 1–2 weeks before | Belly room, bust |
| Third | 2–3 sizes up | 2 months before | 1 week before | Hem, bust, comfort |
Order earlier than regular bridesmaids to account for body changes. Final fittings must happen close to the wedding date.
Five Steps to Choose a Maternity Bridesmaid Dress
Step 1: Determine wedding date and pregnancy stage
Calculate which trimester the bridesmaid will be in on the wedding day. Add 2–4 weeks to account for early or late delivery possibilities.
Early pregnancy (1st trimester) needs less accommodation. Late pregnancy (3rd trimester) needs maximum comfort and room.
Step 2: Choose maternity-friendly styles
Pick from these proven comfortable options:
Empire Waist:
- Best for all trimesters
- Most flattering option
- Hides belly size changes
- Comfortable all day
- Easy to alter
A-Line:
- Great for 2nd and 3rd trimester
- Skims over bump gently
- Not clingy or tight
- Classic, elegant look
- Works for any venue
Wrap Style:
- Adjusts as body changes
- Ties at side or back
- Flatters bust and belly
- Modern, stylish option
- Can be worn after pregnancy
Maxi Dress:
- Full coverage and comfort
- Hides swollen ankles
- Easy to move in
- Casual to formal options
- Breathable and cool
Step 3: Select stretchy, comfortable fabrics
Fabric choice matters more for pregnant bridesmaids than regular bridesmaids. Choose materials that give and breathe.
Best Maternity Fabrics:
Chiffon:
- Light and airy
- Flows over bump
- Does not cling
- Breathable in heat
- Easy to move in
Stretch Mesh:
- Has built-in give
- Adapts to body changes
- Comfortable all day
- Modern look
- Supports without constricting
Jersey Knit:
- Soft and stretchy
- Molds to body gently
- Very comfortable
- Machine washable
- Budget-friendly
Soft Tulle:
- Light and voluminous
- Does not add weight
- Romantic appearance
- Covers without tightness
- Photographs beautifully
Fabrics to Avoid:
- Stiff satin that does not stretch
- Heavy velvet that adds weight
- Tight bodycon styles
- Non-stretch lace
- Thick taffeta
Step 4: Order early with size flexibility
Timing is critical for maternity bridesmaid dresses. Bodies change quickly during pregnancy.
Ordering Timeline:
For 1st trimester weddings:
- Order 3–4 months before
- Standard 1 size up usually works
- Less alteration needed
- Body more predictable
For 2nd trimester weddings:
- Order 2–3 months before
- Go up 1–2 sizes
- Plan for growth
- More alterations likely
For 3rd trimester weddings:
- Order 2 months before
- Go up 2–3 sizes
- Maximum room needed
- Final fitting critical
Sizing Strategy:
Measure bust, under-bust, waist, and hips. Add 2–4 inches to current measurements for growth.
Use maternity sizing charts when available. Regular sizing may not account for belly and bust changes.
Step 5: Schedule strategic fittings
Pregnant bridesmaids need different fitting schedules. Bodies change between fittings.
First Fitting (4–6 weeks before wedding):
- Check overall fit and length
- Mark where alterations needed
- Confirm fabric stretches comfortably
- Test sitting and standing
- Bring maternity undergarments
Second Fitting (2–3 weeks before wedding):
- Try dress with all changes
- Check comfort level carefully
- Adjust for any new growth
- Test movement and breathing
- Confirm shoes and accessories
Final Fitting (1 week before wedding):
- Last chance for tweaks
- Check hem length with shoes
- Ensure zipper closes easily
- Test comfort while sitting
- Plan for emergency pins
Fabric Comparison for Maternity Bridesmaid Dresses
| Fabric | Stretch Level | Comfort | Best For | Avoid If | Cost |
| Chiffon | Low stretch | Very high | All trimesters | None | $79–$135 |
| Stretch Mesh | High stretch | Very high | 2nd & 3rd trimester | Prefer matte | $85–$150 |
| Jersey Knit | High stretch | Maximum | All trimesters | Formal venue | $70–$120 |
| Soft Tulle | Low stretch | High | 2nd & 3rd trimester | Casual venue | $80–$140 |
| Stretch Satin | Medium stretch | Medium | 1st & 2nd trimester | Late pregnancy | $90–$155 |
Stretch level determines how well the dress adapts to belly growth. Comfort affects how the bridesmaid feels all day.
Necklines That Work Best for Pregnant Bridesmaids
Bust size increases during pregnancy. Choose necklines that accommodate growth and provide support.
Best Maternity Necklines:
V-Neck:
- Elongates upper body
- Provides breathing room
- Flatters increased bust
- Does not feel constricting
- Works with all styles
Scoop Neck:
- Gentle, feminine look
- Comfortable on bust
- Not too revealing
- Easy to alter
- Classic choice
Sweetheart:
- Flatters bustline beautifully
- Provides good support
- Elegant and formal
- Photographs well
- Adjustable with cups
Wrap Neckline:
- Adjusts to bust changes
- Provides coverage control
- Very comfortable
- Modern and flattering
- Can adjust on wedding day
Halter:
- Good bust support
- Shows shoulders
- Takes pressure off shoulders
- Comfortable for long wear
- Best for early pregnancy
Necklines to Avoid:
| Neckline | Why Avoid | Better Alternative |
| High Neck | Restricts breathing | V-neck or scoop |
| Strapless | Needs bust support | Halter or straps |
| Bandeau | No support | Sweetheart with straps |
| Off-Shoulder | Limits arm movement | Cap sleeve or sleeveless |
| Cowl Neck | Adds fabric bulk | Simple scoop |
Support and comfort matter more than style for pregnant bridesmaids. Choose necklines that do not restrict or squeeze.
Sleeve Options for Maternity Comfort
Arm size can increase during pregnancy due to swelling. Choose sleeve styles that do not constrict.
Best Sleeve Choices:
Sleeveless:
- Keeps bridesmaid cool
- No constriction on arms
- Maximum comfort in heat
- Easy to move freely
- Can add wrap if needed
Cap Sleeves:
- Light coverage on shoulders
- Does not restrict arms
- Modest but comfortable
- Works for all trimesters
- Balances proportions
Three-Quarter Sleeves:
- Provides arm coverage
- Ends before wrist
- No tight elastic bands
- Elegant and modest
- Good for cool weather
Flutter Sleeves:
- Soft, loose fit
- Romantic appearance
- No pressure on arms
- Comfortable all day
- Hides upper arm swelling
Sleeves to Avoid:
- Tight long sleeves that constrict
- Short sleeves with tight bands
- Puffed sleeves that add bulk
- Bell sleeves that add weight
- Any sleeve with elastic at opening
Color Choices for Pregnant Bridesmaids
Color can affect how comfortable a pregnant bridesmaid feels in photos. Some shades are more forgiving than others.
Most Flattering Colors:
Dark Jewel Tones:
- Navy blue creates slimming effect
- Emerald green looks elegant
- Burgundy photographs beautifully
- Deep purple is sophisticated
- All hide any concerns
Soft Muted Tones:
- Dusty blue is universally flattering
- Sage green looks natural
- Mauve is gentle and feminine
- Champagne is neutral
- Blush pink is soft
Rich Earth Tones:
- Terracotta suits fall weddings
- Rust orange is warm
- Chocolate brown is grounding
- Olive green is natural
- All work for outdoor venues
Colors to Consider Carefully:
- Very pale colors may show everything
- Bright whites can be harsh
- Neon shades draw too much attention
- Horizontal stripes widen appearance
- Busy patterns overwhelm
Choose solid colors over patterns. Single colors create clean, unbroken lines that flatter any body shape.
Maternity Bridesmaid Dress Budget Guide
Maternity dresses may cost slightly more due to extra fabric and specialized sizing. Budget accordingly.
| Expense | Cost Range | When to Pay | Notes |
| Maternity dress | $85–$155 | At order | Higher than regular |
| Rush fee (if needed) | $20–$50 | At order | Avoid with early order |
| Alterations | $40–$70 | After first fitting | More than regular |
| Second alteration | $20–$40 | If needed | For late changes |
| Shoes (comfort) | $40–$80 | 1 month before | Low heels or flats |
| Support garments | $30–$60 | With dress order | Maternity shapewear |
| Accessories | $20–$50 | 2 weeks before | Keep minimal |
Total Budget: $235–$505
Maternity bridesmaid expenses run 20–30% higher than regular bridesmaid costs. The bride may offer to cover extra maternity costs.
Comfort Features Every Maternity Bridesmaid Dress Needs
Pregnant bridesmaids need specific features for all-day comfort. Check for these before ordering.
Essential Comfort Features:
Stretchy Panels:
- Allow belly to expand
- No pressure on stomach
- Fabric gives with movement
- Comfortable sitting and standing
- Critical for 2nd and 3rd trimester
Adjustable Straps:
- Accommodate bust growth
- Prevent shoulder pain
- Can tighten or loosen
- Provide proper support
- Easy to alter last minute
Side Zipper:
- Easier to reach than back zipper
- Does not pull on belly
- Pregnant women can zip alone
- Less alteration needed
- More comfortable fit
Breathable Fabric:
- Pregnancy increases body temperature
- Lightweight materials prevent overheating
- Natural fibers work best
- Avoid synthetic that traps heat
- Essential for summer weddings
Extra Length:
- Belly pulls dress up in front
- Order longer than usual
- Hem to ankle or floor
- Prevents awkward short front
- Easier to shorten than lengthen
Built-in Support:
- Maternity dresses need bust support
- Look for shelf bra or cups
- Prevents need for tight bra
- More comfortable all day
- Reduces shoulder strain
Stretch Waistband:
- Even empire waist needs give
- Elastic or stretchy fabric
- Adapts as body changes
- No constriction or tightness
- Comfortable for hours
Special Considerations for Third Trimester Bridesmaids
Third trimester brings unique challenges. Address these concerns when choosing dresses.
Physical Comfort Issues:
Swollen Feet and Ankles:
- Choose floor-length dresses
- Hide swelling completely
- Wear comfortable flat shoes
- Plan bathroom breaks every hour
- Keep feet elevated when sitting
Back Pain:
- Empire waist reduces back strain
- Avoid heavy dresses
- Provide cushioned seating
- Allow sitting during ceremony
- Offer supportive undergarments
Frequent Bathroom Needs:
- Choose dresses easy to lift
- Practice in fitting room
- Know bathroom locations
- Aisle seat during ceremony
- Extra time for personal needs
Limited Mobility:
- Avoid tight or restrictive styles
- No long train to trip on
- Easy to sit and stand
- Room to bend if needed
- Comfortable all-day length
Overheating:
- Lightweight breathable fabric
- Avoid long sleeves
- Provide fans or cooling
- Summer outdoor weddings risky
- Plan for shade and water
Emotional Considerations:
Many women feel self-conscious about their changing bodies. Choose dresses that make the bridesmaid feel beautiful, not uncomfortable.
Avoid overly clingy or revealing styles. Focus on elegant, flowing designs that celebrate the pregnancy without highlighting concerns.
How to Handle Last-Minute Size Changes
Bodies can change quickly in the final weeks. Have backup plans ready.
Emergency Alterations:
Keep the seamstress on call for the week before the wedding. Pay a rush fee if needed for last-minute changes.
Have safety pins and fashion tape available on the wedding day. These can adjust fit temporarily for photos.
Size-Up Strategy:
If uncertain between sizes, always order the larger size. Taking in a dress is easier and cheaper than letting it out.
Most dresses cannot be let out more than 1–2 inches. Ordering too small creates stress and potential crisis.
Backup Dress Option:
For very late pregnancy (38+ weeks), consider ordering two dresses. One in current size and one size larger.
Return the one that does not fit. This costs more upfront but prevents panic if sizing is wrong.
Accessories for Pregnant Bridesmaids
The right accessories improve comfort and appearance. Choose carefully for pregnancy needs.
Comfortable Shoes:
Best Choices:
- Low block heels (1–2 inches)
- Supportive wedges
- Cushioned ballet flats
- Peep-toe for swollen feet
- Wide toe box styles
Shoes to Avoid:
- Stiletto heels over 3 inches
- Narrow pointed toes
- Ankle straps that cut circulation
- Completely flat with no support
- New shoes that need breaking in
Supportive Undergarments:
Essential Items:
- Maternity support bra with wide straps
- Belly support band for back pain
- Seamless underwear that does not dig
- Shapewear designed for pregnancy
- Comfortable, breathable fabrics
Jewelry:
Keep jewelry minimal and lightweight. Heavy necklaces add weight and discomfort.
Choose:
- Simple stud earrings
- Delicate bracelet
- Small pendant on short chain
- Nothing tight or constricting
- Easy to remove if needed
Wraps and Shawls:
Pregnancy affects body temperature regulation. Have layering options ready.
Choose:
- Light pashmina for air conditioning
- Soft cardigan for photos
- Match dress color
- Easy to add or remove
- Does not wrinkle
Frequently Asked Questions
What is the best bridesmaid dress style for a pregnant woman?
Empire waist is the best style for pregnant bridesmaids. The seam sits just under the bust and fabric flows over the belly without constriction.
A-line and wrap styles also work well. Choose chiffon or mesh fabric that stretches and breathes comfortably.
How many sizes up should a pregnant bridesmaid order?
Order 1–2 sizes up for first and second trimester. Order 2–3 sizes up for third trimester.
Measure bust, under-bust, and belly at 6–8 weeks before the wedding. Use these measurements for sizing, not pre-pregnancy size.
When should a pregnant bridesmaid order her dress?
Order 2–3 months before the wedding for maternity dresses. This allows time for delivery and multiple fittings.
Bodies change quickly during pregnancy. Ordering too early means the dress may not fit on wedding day.
Can a pregnant bridesmaid wear the same dress as other bridesmaids?
Yes, if the style is maternity-friendly. Empire waist, A-line, and wrap styles work for both pregnant and non-pregnant bridesmaids.
Order the pregnant bridesmaid's dress in a larger size or in maternity sizing. Same color and style creates a unified look.
What fabrics are most comfortable for maternity bridesmaid dresses?
Chiffon, stretch mesh, and jersey knit are most comfortable. These fabrics have give and breathe well.
Avoid stiff satin, heavy velvet, and non-stretch lace. Pregnant bridesmaids need fabrics that adapt to their changing bodies.
How much do alterations cost for maternity bridesmaid dresses?
Maternity alterations cost $40–$70 on average. This is higher than regular alterations due to specialized fitting needs.
Most alterations focus on hem length, bust fit, and adding belly room. Final fittings should happen 1–2 weeks before the wedding.
Final Tips for Maternity Bridesmaid Dresses
Choose empire waist or A-line styles in stretchy, comfortable fabric. Order 1–3 sizes up depending on trimester. Start shopping 3–4 months before the wedding. Order dresses 2–3 months before the event.
Schedule 2–3 fittings with the final one close to the wedding date. Bodies change quickly in late pregnancy. Pick chiffon, mesh, or jersey fabric that stretches and breathes. Avoid stiff, heavy materials.
Select V-neck or scoop necklines that accommodate bust growth. Ensure adequate support throughout the day. Choose floor-length or ankle-length hems to hide swollen feet. Provide comfortable low heels or flats.
Budget $85–$155 for the dress and $40–$70 for alterations. Maternity dresses cost slightly more than regular styles. Consider the bridesmaid's comfort above all else. Pregnancy is challenging enough without an uncomfortable dress.
Plan for bathroom breaks, seating during ceremony, and temperature control. Small accommodations make a big difference. Celebrate the bridesmaid's pregnancy as part of your special day. Choose styles that make her feel beautiful and included.
What Is the Best Bridesmaid Dress Style for Petite Bridesmaids?
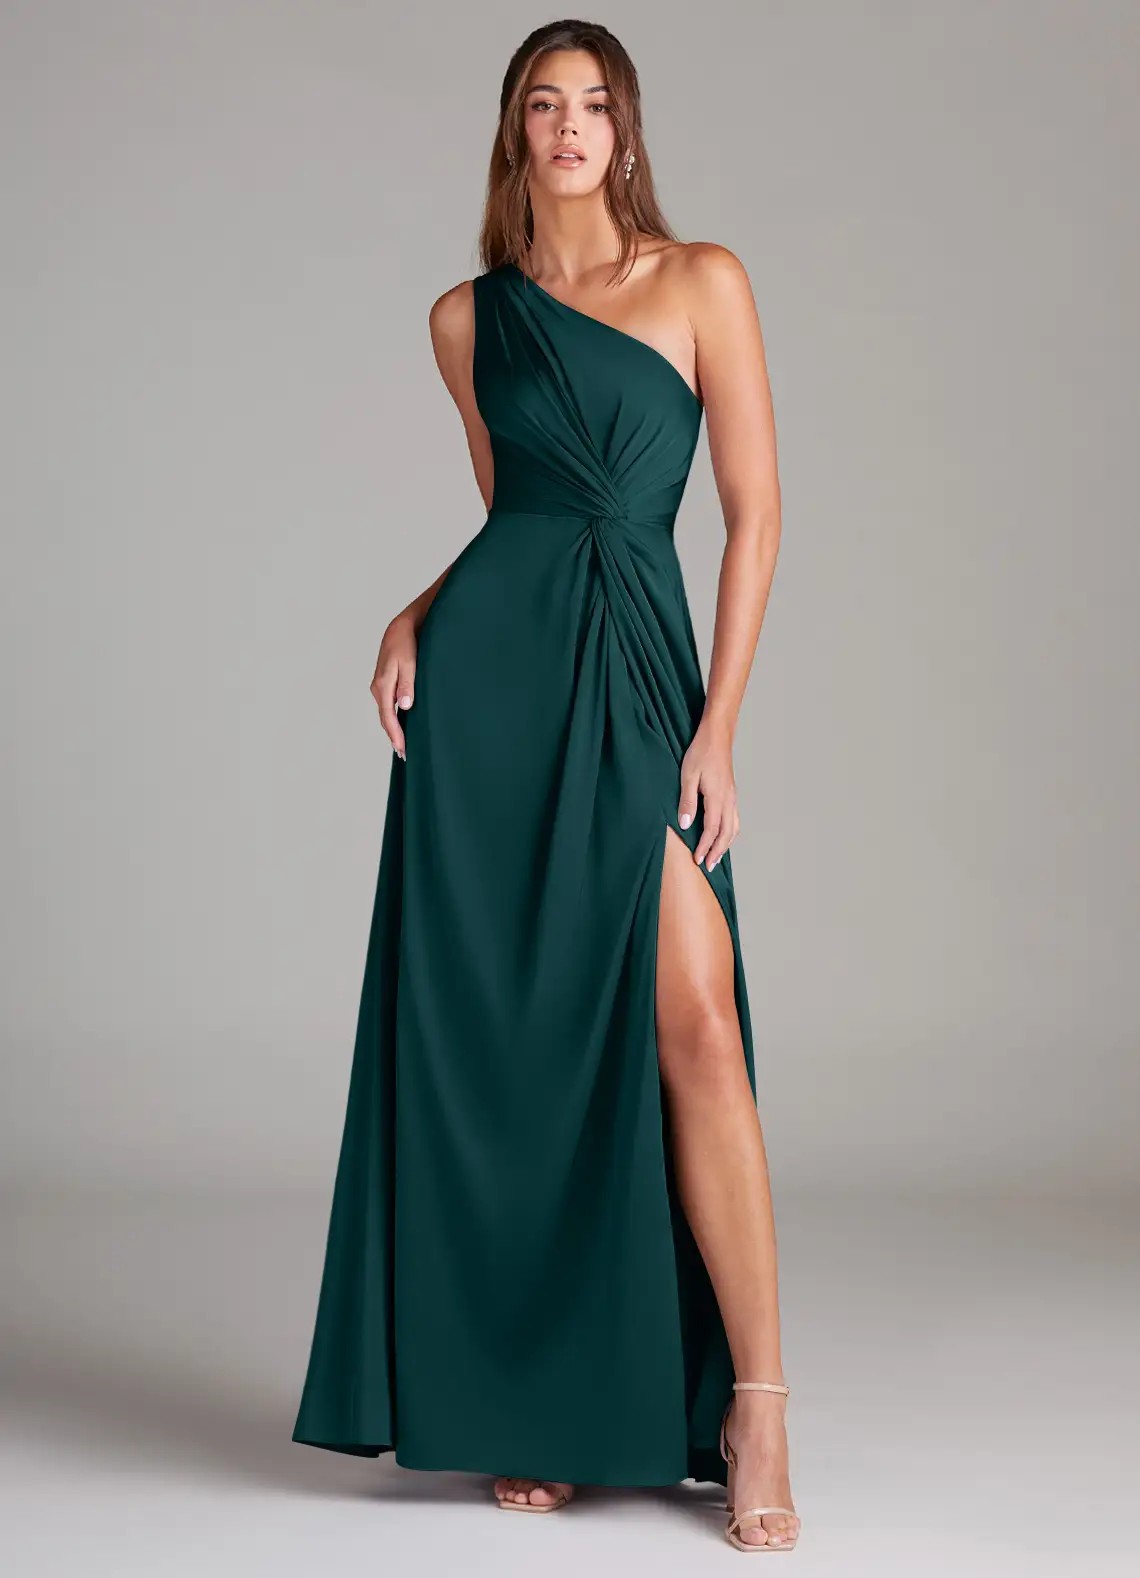
Empire waist and A-line dresses work best for petite bridesmaids under 5'4". These styles lengthen the body and create vertical lines.
Knee-length or tea-length hems prevent fabric from overwhelming small frames. Avoid heavy fabrics like velvet that add bulk.
Plan 2–3 fittings with hem adjustments costing $30–$50. Order petite sizes when available to reduce alteration needs.
Best Dress Styles for Petite Bridesmaids: Quick Guide
| Style | Why It Works | Avoid | Best Length | Price Range |
| Empire Waist | Raises waistline, adds height | Drop waist styles | Above ankle | $79–$140 |
| A-Line | Skims body, creates long line | Ball gown volume | Knee to ankle | $79–$135 |
| Sheath | Streamlined, no extra fabric | Heavy embellishments | Just below knee | $85–$145 |
| V-Neck | Lengthens torso visually | High necklines | Any length | $79–$150 |
| Sleeveless | Shows arms, adds height | Cap sleeves | Any length | $79–$140 |
Why Empire Waist Dresses Flatter Petite Figures
Empire waist dresses have a seam just under the bust. This raises the natural waistline and makes legs look longer.
Key Benefits:
- Creates the illusion of added height
- Does not cut the body in half at the waist
- Allows the skirt to flow from the highest point
- Works for all petite body types
- Easy to alter for perfect hem length
Best Empire Waist Features for Petite:
- Thin fabric like chiffon or mesh
- Minimal gathering under the bust
- Straight or slight A-line skirt
- No heavy beading that adds weight
- Hem hits just above the ankle bone
Colors That Work:
- Single solid colors create unbroken lines
- Vertical color blocking adds height
- Avoid horizontal stripes or patterns
- Monochrome looks lengthen the body
- Dark colors slim and elongate
Empire waist dresses cost $79–$140 at Azazie. Order 3–4 months before the wedding for custom sizing.
A-Line Dresses: The Universal Petite-Friendly Style
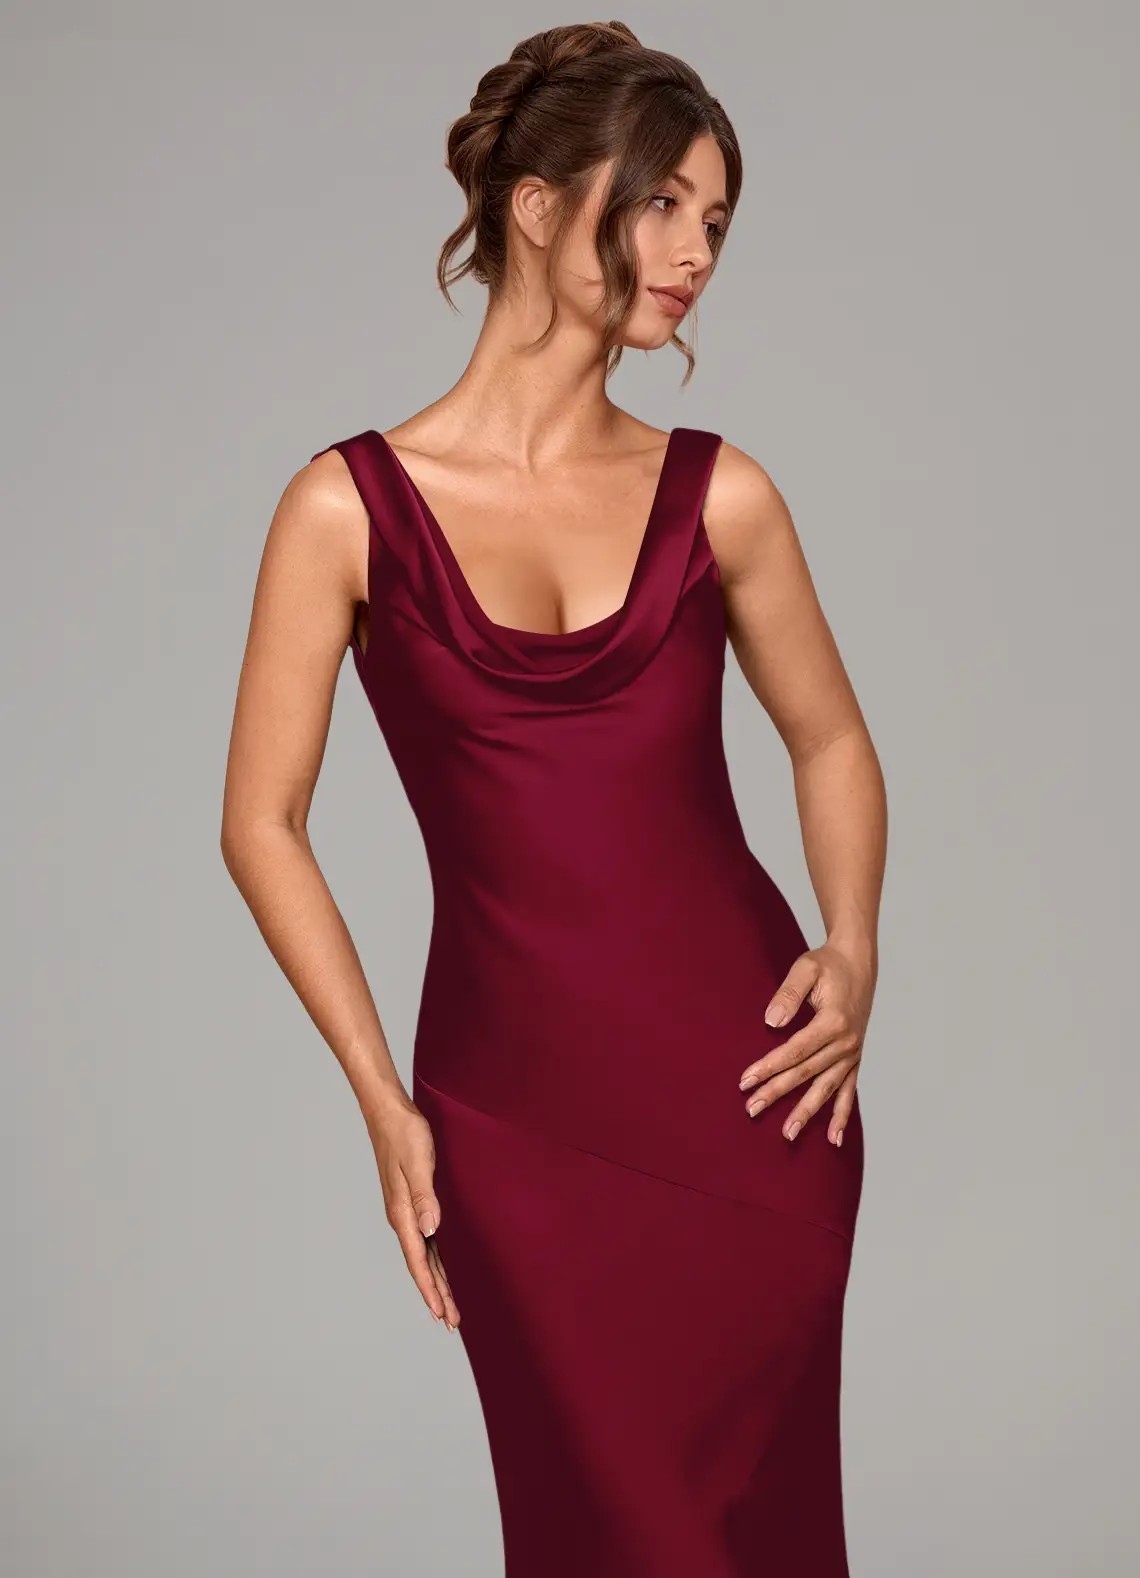
A-line dresses fit at the bodice and gradually widen toward the hem. This creates a balanced silhouette without overwhelming petite frames.
Why A-Line Works:
- Skims the body gently
- Does not add volume at the hips
- Creates a long, unbroken line
- Flatters all body types
- Easy to move and dance in
Best A-Line Features:
- Fitted bodice with defined waist
- Gentle flare from waist to hem
- Light fabrics like chiffon or tulle
- Minimal pleating or gathering
- Clean, simple lines
Hem Length Guide:
| Height | Best Hem Length | Inches from Floor | Alteration Cost |
| 4'10"–5'0" | Tea-length | 4–6 inches | $30–$40 |
| 5'0"–5'2" | Below knee | 2–4 inches | $35–$45 |
| 5'2"–5'4" | Ankle-length | 1–2 inches | $40–$50 |
| 5'4"+ | Floor-length | 0–1 inch | $40–$50 |
Hem length affects how tall you look. Too long creates bunching and looks sloppy.
Too short can look unbalanced. Aim for the ankle bone or just below the knee.
Five Steps to Find the Perfect Petite Bridesmaid Dress
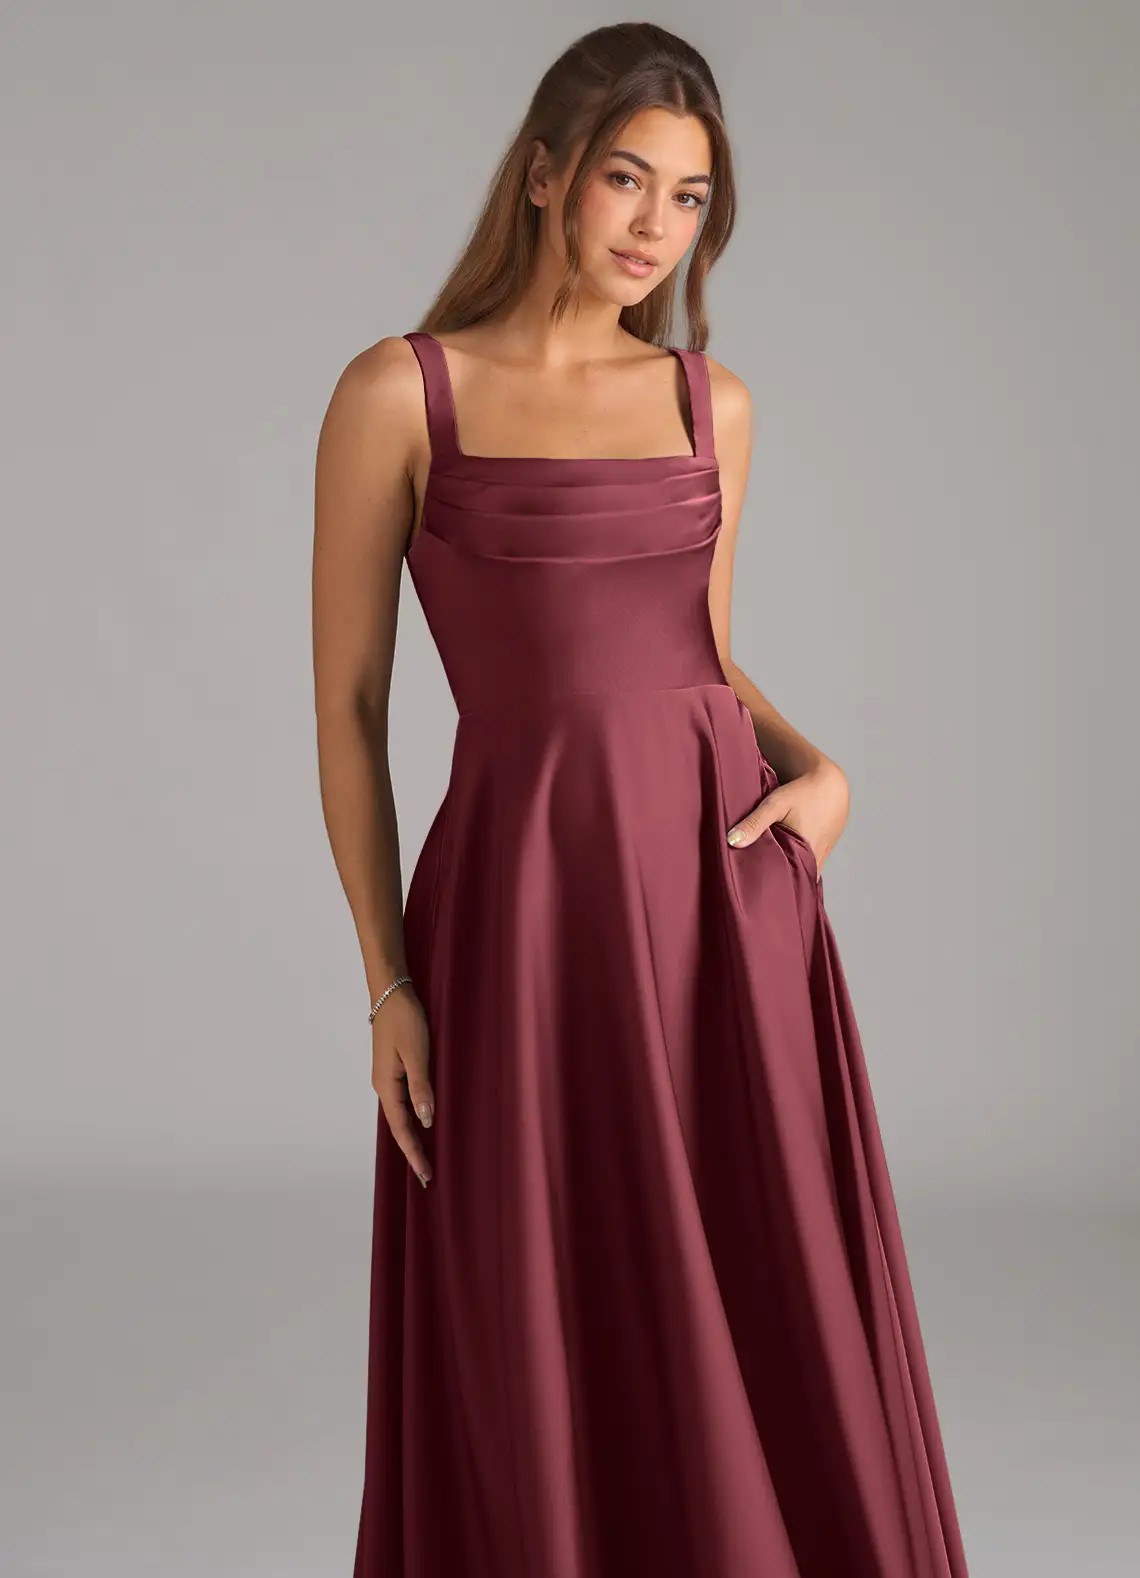
Step 1: Measure accurately and check petite sizing
Take bust, waist, and hip measurements while wearing the undergarments you will use on wedding day. Measure from shoulder to hem to find your ideal dress length.
Check if the brand offers petite sizes. Petite sizing accounts for shorter torsos and arms, reducing alteration needs.
Step 2: Choose styles that create vertical lines
Look for these height-adding features:
- V-neck or scoop necklines
- Vertical seams or panels
- Single-color designs
- Sleeveless or thin straps
- Empire or natural waistlines
Avoid these height-cutting features:
- High necklines that shorten the torso
- Horizontal stripes or color blocks
- Drop waists that lower the waistline
- Cap sleeves that cut across arms
- Heavy embellishments that add bulk
Step 3: Pick the right fabric weight
Light fabrics work best for petite bodies. Heavy fabrics overwhelm small frames and add visual weight.
Best Fabrics:
- Chiffon: Light, flows easily
- Mesh: Stretchy, breathable
- Tulle: Airy, adds softness
- Stretch satin: Smooth, not stiff
- Organza: Crisp, lightweight
Fabrics to Avoid:
- Velvet: Too heavy for petite
- Thick satin: Adds bulk
- Heavy lace: Overwhelms frame
- Brocade: Stiff, adds volume
- Taffeta: Too structured
Step 4: Select the correct hem length
Hem length makes the biggest difference for petite bridesmaids. Follow this guide:
For casual or outdoor weddings:
- Knee-length shows legs and adds height
- Tea-length hits mid-calf, still shows ankle
- Both lengths prevent tripping on fabric
For formal or indoor weddings:
- Ankle-length grazes the ankle bone
- Floor-length touches the floor with heels on
- Avoid pudding fabric on the ground
Step 5: Plan fittings and alterations
Schedule your first fitting 2–3 weeks after the dress arrives. Bring your wedding shoes and undergarments.
The tailor will pin the hem and check the bodice fit. Most petite alterations focus on shortening the hem and straps.
Schedule a second fitting 1–2 weeks later to check completed alterations. Make final tweaks if needed.
Budget $30–$60 for petite alterations depending on complexity.
Necklines That Lengthen Petite Frames
The right neckline adds inches to your appearance. The wrong one makes you look shorter.
Best Necklines for Petite:
V-Neck:
- Creates a long vertical line
- Draws the eye up and down
- Lengthens the neck and torso
- Works for all bust sizes
- Most universally flattering
Scoop Neck:
- Opens up the chest area
- Shows more skin for height
- Softens angular features
- Less dramatic than V-neck
- Good for smaller busts
Sweetheart:
- Flatters the bust area
- Creates a feminine shape
- Opens up the neckline
- Works for most body types
- Adds elegance without bulk
Halter:
- Draws eyes upward
- Shows shoulders and arms
- Creates long vertical lines
- Best for small to medium busts
- Modern and sleek
Necklines to Avoid:
| Neckline | Why to Avoid | Better Alternative |
| High Neck | Shortens torso | V-neck or scoop |
| Jewel Neck | Cuts across collarbone | Scoop or sweetheart |
| Boat Neck | Creates horizontal line | V-neck or halter |
| Cowl Neck | Adds fabric bulk | Simple scoop |
| Off-Shoulder | Shortens neck | Strapless or halter |
Necklines that show more skin create the illusion of height. Covered necklines make petite bridesmaids look shorter.
Sleeve Styles for Petite Bridesmaids

Sleeves affect how tall and balanced you look. Choose styles that do not cut across your arms.
Best Sleeve Options:
Sleeveless:
- Shows arms completely
- Creates clean vertical lines
- No fabric to add bulk
- Works year-round with wraps
- Most height-friendly option
Thin Spaghetti Straps:
- Minimal fabric on shoulders
- Draws eyes upward
- Delicate and feminine
- Easy to adjust length
- Works for all seasons
Three-Quarter Sleeves:
- Ends before wrist
- Does not shorten arms
- Provides some coverage
- Good for cool weather
- Elegant and modest
Sleeves to Avoid:
Cap Sleeves:
- Cut across the widest part of arms
- Create horizontal line at shoulders
- Make arms look shorter
- Add bulk to upper body
- Rarely flattering on petite
Short Sleeves:
- End at awkward mid-bicep point
- Cut the arm in half visually
- Create unflattering proportion
- Add width to shoulders
- Better to go sleeveless
Long Sleeves:
- Can overwhelm petite frames
- Add extra fabric bulk
- Make arms look shorter if not fitted
- Only work if very slim fitting
- Difficult to alter properly
Colors and Patterns for Petite Bridesmaids
Color choice affects how tall you appear. Follow these guidelines for the most flattering look.
Best Color Strategies:
Solid Single Colors:
- Create one unbroken vertical line
- Make the body look longer
- Easy to coordinate with other bridesmaids
- Work for any wedding theme
- Most universally flattering
Monochrome Looks:
- Same color in different shades
- Still creates vertical line
- Adds subtle interest
- Maintains lengthening effect
- Modern and sophisticated
Vertical Color Blocking:
- Dark panels on sides
- Lighter center panel
- Creates long vertical lines
- Slims and lengthens
- Works for all body types
Patterns to Avoid:
| Pattern Type | Why It Does Not Work | Better Choice |
| Horizontal Stripes | Cuts body in half | Vertical stripes |
| Large Prints | Overwhelms small frame | Small prints or solid |
| Color Blocking | Breaks up vertical line | Single color |
| Busy Patterns | Too much visual noise | Simple, clean designs |
| Border Prints | Adds horizontal line at hem | Solid hem |
Dark colors like navy, burgundy, and emerald create a slimming effect. Light colors like blush, champagne, and dusty blue work if the style is simple and streamlined.
How to Avoid Common Petite Bridesmaid Dress Mistakes
Many petite bridesmaids make the same mistakes. Avoid these to look your best.
Mistake 1: Ordering regular sizes instead of petite
Regular sizes have longer torsos and arms. This creates excess fabric that bunches and bags.
Petite sizes are proportioned for shorter bodies. They reduce alteration costs and fit better overall.
Mistake 2: Choosing floor-length when ankle-length works better
Floor-length dresses often puddle on the ground for petite bridesmaids. This creates a sloppy look and tripping hazard.
Ankle-length dresses show your shoes and create a cleaner line. They look intentional, not ill-fitting.
Mistake 3: Picking heavy fabrics
Velvet, thick satin, and brocade add visual weight. They make petite frames look overwhelmed by fabric.
Choose chiffon, mesh, or tulle instead. Light fabrics drape without adding bulk.
Mistake 4: Wearing high necklines
High necklines cut off the neck and make torsos look shorter. This reduces overall height.
V-necks, scoop necks, and sweetheart necklines open up the chest. They create longer vertical lines.
Mistake 5: Skipping multiple fittings
One fitting is not enough for petite bridesmaids. Hem length and proportion need careful adjustment.
Plan 2–3 fittings to get the perfect fit. This prevents last-minute panic before the wedding.
Petite Bridesmaid Dress Shopping Timeline
| Task | When to Complete | Time Needed | Cost Estimate |
| Take measurements | 4–5 months before | 30 minutes | Free |
| Order dress | 3–4 months before | 1–2 hours | $79–$145 |
| Receive dress | 6–8 weeks after order | Delivery time | Included |
| First fitting | 2–3 weeks after delivery | 45 minutes | Included |
| Alterations completed | 1–2 weeks after first fitting | Varies | $30–$60 |
| Second fitting | 1 week after alterations | 30 minutes | Included |
| Final pickup | 1–2 weeks before wedding | 15 minutes | Free |
| Steam and prep | 1–2 days before wedding | 20 minutes | $10–20 |
Start early to avoid rush fees. Petite alterations take the same time as regular alterations but need more precision.
Order 3–4 months before the wedding. Made-to-order dresses take 6–8 weeks to arrive.
Accessories That Add Height for Petite Bridesmaids
The right accessories enhance your height. The wrong ones make you look shorter.
Height-Adding Accessories:
Shoes:
- Nude heels in 3–4 inch height
- Pointed-toe pumps that lengthen legs
- Ankle straps in skin tone
- Platform heels for hidden height
- Avoid chunky or block heels
Jewelry:
- Long pendant necklaces that hang low
- Drop earrings that draw eyes down
- Avoid chokers that shorten neck
- Delicate pieces that do not overwhelm
- Vertical designs over horizontal
Hair:
- Updos that add height at crown
- High ponytails or buns
- Avoid styles that sit low on neck
- Sleek looks over voluminous
- Show neck and shoulders
Wraps and Shawls:
- Thin pashminas, not bulky shawls
- Drape vertically over shoulders
- Match dress color for long line
- Avoid heavy furs or thick knits
- Only when needed for warmth
Frequently Asked Questions
What dress length is best for petite bridesmaids under 5'2"?
Knee-length or tea-length works best for petite bridesmaids under 5'2". These lengths show your legs and prevent fabric from overwhelming your frame.
Ankle-length can work if hemmed precisely to graze the ankle bone. Avoid floor-length unless perfectly tailored with heels.
Should petite bridesmaids avoid long bridesmaid dresses?
No, but choose ankle-length over floor-length. Ankle-length grazes the ankle bone and shows shoes, creating a cleaner line.
Floor-length can work if hemmed perfectly with your wedding shoes. Budget extra for precise alterations to prevent fabric puddling.
Do empire waist dresses make petite bridesmaids look taller?
Yes, empire waist dresses raise the waistline to just under the bust. This makes legs look longer and adds the illusion of height.
Choose empire styles with light, flowing skirts. Avoid empire dresses with heavy gathering or thick fabrics that add bulk.
Can petite bridesmaids wear A-line dresses?
Yes, A-line is one of the best styles for petite figures. It fits the bodice and gently widens toward the hem without adding bulk.
Choose A-line dresses in light fabrics. Avoid ball gown styles with too much volume that overwhelm small frames.
What colors are most flattering for petite bridesmaids?
Solid single colors work best because they create one unbroken vertical line. Dark colors like navy, burgundy, and emerald create a slimming effect.
Light colors like blush and champagne work if the dress style is simple. Avoid horizontal stripes and busy patterns that break up your line.
How much do alterations cost for petite bridesmaid dresses?
Petite alterations cost $30–$60 on average. Most alterations focus on hemming the dress and shortening straps.
Simple hems cost $30–$40. More complex alterations like taking in the bodice cost $50–$60. Always get a quote before starting.
Final Tips for Petite Bridesmaids
Choose empire waist or A-line dresses in light fabrics. These styles create long vertical lines without adding bulk. Pick knee-length, tea-length, or ankle-length hems. Avoid floor-length unless perfectly tailored.
Order petite sizes when available. This reduces alteration time and costs. Select V-neck or scoop necklines. These open up the chest and lengthen the torso. Go sleeveless or use thin straps. Avoid cap sleeves that cut across arms.
Choose solid colors over patterns. Single colors create unbroken vertical lines.Plan 2–3 fittings for perfect hem length. Budget $30–$60 for alterations. Wear nude heels in 3–4 inch height. Pointed toes lengthen legs.
Start shopping 4–5 months before the wedding. Order dresses 3–4 months out. Test fabrics with swatches before ordering. Feel the weight and drape in person. Your height does not limit your style options. With the right choices, petite bridesmaids look just as stunning as any other bridesmaid.
What Is the Difference Between Chiffon and Satin Bridesmaid Dresses?
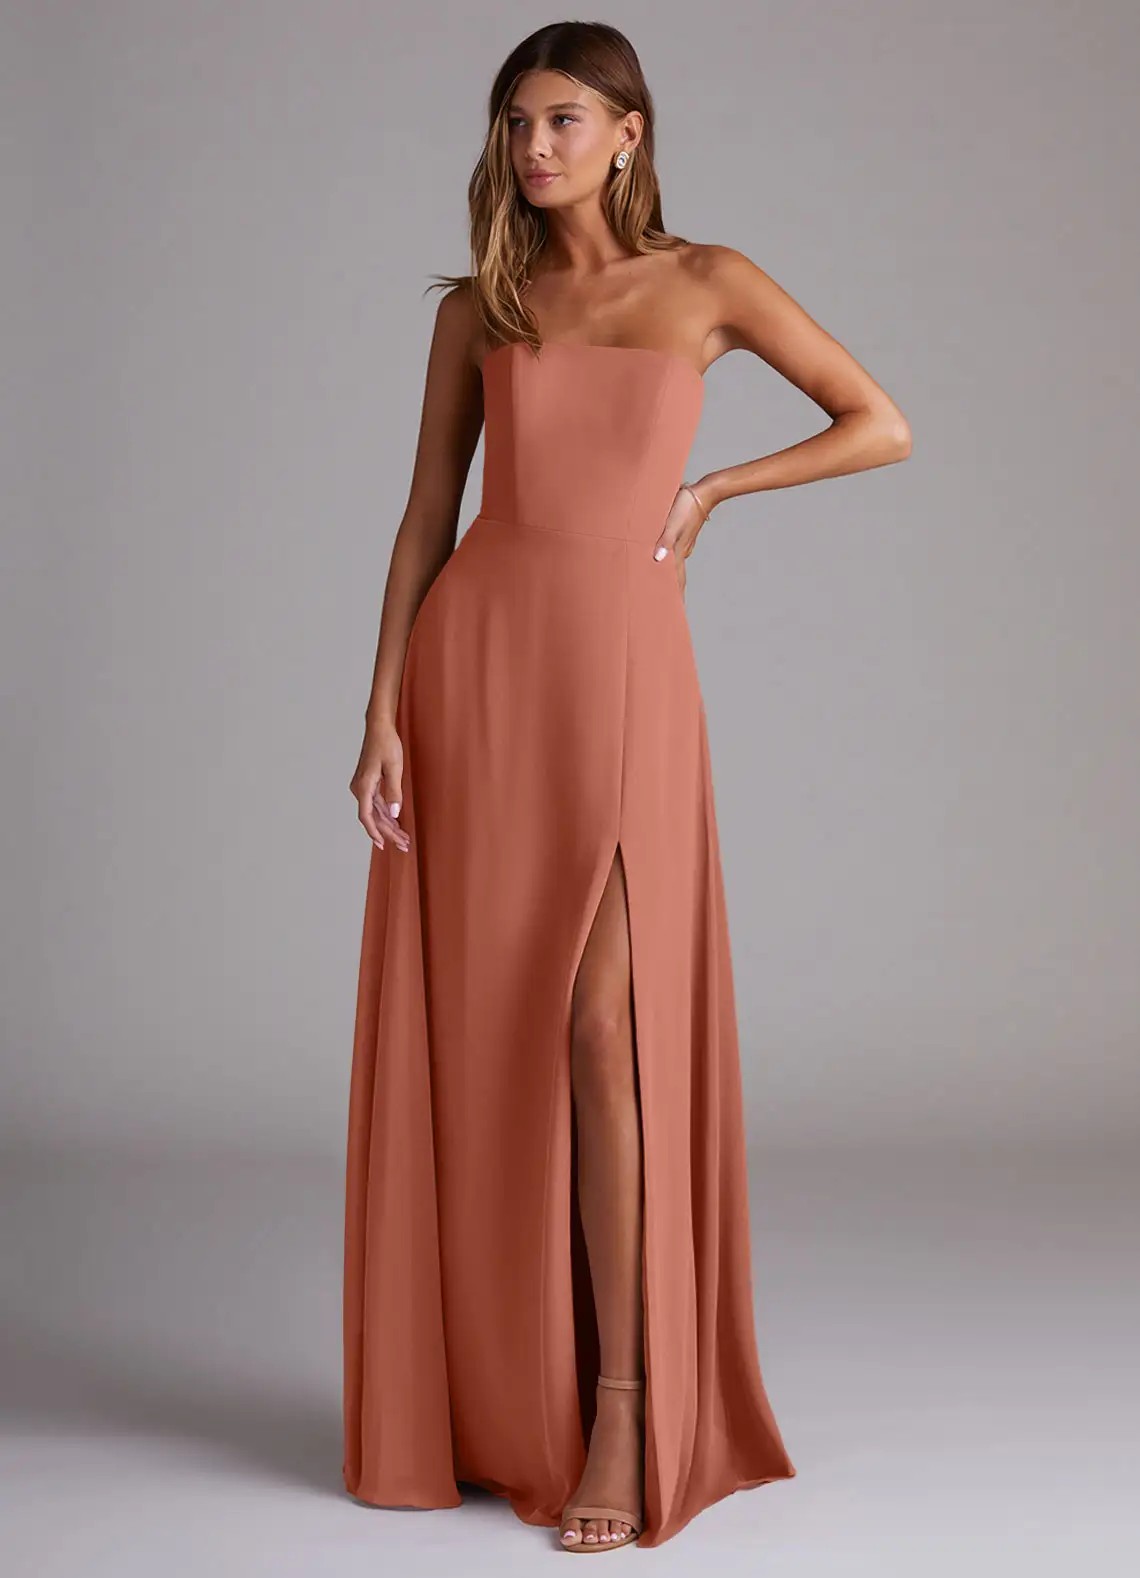
Chiffon is light, airy, and flows easily, making it perfect for outdoor and summer weddings. Satin is smooth, structured, and has a subtle shine, ideal for formal indoor events. Chiffon costs $79–$135 and suits casual to semi-formal styles.
Satin costs $85–$150 and works best for elegant, polished looks. Chiffon flatters all body types with its drape. Satin shows body shape more closely.
Chiffon vs Satin: Quick Comparison Table
| Feature | Chiffon | Satin | Best For |
| Weight | Very light | Medium | Chiffon: summer; Satin: winter |
| Texture | Soft, sheer | Smooth, sleek | Chiffon: casual; Satin: formal |
| Shine | Matte finish | Subtle sheen | Chiffon: day; Satin: evening |
| Drape | Flows freely | Structured drape | Chiffon: movement; Satin: shape |
| Price | $79–$135 | $85–$150 | Both budget-friendly |
| Care | Hand wash or dry clean | Dry clean only | Chiffon: easier |
Chiffon suits relaxed, breezy styles. Satin fits polished, formal settings. Both fabrics come in all bridesmaid dress colors and silhouettes.
What Is Chiffon and When Should You Use It?
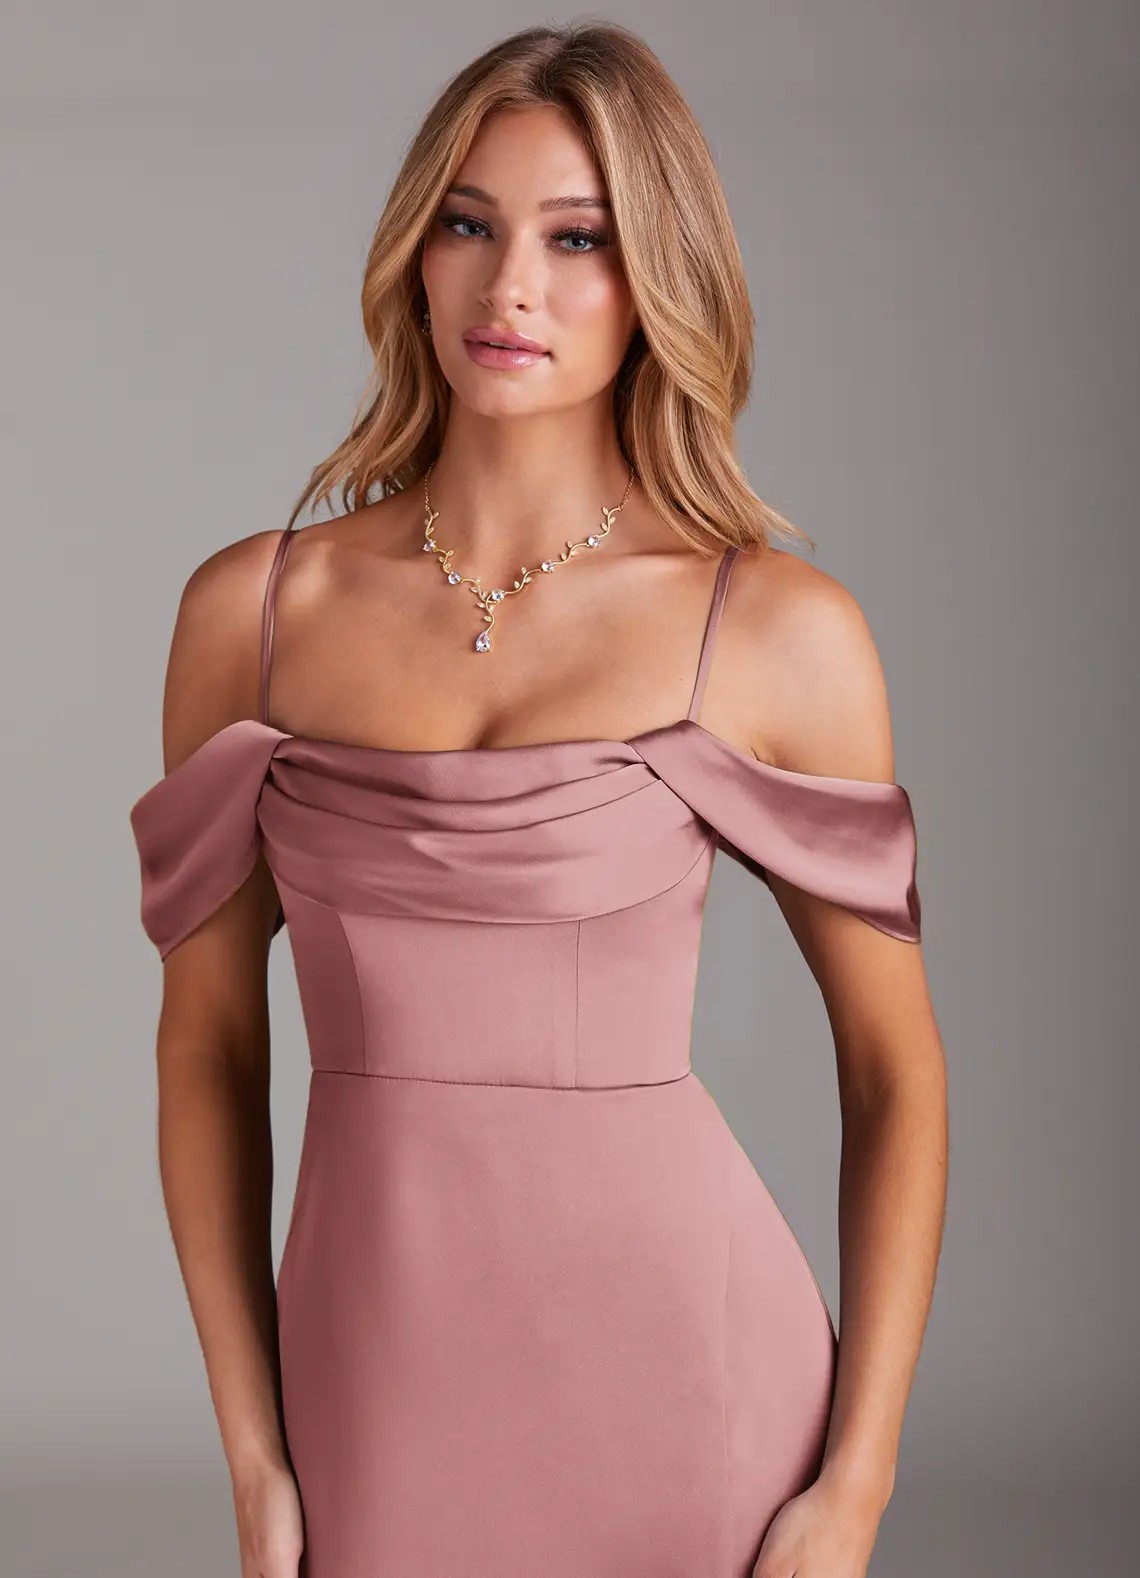
Chiffon is a lightweight, sheer fabric made from silk, polyester, or nylon. It has a soft texture and flows easily. Chiffon dresses move gracefully and photograph well in outdoor settings.
Best Uses for Chiffon
- Spring and summer weddings when temperatures are warm
- Outdoor venues like gardens, beaches, or vineyards
- Casual or semi-formal wedding styles
- All-day events where comfort matters
- Bridesmaids of all body types because it skims the body gently
Chiffon Pros Chiffon is breathable and keeps bridesmaids cool. It hides problem areas with its soft drape. This fabric is easy to move in during dancing and photos. Chiffon dresses pack well without heavy wrinkles. Alterations are simple and cost less.
Chiffon Cons Chiffon is sheer, so it may need a lining. It can snag on jewelry or rough surfaces. This fabric shows wrinkles after sitting. Chiffon needs gentle care with hand washing or dry cleaning. It may look too casual for black-tie weddings.
What Is Satin and When Should You Use It?
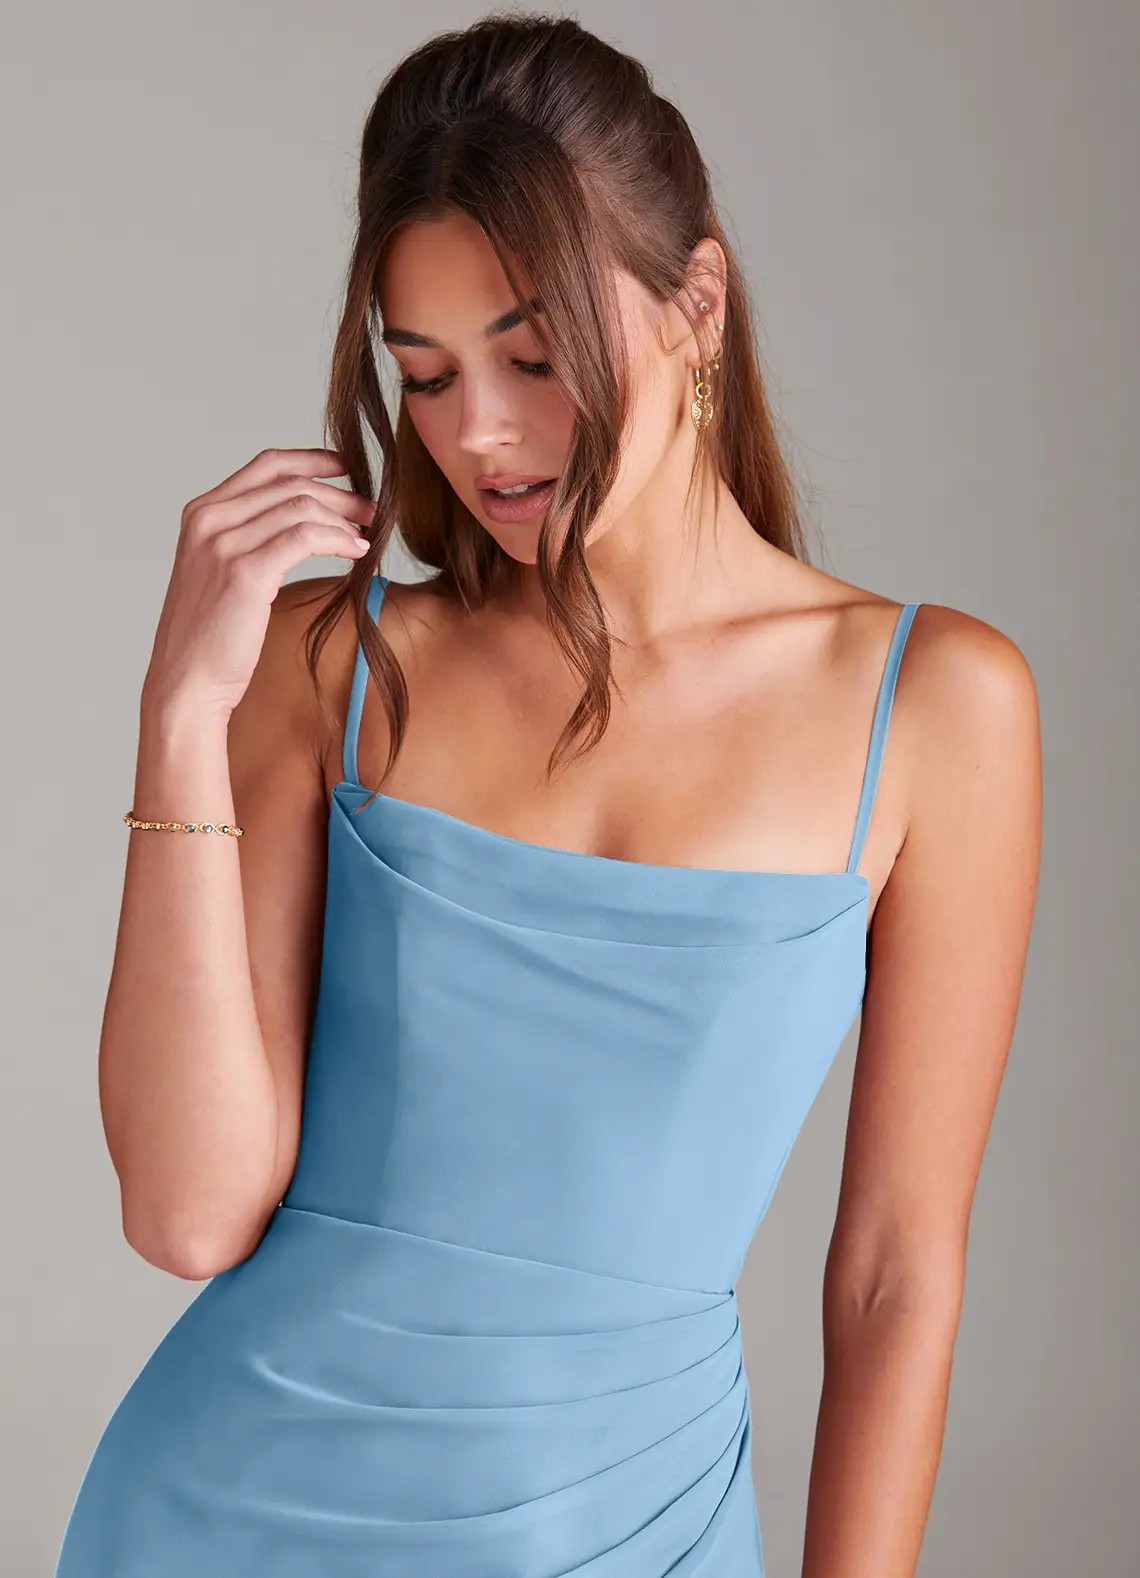
Satin is a smooth, glossy fabric made from silk, polyester, or acetate. It has a luxurious feel and reflects light with a subtle shine. Satin dresses look polished and elegant in formal settings.
Best Uses for Satin
- Fall and winter weddings when temperatures are cool
- Indoor venues like ballrooms, hotels, or churches
- Formal or black-tie wedding styles
- Evening events with elegant lighting
- Bridesmaids who want a structured, sophisticated look
Satin Pros Satin has a rich, luxurious appearance. It holds its shape well throughout the day. This fabric photographs beautifully with its soft shine. Satin works for both classic and modern dress styles. It feels smooth and comfortable against skin.
Satin Cons Satin shows every wrinkle and crease easily. It clings to the body and reveals curves. This fabric is heavier than chiffon and less breathable. Satin requires dry cleaning only. It may feel too warm for summer outdoor weddings.
Five Steps to Choose Between Chiffon and Satin
- Check your wedding season and venue – Warm weather and outdoor spaces suit chiffon. Cool weather and indoor venues suit satin. If your wedding is in June at a garden, pick chiffon. If it is in November at a hotel, pick satin.
- Consider your formality level – Casual and semi-formal weddings work with chiffon. Formal and black-tie events call for satin. Match the fabric to your overall wedding style and dress code.
- Think about body types – Chiffon flows over the body and flatters all shapes. Satin hugs curves and shows more shape. If your bridesmaids prefer a forgiving fit, choose chiffon. If they want structure, choose satin.
- Test the fabric in person – Order fabric swatches before buying. Feel the weight and texture. Hold them in natural light to see how they photograph. This step prevents surprises after ordering.
- Factor in care and budget – Chiffon costs slightly less and is easier to care for. Satin costs more and needs dry cleaning. Add these costs to your total budget when deciding.
How Do Chiffon and Satin Look in Wedding Photos?

Both fabrics photograph well but create different effects.
Chiffon in Photos Chiffon moves beautifully in the wind. It creates soft, romantic images in natural light. This fabric works well for outdoor ceremony and reception photos. Chiffon layers look elegant when bridesmaids walk or spin. The matte finish does not reflect harsh light.
Satin in Photos Satin has a subtle shine that catches light. It creates polished, formal images in indoor settings. This fabric looks rich in evening photos with artificial lighting. Satin holds its shape, so silhouettes stay clean and defined. The sheen adds depth to colors.
Lighting Considerations Outdoor natural light suits chiffon best. Indoor and evening light suits satin best. If you plan photos in both settings, consider mixing fabrics. Some brides choose chiffon for ceremony and satin for reception photos.
Which Fabric Is Better for Different Body Types?
Both fabrics work for all body types, but each has specific benefits.
Chiffon for Body Types
- Petite figures: Chiffon does not add bulk. It creates a light, airy look without overwhelming small frames.
- Plus-size figures: Chiffon skims curves without clinging. It provides a forgiving drape that flatters naturally.
- Athletic builds: Chiffon softens angular lines and adds feminine flow to straight silhouettes.
- Pear shapes: Chiffon balances proportions by flowing over hips without emphasis.
Satin for Body Types
- Hourglass figures: Satin defines the waist and highlights curves elegantly.
- Tall figures: Satin adds structure and sophistication. It holds shape on long frames.
- Slim builds: Satin creates a sleek, polished line without extra volume.
- Apple shapes: Choose stretch satin for comfort. Avoid stiff satin that clings.
Chiffon vs Satin: Cost and Care Comparison
| Factor | Chiffon | Satin | Notes |
| Dress price | $79–$135 | $85–$150 | Both affordable |
| Alteration cost | $30–$60 | $40–$80 | Chiffon is easier |
| Cleaning | Hand wash or dry clean | Dry clean only | Chiffon saves money |
| Wrinkle care | Steamer works | Iron on low heat | Both need care |
| Durability | Snags easily | More durable | Satin lasts longer |
| Storage | Hang or fold | Hang only | Satin needs space |
Chiffon saves money on alterations and cleaning. Satin costs more but lasts longer. Factor in these costs when choosing fabric for multiple bridesmaids.
Can You Mix Chiffon and Satin in One Wedding?
Yes, mixing fabrics can work if done carefully.
When Mixing Works
- Keep the same color across both fabrics
- Use chiffon for outdoor ceremony, satin for indoor reception
- Let bridesmaids choose fabric based on their comfort
- Mix textures in a boho or eclectic wedding theme
How to Mix Successfully Choose one dominant fabric and one accent fabric. For example, four bridesmaids in chiffon and two in satin. Keep silhouettes similar across fabrics. An A-line chiffon dress should match an A-line satin dress in cut.
When Mixing Does Not Work Avoid mixing fabrics in formal, traditional weddings. The contrast may look unplanned. If you want a unified, polished look, stick to one fabric. Also avoid mixing if dress colors are already mismatched. Too many variables create chaos in photos.
How to Care for Chiffon and Satin Bridesmaid Dresses
Proper care keeps dresses looking fresh for the wedding day.
Caring for Chiffon Hand wash chiffon in cold water with mild detergent. Avoid twisting or wringing the fabric. Lay flat to dry or hang on a padded hanger. Use a steamer to remove wrinkles. Never use a hot iron directly on chiffon. Store in a breathable garment bag.
Caring for Satin Dry clean satin only. Do not attempt to wash at home. Hang satin dresses on wide, padded hangers to prevent shoulder marks. Iron on the lowest heat setting with a pressing cloth. Steam satin gently from a distance. Store away from direct sunlight to prevent fading.
Pre-Wedding Storage Store dresses in a cool, dry place. Avoid plastic bags that trap moisture. Hang dresses 1–2 weeks before the wedding to let wrinkles fall out naturally. Steam both fabrics the morning of the wedding for the best look.
What Seasons Work Best for Each Fabric?
| Season | Best Fabric | Why | Backup Option |
| Spring | Chiffon | Light and fresh for mild weather | Satin for evening |
| Summer | Chiffon | Breathable in heat | Avoid satin outdoors |
| Fall | Satin | Rich look for cooler temps | Chiffon for warm days |
| Winter | Satin | Warmth and formal elegance | Velvet over chiffon |
Season affects comfort and appearance. Chiffon works best in warm months. Satin suits cool months. Always consider your specific wedding date and venue temperature.
Frequently Asked Questions
Is chiffon or satin better for outdoor weddings?
Chiffon is better for outdoor weddings. It moves gracefully in the breeze and stays cool in warm weather. Satin can be too heavy and hot outdoors. Chiffon also photographs beautifully in natural light. Choose satin only if your outdoor wedding is in cool weather.
Which fabric is more affordable for bridesmaid dresses?
Chiffon is slightly more affordable. Chiffon dresses cost $79–$135, while satin costs $85–$150. Chiffon also saves money on alterations and cleaning. Hand washing chiffon is cheaper than dry cleaning satin. Overall, chiffon is the budget-friendly choice.
Does satin wrinkle more than chiffon?
Yes, satin wrinkles more easily than chiffon. Satin shows every crease and fold. It needs careful steaming or ironing before wearing. Chiffon wrinkles too but hides them better because of its soft drape. Both fabrics need proper storage to prevent wrinkles.
Can plus-size bridesmaids wear satin dresses?
Yes, but stretch satin works better than regular satin. Stretch satin has some give and drapes more forgivingly. Regular satin clings to curves and may feel restrictive. Chiffon is often more comfortable for plus-size figures because it skims the body gently without clinging.
Which fabric looks better in wedding photos?
Both look beautiful but create different effects. Chiffon looks soft and romantic in natural light. Satin looks polished and elegant in indoor lighting. Choose based on your venue and time of day. Outdoor daytime weddings suit chiffon. Indoor evening weddings suit satin.
How do I choose between chiffon and satin for a formal wedding?
Satin is the traditional choice for formal weddings. It has a luxurious shine and structured drape that suits black-tie events. Chiffon can work for formal weddings if styled elegantly. Choose floor-length chiffon with minimal embellishments. Satin is the safer, more polished option for very formal affairs.
Final Tips for Choosing Chiffon or Satin
Pick chiffon for warm weather, outdoor venues, and relaxed styles. Pick satin for cool weather, indoor venues, and formal events. Consider your bridesmaids comfort and body types when deciding.
Order fabric swatches to see and feel both options before committing. Test them in your venue lighting if possible. This prevents disappointment after ordering.
Both fabrics come in all colors and silhouettes. You cannot go wrong with either choice if you match the fabric to your season, venue, and formality level.
Plan 3–4 months for ordering and 2–3 fittings for alterations. Both chiffon and satin need proper fitting to look their best. Budget for cleaning and storage costs after the wedding.
Your bridesmaids will look beautiful in either fabric. Choose the one that fits your wedding vision and makes your bridesmaids feel confident and comfortable.
How to Choose the Right Bridesmaid Dress for a Fall Wedding
Choosing the right bridesmaid dress for a fall wedding means picking rich colors like burgundy or dusty blue, fabrics that suit cooler weather like velvet or satin, and ordering 3–4 months before the wedding date.
A-line and empire-waist styles work for most body types. Plan for 2–3 fittings with 1–2 weeks between visits. Fall weddings call for dresses that balance warmth with style.
Best Fall Bridesmaid Dress Colors and Fabrics
| Color | Why It Works | Best Fabric | Season Match | Price Range |
| Burgundy | Rich, warm, complements fall leaves | Velvet, Satin | Perfect | $79–$150 |
| Dusty Blue | Soft, elegant, works with cool air | Chiffon, Satin | Excellent | $79–$140 |
| Emerald Green | Bold, pairs with autumn scenery | Velvet, Mesh | Perfect | $85–$155 |
| Sage Green | Muted, natural, garden-friendly | Chiffon, Tulle | Good | $79–$135 |
| Champagne | Neutral, warm glow for photos | Satin, Mesh | Good | $79–$145 |
Fall weather can shift from warm afternoons to cool evenings. Fabrics like velvet keep bridesmaids comfortable when temperatures drop. Satin adds a polished look without extra weight. Chiffon works for early fall when it is still mild.
How to Pick the Right Style for Fall Weddings
Fall weddings happen indoors or outdoors. The venue and temperature guide your style choice.
- Indoor Fall Weddings Long, floor-length dresses in velvet or satin fit formal indoor venues. A-line and sheath styles look elegant in ballrooms or historic buildings. These silhouettes allow easy movement and photograph well under indoor lighting.
- Outdoor Fall Weddings Outdoor venues need practical choices. Chiffon or tulle dresses move well in the breeze. Knee-length or tea-length styles prevent hems from dragging on grass or dirt paths. Consider adding a wrap or shawl for evening chill.
- Mix-and-Match Approach Many brides choose mismatched bridesmaid dresses in the same color family. This lets each bridesmaid pick a neckline and silhouette that suits her body type. Keep the fabric and color palette consistent for a unified look.
Five Steps to Order Fall Bridesmaid Dresses
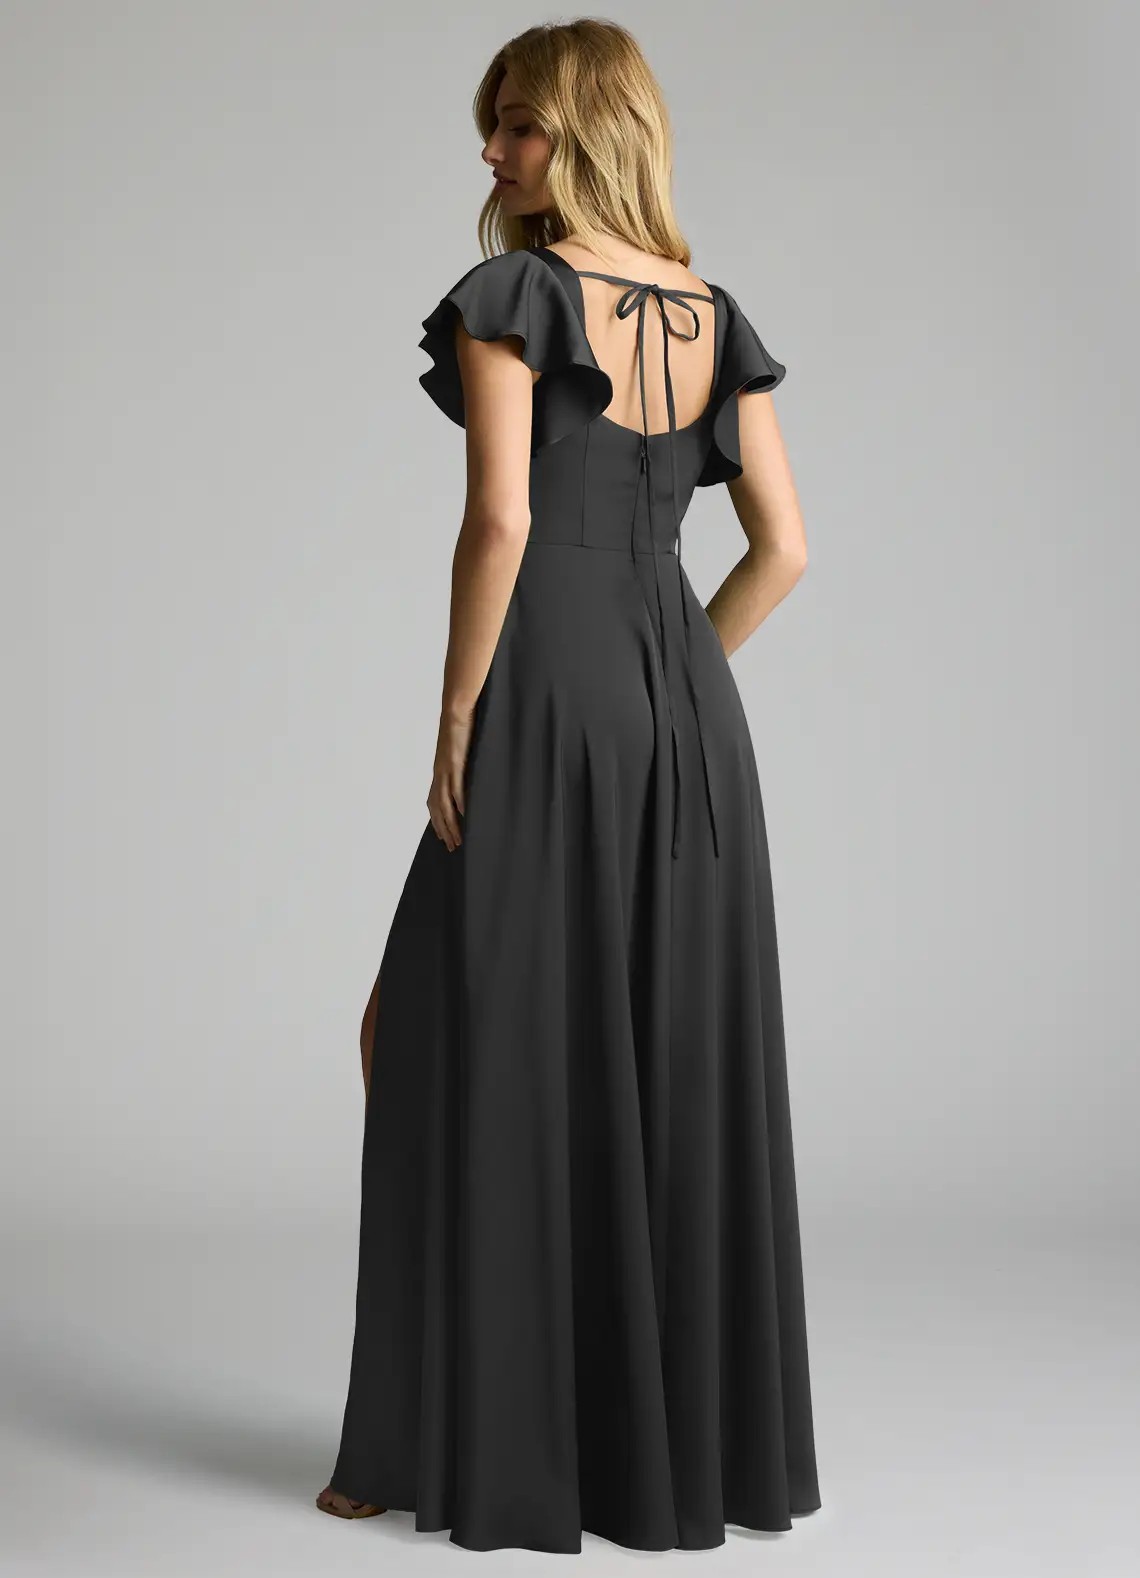
- Measure accurately – Take bust, waist, and hip measurements. Note any special fit needs. Check the size chart before ordering. Order 3–4 months before the wedding.
- Pick your color and fabric – Choose fall tones like burgundy, dusty blue, or emerald. Select velvet for cold weather or chiffon for mild temperatures. Order fabric swatches to see colors in person.
- Select the silhouette – A-line works for most body types. Empire waist suits petite and plus-size figures. Sheath dresses fit formal venues. Jumpsuits offer a modern option.
- Schedule fittings – Plan the first fitting 2–3 weeks after dresses arrive. Make adjustments for hem length and bust fit. Schedule a final fitting 1–2 weeks before the wedding.
- Add accessories – Pick shoes, wraps, and jewelry that match the season. Closed-toe heels work better than sandals in fall. A pashmina or bolero adds warmth for outdoor photos.
Fall Wedding Timeline for Bridesmaid Dresses
| Task | When to Complete | Time Needed | Notes |
| Measure and order | 3–4 months before | 1 week | Custom orders take longer |
| Receive dresses | 6–8 weeks after order | Delivery time | Made-to-order items ship slower |
| First fitting | 2–3 weeks after delivery | 30–45 minutes | Bring shoes and undergarments |
| Alterations done | 1–2 weeks after first fitting | Varies | Simple hems take less time |
| Final fitting | 1–2 weeks before wedding | 20–30 minutes | Check all adjustments |
| Pick up or deliver | 1 week before | Same day | Steam dresses before storing |
Ordering early prevents rush fees. Made-to-order dresses take 6–8 weeks to arrive. Add extra time for alterations and unexpected delays.
What Fabrics Work Best for Fall Bridesmaid Dresses?
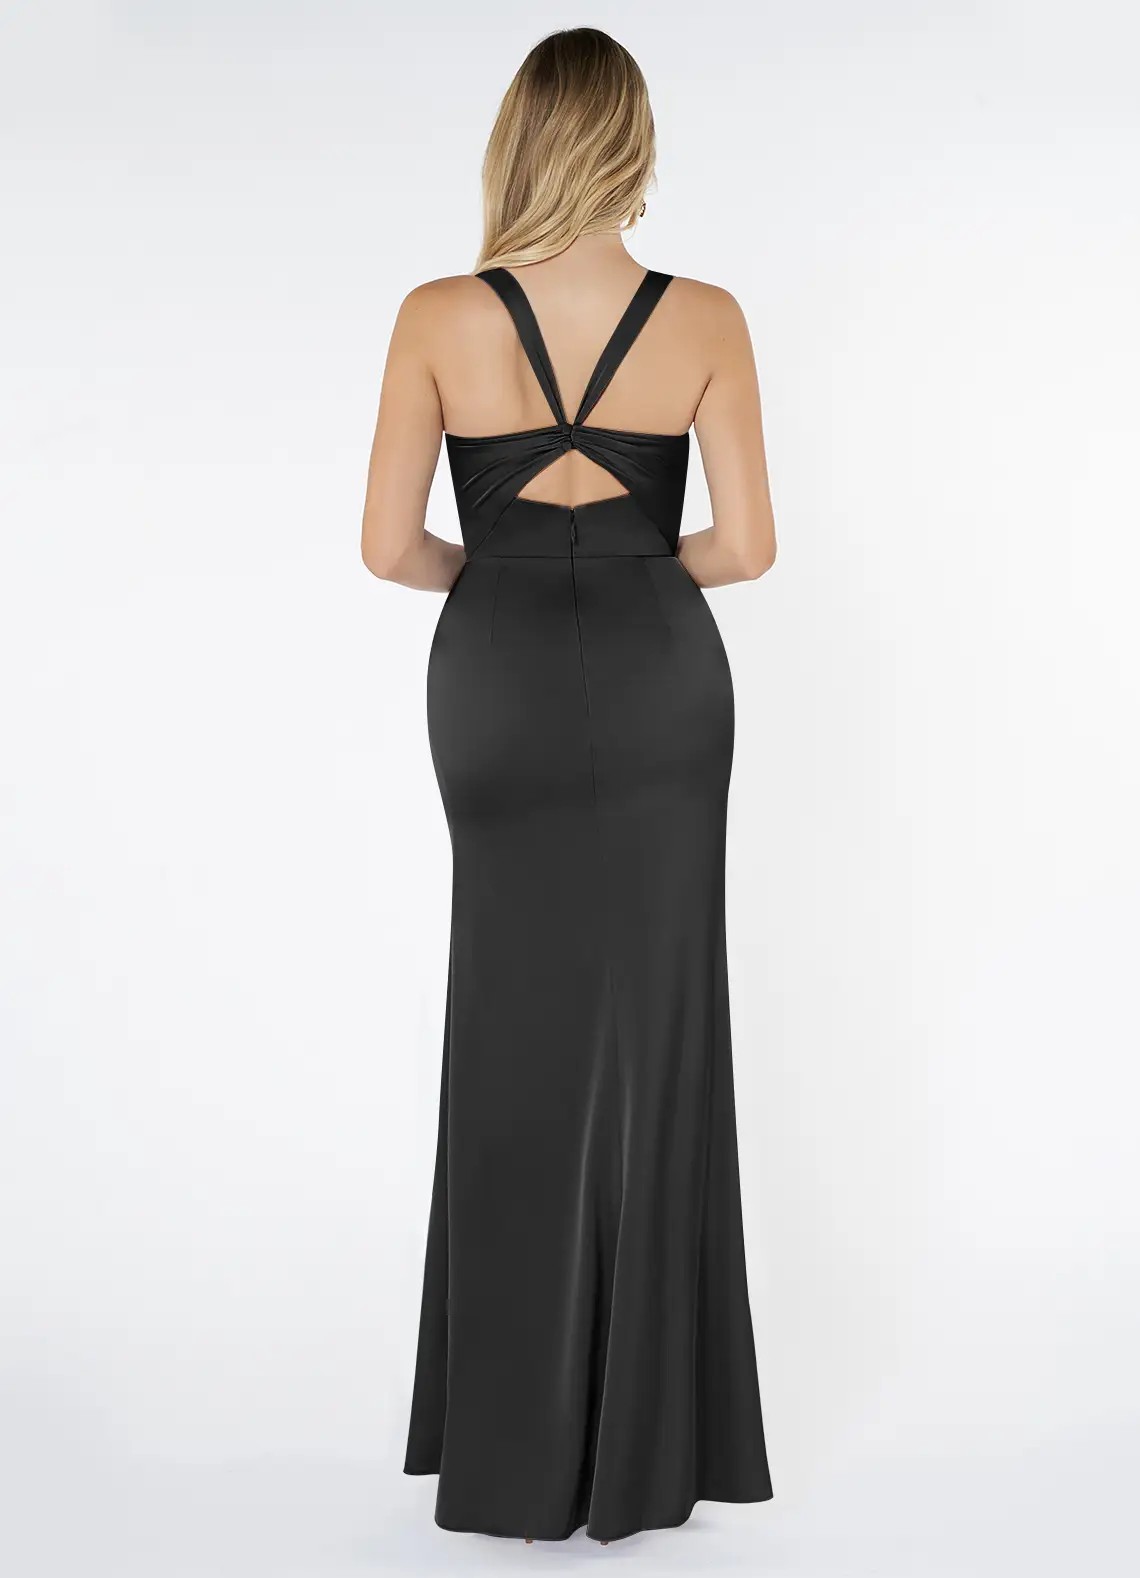
Fall fabrics need to balance warmth and movement. Here are the top choices and when to use them.
- Velvet Velvet feels plush and rich. It works for October through December weddings when temperatures stay cool. This fabric photographs beautifully and adds a formal touch. Avoid velvet for warm early-fall days.
- Satin Satin has a smooth finish with a subtle shine. It drapes well on all body types and suits both indoor and outdoor venues. Stretch satin allows easy movement. This fabric works from September through November.
- Chiffon Chiffon is light and airy with a soft texture. It flatters all figures and moves gracefully in photos. Use chiffon for September or early October when weather is still mild. It layers well under wraps for cooler evenings.
- Tulle Tulle creates volume without adding weight. It gives dresses a romantic, dreamy look. This fabric works for garden or outdoor fall weddings. Tulle is sheer, so it may need a lining for warmth.
- Mesh Mesh is stretchy and breathable. It keeps bridesmaids comfortable during long events. This fabric suits casual or semi-formal fall weddings. Mesh dresses often cost less than velvet or satin styles.
How Many Fittings Do Fall Bridesmaid Dresses Need?

Most bridesmaids need 2–3 fittings. The first fitting checks basic fit and marks alterations. The second fitting confirms adjustments. A third fitting may be needed for complex changes.
- First Fitting (2–3 weeks after delivery):
The tailor pins the hem length. Check bust, waist, and hip fit. Bring the shoes and undergarments you will wear on the wedding day. This appointment takes 30–45 minutes.
- Second Fitting (1–2 weeks after first fitting):
Try on the dress with completed alterations. Check the hem, straps, and seams. Make any final tweaks. This visit takes 20–30 minutes.
- Third Fitting (if needed):
Use this only for major changes like resizing or restyling. Schedule it 1 week before the wedding. Not all bridesmaids need a third fitting.
Alterations cost $30–$100 depending on the changes. Simple hems cost less than taking in seams or adjusting the bodice.
Should Bridesmaids Wear Long or Short Dresses in Fall?
Both lengths work for fall weddings. Your choice depends on the venue and formality level.
- Floor-Length Dresses Long dresses suit formal indoor venues like ballrooms or churches. They keep legs warm in cool weather. Floor-length styles look elegant in photos. They require careful hemming to prevent tripping.
- Knee-Length and Tea-Length Dresses Shorter dresses work well for outdoor or casual fall weddings. They allow easier movement on uneven ground. These styles show off shoes and are easier to alter. Pair them with tights for added warmth.
- Mix Both Lengths Some brides mix long and short dresses in the same color and fabric. This gives bridesmaids flexibility to choose what suits their height and comfort. Keep the style cohesive by matching necklines or fabric.
Fall Bridesmaid Dress Shopping: When to Start and Where to Look
Start shopping 4–5 months before the wedding. This gives time for ordering, shipping, and alterations.
- Online Shopping Tips Most bridesmaid dresses are now ordered online. Look for sites that offer fabric swatches and at-home try-on programs. Check the return policy before ordering. Read reviews from other bridesmaids about fit and quality.
- Azazie offers an at-home try-on program. You can order sample dresses to test styles before committing. Fabric swatches help you see colors in person. This reduces the chance of ordering the wrong shade or style.
- In-Store Shopping If you prefer in-person shopping, visit stores in late spring or early summer for fall weddings. Bring your bridesmaids to try on different styles. Take photos to compare options later. Many stores need 3–4 months to order and deliver custom dresses.
- Budget Considerations Set a budget before shopping. Bridesmaid dresses range from $79 to $200. Add costs for alterations, shoes, and accessories. Communicate the budget clearly so bridesmaids know what to expect.
How to Style Fall Bridesmaid Dresses for Photos
Fall light is warm and golden. Dress colors and accessories should complement this natural backdrop.
- Color Pairing Burgundy and gold jewelry create a rich fall look. Dusty blue pairs well with rose gold accents. Emerald green works with gold or silver. Keep jewelry simple so it does not compete with the dress.
- Outerwear for Outdoor Photos Fall weather can be unpredictable. Have pashminas, boleros, or faux fur wraps ready. Choose wraps in neutral tones that match all dress colors. These keep bridesmaids warm without hiding the dresses.
- Shoes Closed-toe heels work better than sandals in fall. Block heels or wedges suit outdoor venues with grass or gravel. Metallic tones like gold, bronze, or champagne complement fall colors. Make sure shoes are comfortable for all-day wear.
- Hair and Makeup Fall makeup trends lean toward warm tones. Copper, bronze, and burgundy eyeshadows match the season. Hair can be worn up or down. Loose waves or low buns suit the relaxed elegance of fall weddings.
Frequently Asked Questions
What is the best color for fall bridesmaid dresses?
Burgundy, dusty blue, and emerald green are top choices for fall. These colors match autumn leaves and cooler weather. Burgundy adds richness, dusty blue brings softness, and emerald pops in photos.
Can bridesmaids wear velvet in early fall?
Velvet works best for late fall weddings in October, November, and December. It may be too warm for September weddings.
How much do bridesmaid dress alterations cost?
Alterations cost $30–$100 on average. A simple hem costs $30–$50. Taking in the bodice or adjusting straps costs $50–$80. Complex changes like resizing or adding sleeves can reach $100. Ask your tailor for a quote before starting.
Should all bridesmaids wear the same dress style?
Not necessarily. Many brides choose mismatched bridesmaid dresses in the same color or fabric. This lets each bridesmaid pick a style that suits her body type and comfort. Keep necklines or hem lengths similar for a unified look.
When should bridesmaids order dresses for a fall wedding?
Order dresses 3–4 months before the wedding. Made-to-order dresses take 6–8 weeks to arrive. Add time for alterations and fittings. Ordering early prevents rush fees and stress.
What accessories do bridesmaids need for fall weddings?
Bridesmaids need shoes, a wrap or shawl, and simple jewelry. Closed-toe heels work better in fall than sandals. A pashmina or bolero adds warmth for outdoor photos. Keep jewelry minimal so it does not overwhelm the dress.
Final Tips for Choosing Fall Bridesmaid Dresses
Fall weddings offer rich colors and textures that make bridesmaid dresses stand out. Pick fabrics that suit the weather and venue. Order early to allow time for delivery and alterations. Plan 2–3 fittings to get the perfect fit.
Consider each bridesmaid's body type and comfort. A-line and empire-waist styles flatter most figures. Let bridesmaids choose their neckline or sleeve style if you want a mix-and-match look.
Use fabric swatches and at-home try-on programs to test options before committing. This reduces returns and ensures everyone is happy with the final choice.
Fall is a beautiful season for weddings. With the right planning and fabric choices, your bridesmaids will look stunning and feel comfortable all day.
Best Bridesmaid Dress Styles for Plus-Size
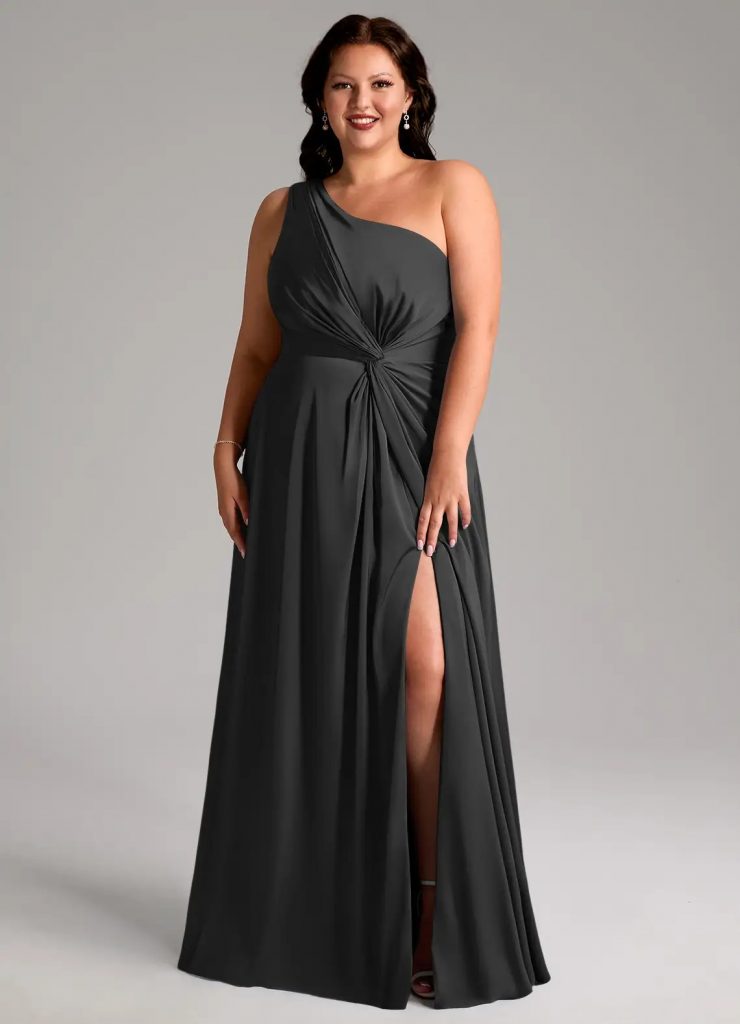
A-line dresses are hands-down the best choice for plus-size bridesmaids. They cinch at the waist and flow gracefully over the hips, creating a balanced, flattering shape. Pair an A-line silhouette with soft fabrics like chiffon or stretch satin, add a V-neck, and you've got a winning combination. Plan to order 5–6 months before the wedding to give yourself plenty of time to find the perfect fit.
Best Dress Styles for Plus-Size Bridesmaids
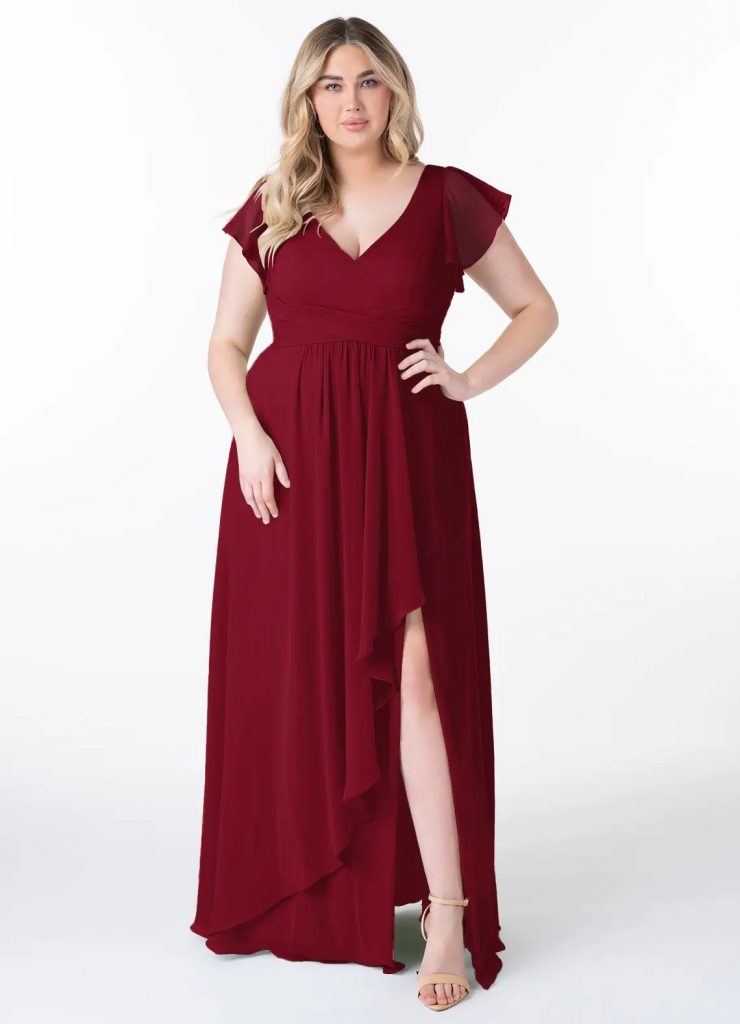
A-Line Dresses
A-line is the gold standard for plus-size bridesmaids, and for good reason. The dress fits close through the bodice, nips in at your natural waist, and then gradually flares out toward the hem in an "A" shape. This silhouette is magic because it highlights your smallest point—the waist—while skimming over areas where you might want a little more coverage.
Why A-line works so well:
- Shows off your waist without clinging anywhere else
- The flare balances your proportions beautifully
- Gives you plenty of room to move, sit, and dance
- Flatters nearly every body type and height
- Photographs gorgeously from every angle
When you're shopping for plus-size bridesmaid dresses, you'll notice A-line dominates the options. That's because it's proven to work time and time again. Whether you're 5'2" or 6'0", curvy or athletic, A-line adapts to you.
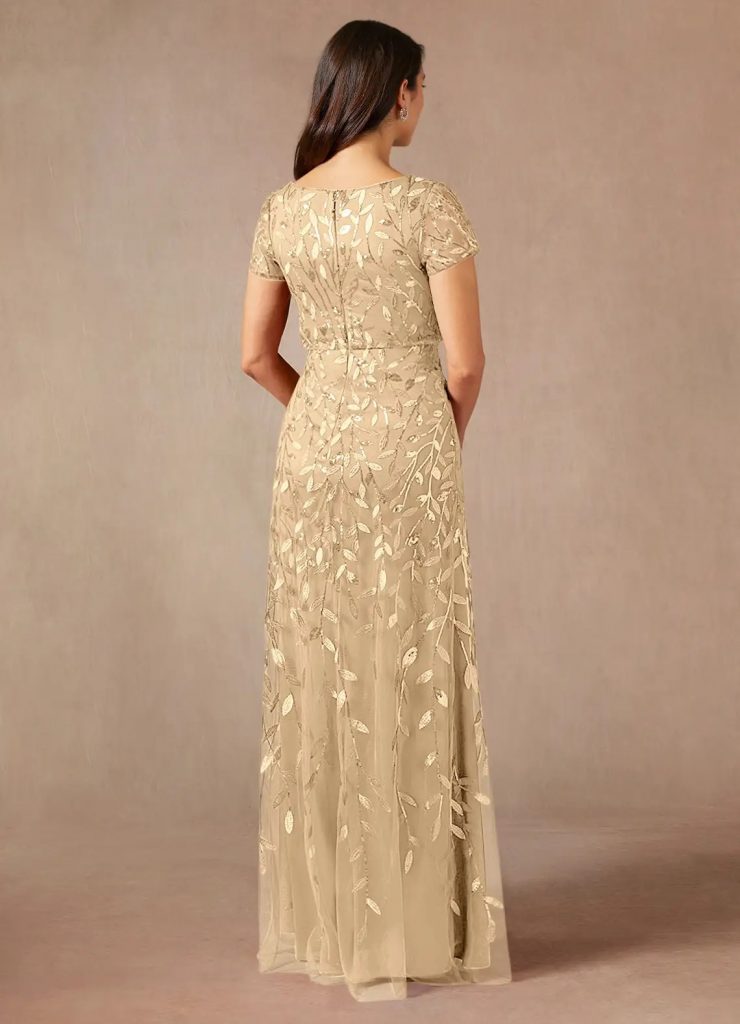
Empire Waist Dresses
Empire waist dresses have a fitted bodice that ends right below the bust, with the skirt flowing straight down from that high seam. This creates a long, unbroken line from chest to floor that makes you look taller and more elongated.
What makes empire waist special:
- Draws the eye up to your face and shoulders
- Completely camouflages the midsection
- Incredibly comfortable—no tight waistband digging in
- Perfect for outdoor summer weddings where you need to breathe
- Works beautifully for bridesmaids at any stage of pregnancy
The key with an empire waist is making sure the bodice has some structure—boning or darts—so it doesn't look like a maternity dress. When done right, it's elegant and flattering.
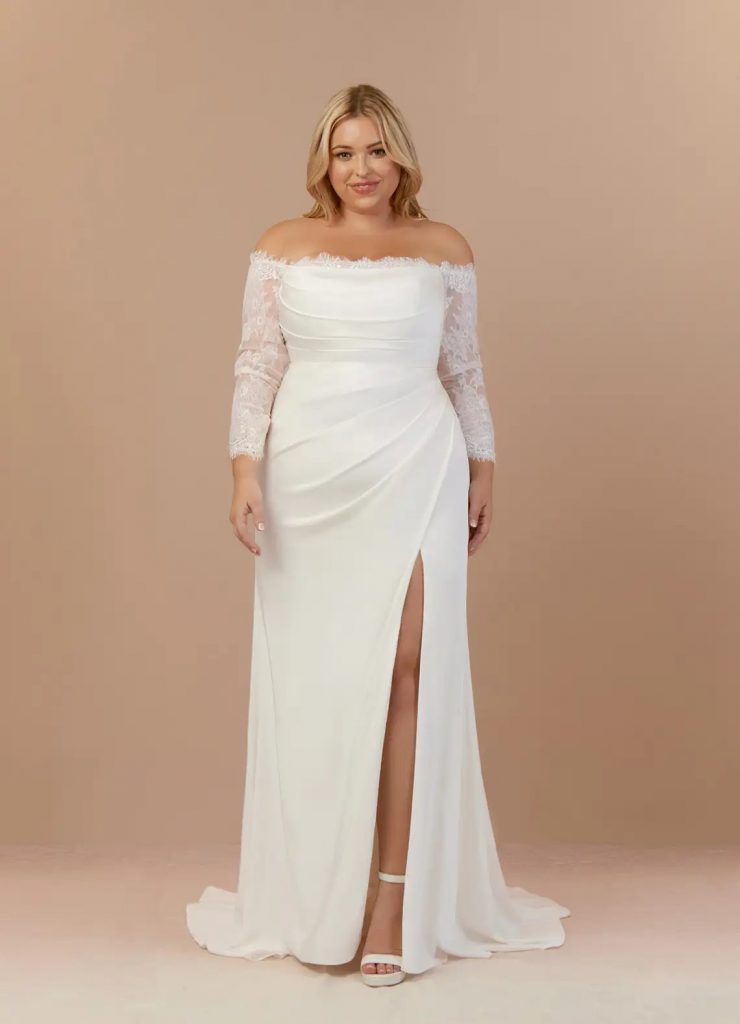
Wrap and Faux Wrap Dresses
Wrap dresses are brilliant because they work with your body instead of against it. The dress crosses over in front, creating a natural V-neckline, and ties at the side so you can adjust it to fit your exact measurements.
Why wrap styles are winners:
- You control the fit—tighten or loosen as needed
- The crossover front creates a slimming diagonal line
- Built-in V-neckline flatters your décolletage
- Adapts if your weight fluctuates before the wedding
- Looks feminine and elegant without trying too hard
If you're worried about the tie coming undone mid-reception, go for a faux-wrap. It has the wrapped look but actually zips up the back, so it stays put all day while still giving you that flattering V-shaped bodice.
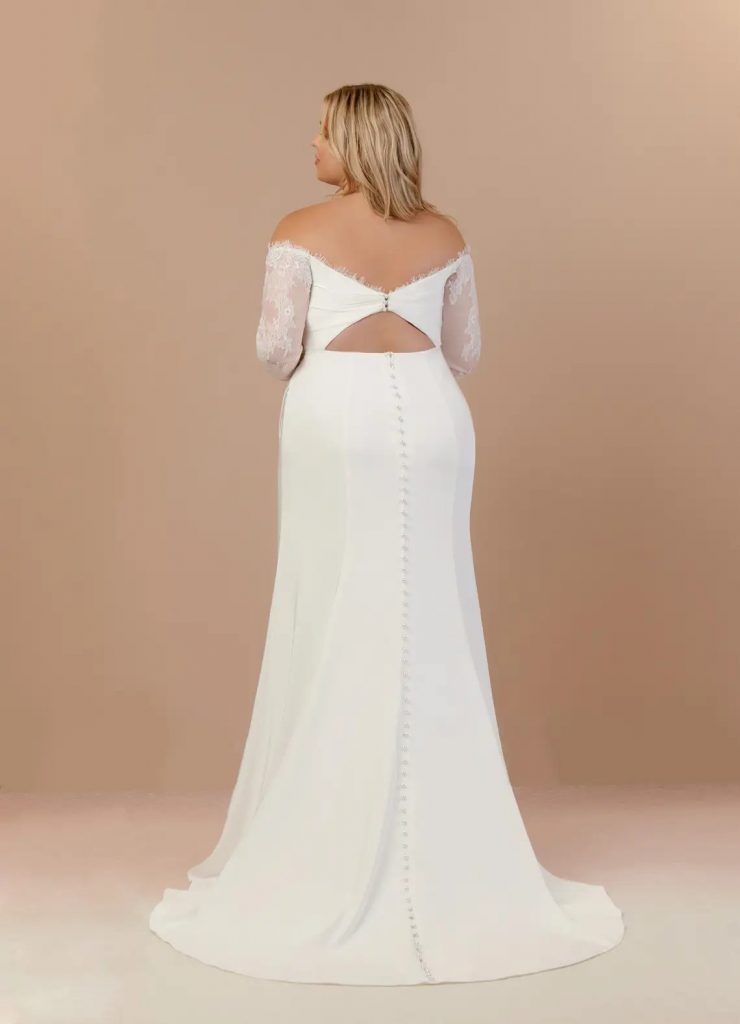
Fit-and-Flare Dresses
Fit-and-flare (sometimes called trumpet style, though slightly different) hugs your body from the shoulders through the waist and hips, then flares out at the thighs or knees. It's more fitted than an A-line but not as restrictive as a mermaid.
When fit-and-flare works:
- You're comfortable showing your curves
- The dress is made from stretch crepe or ponte knit
- You want something modern and sophisticated
- You're okay with a dress that's a bit more form-fitting
This style requires a good fit through the hips. If it's too tight, it'll be uncomfortable. If it's too loose, it won't have the impact. But when it fits right? Stunning.
Styles to Skip
Steer clear of:
- Mermaid and trumpet: These hug tightly through the hips and flare dramatically at the knees. They're beautiful but restrictive. Sitting is awkward, stairs are tricky, and they require perfect tailoring.
- Straight column with no waist definition: These can make you look boxy. You want shape, not a tent.
- High-low hems: The uneven hemline can throw off your proportions and look choppy in photos.
- Drop waist: This style drops the waistline to the hips, which shortens your torso and rarely flatters plus-size figures.
Style Comparison at a Glance
| Style | Best Feature | Comfort Level | Works For | Skip If |
| A-line | Defines waist, flows over hips | Very comfortable | All body types, all seasons | You want a fitted look |
| Empire waist | Elongates body, no waist pressure | Extremely comfortable | Hiding midsection, pregnancy | You're very petite (under 5'2") |
| Wrap | Adjustable fit, built-in V-neck | Comfortable | Busty figures, fluctuating weight | Very active dancing |
| Fit-and-flare | Shows curves, modern look | Moderate comfort | Confident with curves | You need maximum mobility |
Necklines That Flatter
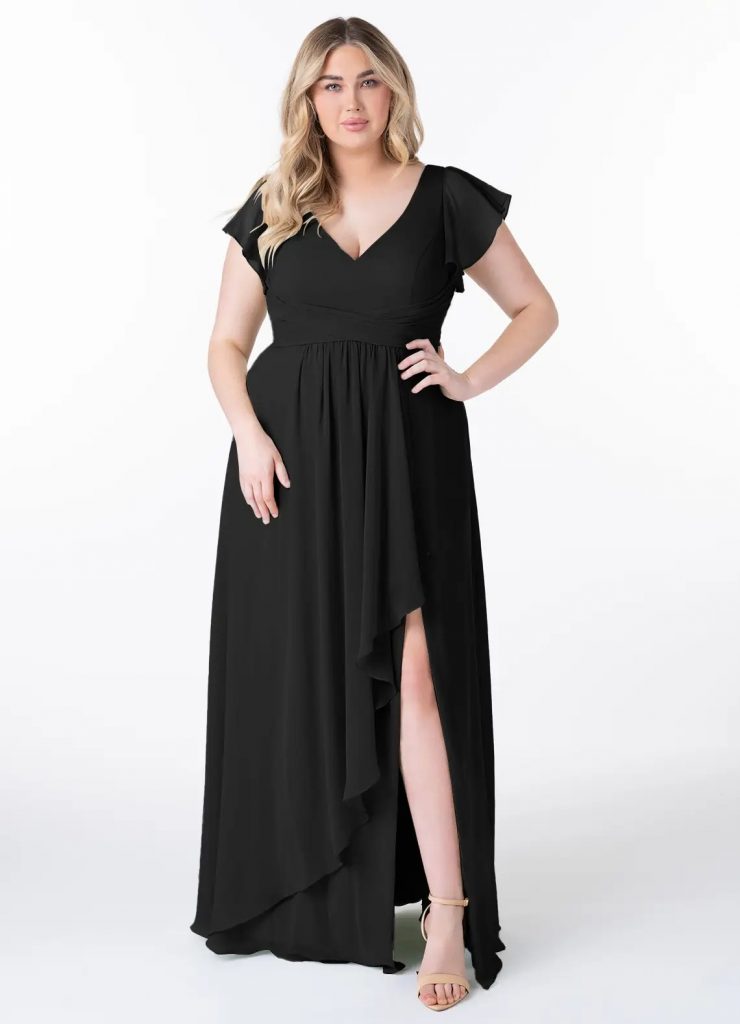
V-Neck: The Universal Favorite
V-necks are magic. Seriously. The V-shape creates a vertical line that draws the eye up and makes your neck look longer. It balances a fuller bust without overwhelming it, and it works with virtually every face shape.
The sweet spot: Aim for a V that dips about 3–4 inches below your collarbone. Any deeper starts to look too casual for a wedding. Any shallower and you lose the lengthening effect.
V-necks pair beautifully with A-line and wrap dresses. They're your safest bet if you're unsure what neckline to choose.
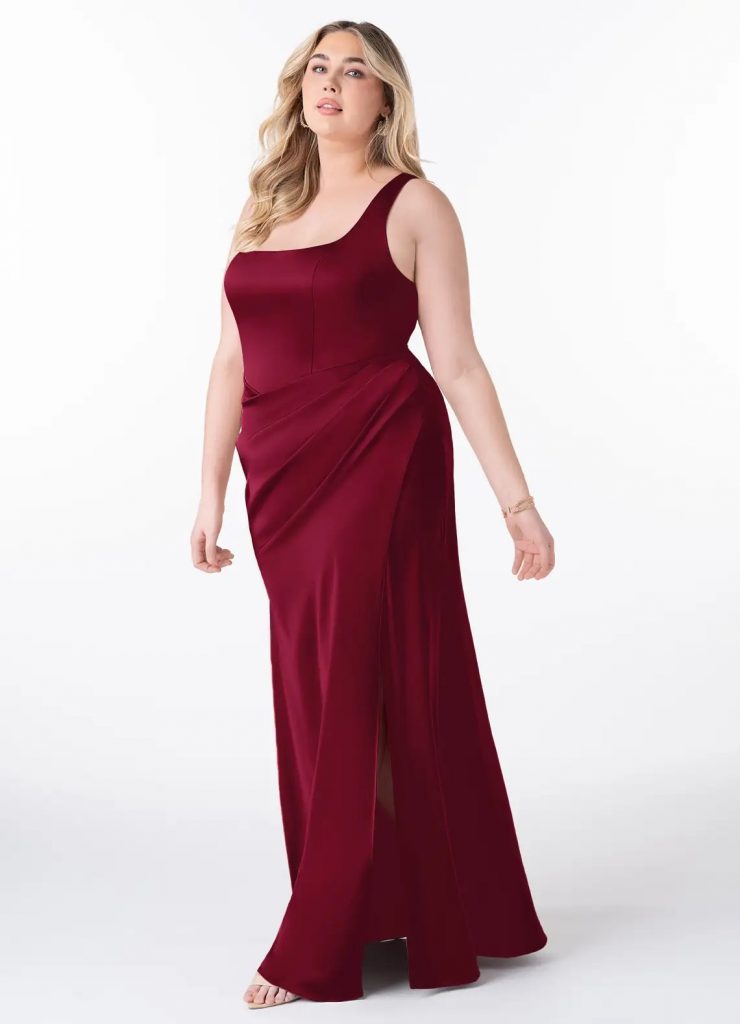
Square Neckline: Modern and Structured
Square necklines have clean, horizontal lines across the chest and create a frame for your collarbone and shoulders. They look fresh and modern—think Bridgerton meets contemporary elegance.
Why square necks work:
- They provide excellent support, especially when paired with wider straps
- The horizontal line balances out broader hips
- They look polished and put-together in photos
- Great for formal evening weddings
Square necks work best with at least 2-inch-wide straps. The combination gives you structure and support without any slipping or adjusting.

Off Shoulder: Romantic but Requires Structure
Off-shoulder necklines sit on your upper arms just below the shoulder, exposing your collarbone and creating a romantic, ethereal look. They're gorgeous for garden weddings and spring ceremonies.
The catch: Off-shoulder only works if the bodice has serious structure. We're talking boning, silicone gripper strips on the inside, and a snug fit through the bust. Without these, you'll spend the entire day hiking the dress back up onto your shoulders. Not fun.
If you love the look, make sure the dress has built-in support. Otherwise, go for a standard V-neck or square neck instead.
Sweetheart and Scoop: Proceed with Caution
Sweetheart necklines (shaped like the top of a heart) and scoop necks (rounded U-shape) can work, but they're not always the most flattering for plus-size figures.
The issue: Sweetheart necklines often require strapless construction, which means less support. Scoop necks can make your neck look shorter and wider. They're not bad choices—they just don't give you the advantages that V-necks and square necks do.
Skip These
Avoid:
- High crew neck: Cuts off your neck and adds visual weight to your upper body
- Halter: Puts all the weight on the back of your neck, which gets uncomfortable fast
- Strapless: Needs constant adjustment and offers minimal support unless heavily boned
- Deep plunging V: Too revealing for a bridesmaid dress
Sleeve Options That Work
Flutter Sleeves: Perfect for Warm Weather
Flutter sleeves are short, loose sleeves that perch gently on your upper arm. They look like little wings and they're incredibly flattering because they provide coverage without adding bulk or squeezing.
Why flutter sleeves are brilliant:
- Cover the upper arm without constriction
- Keep you cool in warm weather
- Move beautifully when you walk
- Photograph softly and femininely
- Work best in lightweight fabrics like chiffon
Flutter sleeves are ideal for spring and summer weddings. They give you coverage without making you hot or restricted.
Cap Sleeves: Use Wisely
Cap sleeves are very short sleeves that just cover the shoulder. They can work, but they're tricky for plus-size bridesmaids.
The rule: Cap sleeves must be loose, not tight. If they squeeze your arm at all, they'll make your arm look larger than it is by creating a "squeeze point." The sleeve should end before the widest part of your upper arm.
Honestly? Most plus-size bridesmaids prefer flutter sleeves over cap sleeves because they're more forgiving and more flattering.
Three-Quarter Sleeves: Great Coverage
Three-quarter sleeves end somewhere between your elbow and wrist. They give you substantial arm coverage while still showing off your wrists and hands, which keeps the look elegant rather than covered-up.
Why three-quarter sleeves work:
- Excellent coverage without being hot
- Perfect for fall and winter weddings
- Look polished and sophisticated
- Easy to move your arms fully
- Pair beautifully with V-necks and square necks
If you're self-conscious about your arms and the wedding is in cooler weather, three-quarter sleeves are your friend.
Long Sleeves: For Cooler Weddings
Full-length sleeves to the wrist are gorgeous for autumn and winter weddings. They look elegant and formal.
Best long sleeve features:
- Made from stretch fabric so you can move easily
- Fitted but not skin-tight
- Slight bell or flare at the wrist for visual interest
- Illusion mesh sleeves for a lighter, airier look
Long sleeves should never restrict your movement. If you can't raise your arms comfortably, they're too tight.
Sleeveless: Wide Straps Are Key
Going sleeveless? That's totally fine if you feel comfortable. Just make sure you choose wide straps—at least 1.5 inches, ideally 2 inches.
Why wide straps matter:
- They hide your bra straps
- They provide actual support rather than just decoration
- They look more formal and elegant than thin straps
- They distribute weight across your shoulders comfortably
Skip spaghetti straps. They dig in, show every bra strap, and don't give you enough support.
Skip These Sleeve Styles
Avoid:
- Tight cap sleeves that squeeze: They'll cut into your arm and create an unflattering line
- Short sleeves that end at the widest part of your arm: This highlights the exact spot you probably want to minimize
- Big puffy sleeves: They add volume and bulk where you don't need it
- Cold-shoulder cutouts: This trend is dated and the cutouts rarely flatter
Fabrics That Flatter
Chiffon: The Top Choice
Chiffon is a lightweight, slightly sheer fabric that layers beautifully. It's the number one choice for plus-size bridesmaid dresses, and once you understand why, you'll see it everywhere.
What makes chiffon special:
- Weighs practically nothing, so it doesn't add bulk
- Drapes and flows over your body like water
- Never clings or pulls at curves
- Hides any lumps, bumps, or lines
- Breathes beautifully in warm weather
- Photographs with a soft, romantic quality
The key is that chiffon needs proper lining. The outer chiffon is sheer, but underneath there's a full lining in a coordinating color that provides the coverage. The combination gives you the pretty drape without any sheerness.
Browse chiffon bridesmaid dresses and you'll see why this fabric dominates—it just works.
Stretch Satin: Elegant with Give
Satin gives you that smooth, elegant look with a subtle sheen. But regular satin can be unforgiving. That's why you want "stretch satin"—satin with about 5–10% spandex blended in.
Why stretch satin is better:
- Moves with your body instead of restricting it
- Doesn't wrinkle as easily as regular satin
- Holds its shape throughout the day
- Feels substantial without being heavy
- Offers the formal look of satin with the comfort of stretch
Pro tip: Choose matte satin or satin with a subtle sheen. High-shine satin can create unflattering highlights in flash photography. You want elegant, not disco ball.
Check out satin bridesmaid dresses made with stretch fabrics for the best of both worlds.
Georgette: Chiffon's Structured Cousin
Georgette is similar to chiffon but slightly thicker and more textured. It has more body and structure while still draping beautifully.
Why georgette works:
- Drapes like chiffon but feels more substantial
- Resists wrinkles better than regular chiffon
- Looks more formal and luxurious
- Works for all seasons
- Slightly less sheer so requires less lining
Georgette is perfect if you want the flow of chiffon but need something with a bit more heft for a formal evening wedding.
Jersey and Crepe: Comfortable Stretch
Jersey knit and crepe are knit fabrics with natural stretch built in. They move like your favorite comfortable dress but look formal enough for a wedding.
Why knit fabrics work:
- Incredibly comfortable for all-day wear
- Never wrinkle, even if you pack them in a suitcase
- Forgiving fit that moves with you
- Great for dancing
- Easy to care for
The trick is choosing substantial knits. Thin jersey shows every line and clings. You want thick, quality jersey or ponte knit that has enough weight to skim smoothly over your body.
Tulle: For Skirts Only
Tulle is that netting fabric that creates volume. It's beautiful for adding fullness to skirts, but it's not great for full dresses on plus-size figures.
Use tulle for:
- A-line skirts with layers for volume
- Adding romantic fullness to the hem
- Garden and fairytale-themed weddings
Don't use tulle for:
- Entire dresses (too much volume)
- Fitted bodices (too stiff and scratchy)
- As the main fabric (needs to be an accent)
Mesh and Lace: Accents, Not Main Fabric
Mesh (illusion netting) and lace are gorgeous for details but shouldn't be the entire dress.
Good uses:
- Illusion mesh sleeves for lightweight coverage
- Lace overlay on the bodice for texture
- Lace detailing on the back
- Mesh insets at the waist
Not-so-good uses:
- Entire lace dress (too heavy, too textured, too expensive)
- Sheer mesh with no lining (see-through)
- Scratchy lace directly against skin
Fabrics to Avoid Completely
Skip these:
- Thin, cheap jersey: Shows every single line and cling
- Stiff taffeta: Adds bulk and doesn't drape naturally
- High-shine satin: Creates bright spots and unflattering highlights in photos
- Heavy brocade or jacquard: Too much texture, too much weight, too formal
- Non-breathable polyester: Makes you hot and sweaty
- Velvet: Hard to alter, too warm for most weddings, and very heavy
Shop by Style at Azazie
When you're ready to start shopping, Azazie makes it easy to find exactly what you need in your size.
Browse Complete Collections
Start with the full plus-size bridesmaid dresses collection. Every style you see is available in sizes 0–30 at no extra charge. No "special order" fees, no limited selection—full access to the entire line.
Shop by Silhouette
A-line bridesmaid dresses are the most popular for good reason. Browse hundreds of A-line options in every color imaginable, from classic navy to trendy terracotta.
Empire waist bridesmaid dresses offer maximum comfort with high waistlines and flowing skirts. Perfect for summer weddings and bridesmaids who prioritize all-day comfort.
Wrap bridesmaid dresses give you that adjustable, customizable fit with a built-in V-neckline. Great if your measurements fall between standard sizes or if you expect any weight changes before the wedding.
Shop by Fabric
Chiffon bridesmaid dresses are the go-to for plus-size bridesmaids. This lightweight, flowing fabric flatters every figure and works for almost any wedding style.
Satin bridesmaid dresses bring elegance and structure. Look for stretch satin options that give you the formal look with comfortable movement.
Create a Personalized Look
Want each bridesmaid to feel her best? Try mismatched bridesmaid dresses. Choose the same color and fabric, but let each person pick the neckline and style that makes her feel most confident. The result looks intentionally curated, not matchy-matchy.
Frequently Asked Questions
Why are A-line dresses so flattering?
They define the waist and skim over hips, tummy, and thighs, creating a balanced hourglass shape. They’re comfy for long days, easy to move in, and look great from every angle.
Chiffon or satin?
- Choose chiffon for flow, breathability, and zero cling—safe for most people.
- Love satin? Pick stretch satin with a matte/subtle sheen for a smoother, more forgiving look.
Are mermaid/trumpet styles a good idea?
They can look stunning only with perfect fit (stretch fabric + pro alterations). Expect less mobility for sitting, stairs, and dancing. If comfort matters, go A-line or empire.
Most universally flattering neckline?
V-neck wins: lengthens the neck, balances a fuller bust, draws eyes up.
Square neck + wide straps is a strong second—clean lines and solid support.
Can I wear a jumpsuit?
Absolutely. Choose wide-leg, defined waist, V-neck/wrap, and a structured bodice. Plan on inseam tailoring and remember bathroom logistics.
Sleeves & straps that give coverage without bulk
- Three-quarter sleeves: polished coverage, still light.
- Flutter sleeves: airy, no squeeze.
- Sleeveless: use wide straps (≥1.5–2 in.) for support and bra coverage.
- Avoid tight cap sleeves or sleeves ending at the widest part of the upper arm.
The Bottom Line
When it comes to plus-size bridesmaid dresses, A-line silhouettes in chiffon or stretch satin are your safest, most flattering bet. Choose V-necks or square necks to elongate your neckline, add flutter or three-quarter sleeves if you want arm coverage, and stick with soft, flowing fabrics that drape rather than cling.
Order 5–6 months before the wedding to give yourself plenty of time to find the perfect dress and get it fitted properly. The right dress will make you feel confident, comfortable, and beautiful from the ceremony through the last dance.